

There’s nothing quite like your RV air conditioner giving up the ghost on a sweltering summer day. It can bring a great trip to a dead stop. But here's the good news: getting your rv air conditioner repair sorted often comes down to a quick diagnosis and knowing what usually goes wrong. This guide is all about what actually works, so you can tackle the most common AC headaches and get back to your adventure.
Why Your RV AC Needs Attention
Think of your RV’s air conditioner as more than just a creature comfort—it's essential for staying safe and sane during warm-weather travels. Unlike the unit sitting outside your house, an RV AC lives a tough life. It’s constantly dealing with road vibrations, shaky power sources at campgrounds, and direct exposure to sun, wind, and rain.
These unique stressors mean that a little proactive maintenance goes a long, long way. Ignoring the early signs of trouble doesn't just leave you sweating; it can snowball into a much bigger, more expensive failure down the road. Luckily, many of the most frequent problems are surprisingly simple to fix yourself.
Spotting the Early Warning Signs
The first step to any successful DIY repair is catching the problem before it becomes a catastrophe. Keep your eyes and ears open for these classic signs that your AC unit is asking for help:
- Weak Cooling: The air blowing out of the vents just isn't cold like it used to be.
- Poor Airflow: You can hear the fan running, but there’s barely a breeze coming through.
- Odd Noises: Any new rattling, grinding, or buzzing sounds are definite red flags.
- Constant Cycling: The unit kicks on and off over and over without ever really cooling the space.
If your main complaint is that the RV AC isn't blowing cold air, you'll find a great breakdown of the common reasons your air conditioner isn't cooling and how to fix them. Many of the same principles for home units apply directly to your rig's system.
#rv #rvlife #rvliving #rvlifestyle #rvrenovation #rvremodel
#rvtravel #rvcamping #rvadventures #ruralwifi #5gwifi
#5ginternet
Taking a few minutes to diagnose an issue can save you hours of frustration and a potentially costly visit to a technician. Most failures begin as small, manageable problems.
Before diving deep into the guts of your AC unit, it’s always a good idea to run through a quick checklist of the usual suspects. Often, the fix is simpler than you think.
Quick RV AC Diagnostic Checklist
Before you start any complex repairs, run through these initial checks to quickly identify the most common issues.
| Symptom | First Thing to Check | Likely Cause |
|---|---|---|
| AC won't turn on at all | Circuit breaker | Tripped breaker or blown fuse |
| Fan runs, but no cold air | Air filters | Dirty or clogged filters |
| Unit cycles on and off | Thermostat settings | Incorrect temperature or mode setting |
| Water dripping inside RV | Drain line | Clogged drain hole or tube |
| AC is freezing up | Airflow | Blocked vents or dirty evaporator coils |
This simple table covers a surprising number of AC failures I've seen over the years. Always start with the basics before assuming the worst!
It’s no surprise that the demand for reliable RV service is on the rise. With more people hitting the road, the RV repair service market was valued at $3.89 billion and is projected to more than double by 2035. That's a lot of rigs needing a little TLC
Your Essential Toolkit for Safe AC Repair
Before you even think about climbing up on the roof or popping open a panel, any successful and safe RV air conditioner repair starts with getting your gear in order. We’ve all been there—trying to tackle a job without the right equipment is a one-way ticket to frustration. But when you’re dealing with electricity and working at heights, it's also a serious safety risk. Putting together a dedicated toolkit is the first real step.
This isn't about running out and buying every fancy tool you can find. It's about focusing on a handful of key items that will see you through the vast majority of common AC problems. You’d be surprised how much you can get done with a small, well-chosen set of tools.
Must-Have Tools for the Job
Your go-to AC repair kit is going to be a mix of electrical and mechanical tools. The good news is that most of these are multi-purpose items you'll find useful for all sorts of other RV tasks, making them a solid investment for life on the road.
- Multimeter: This is absolutely non-negotiable for any electrical diagnosis. You'll need it to check for voltage at the unit, test capacitors, and—most importantly—confirm that circuits are completely dead before you lay a finger on them.
- Nut Driver Set: Most RV AC shrouds and the components inside are held on with hex-head screws. A good set of nut drivers, especially a 1/4" and 5/16", will make taking things apart (and putting them back together) so much faster.
- Screwdrivers: A simple multi-bit screwdriver with both Phillips and flathead attachments will handle almost every screw you'll encounter.
- Pliers: A solid pair of needle-nose pliers is perfect for grabbing and maneuvering wires in those tight spaces.
Your safety has to be the number one priority, always. An electrical shock or a fall from the roof can bring your trip to a screeching halt. Never rush the prep work, no matter how quick and easy the fix seems.
Essential Supplies and Safety Gear
Beyond the tools themselves, a few basic supplies and safety items are just as crucial for the repair and for your own well-being. Having these ready is just as important as having the right wrench.
- AC Coil Cleaner: Grab a can of the foaming spray made specifically for this. It's designed to eat away at all the gunk on your evaporator and condenser coils without messing up the delicate fins.
- Fin Comb: This is a cheap but invaluable little plastic tool. You use it to gently straighten out any bent coil fins, which is critical for getting proper airflow back.
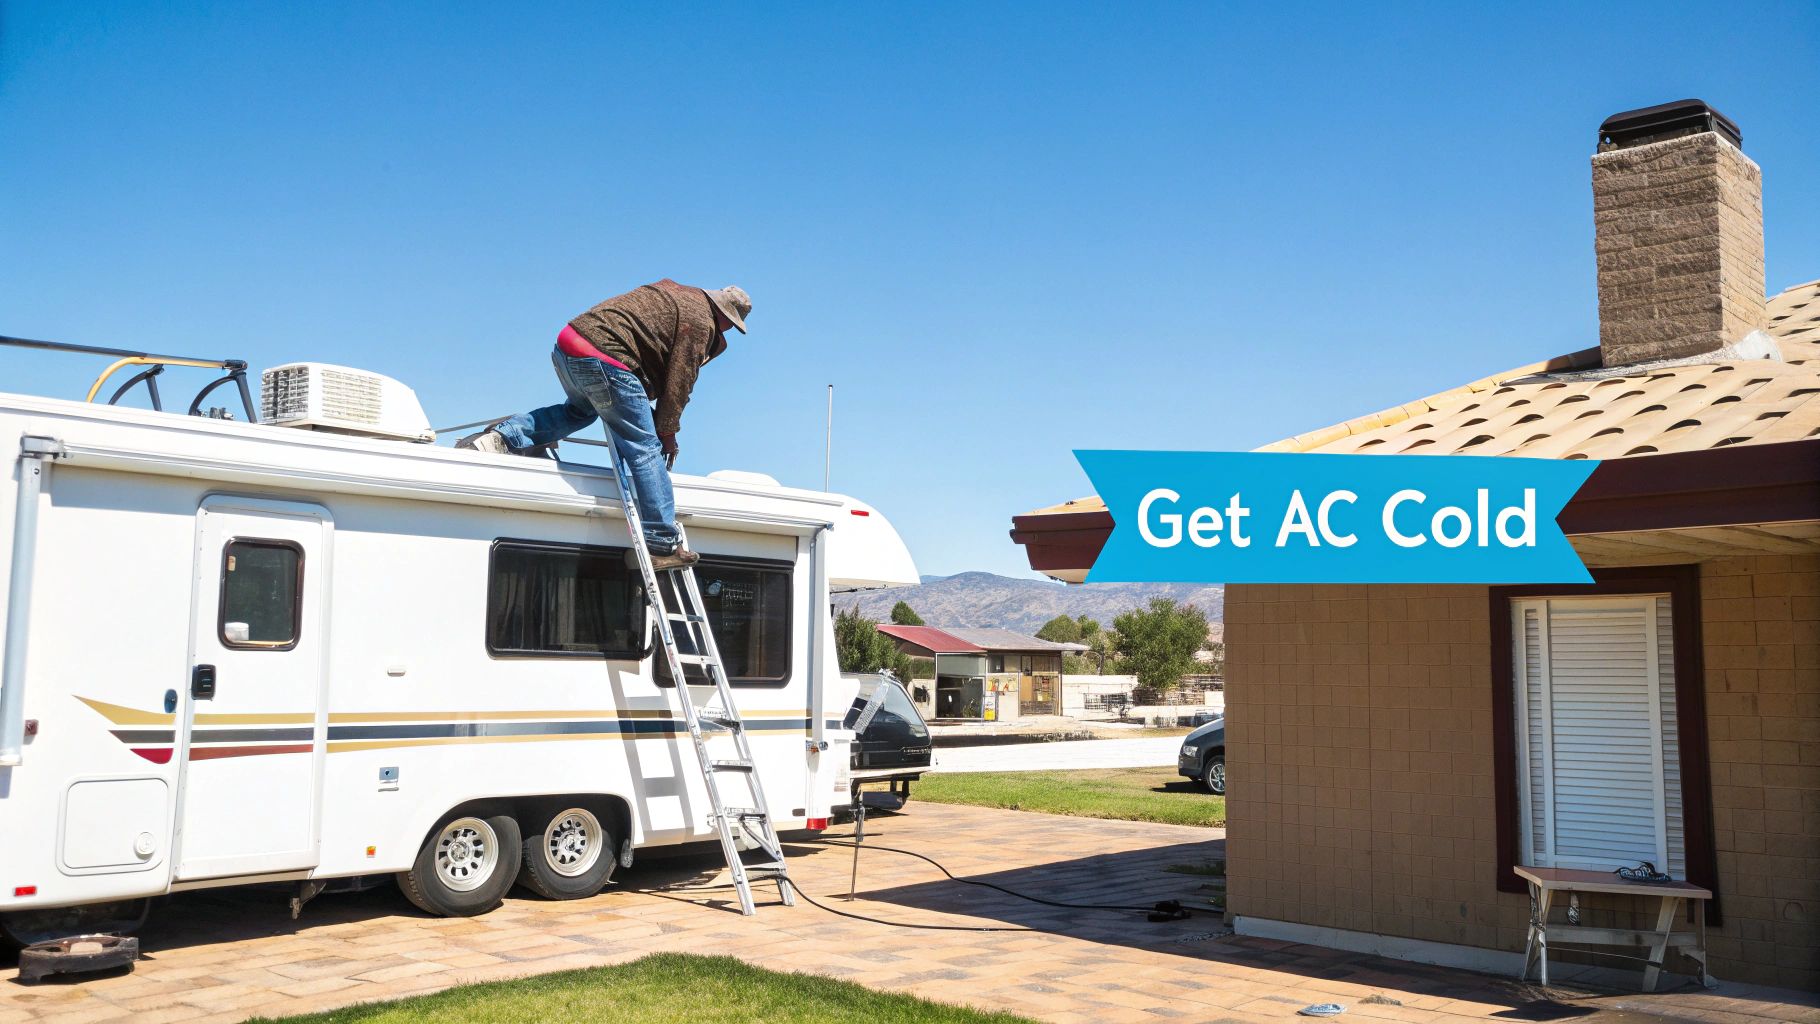
- Sturdy Ladder: Make sure your ladder is on solid, level ground and is tall enough that you can work comfortably without having to stretch or reach.
- Safety Glasses: A simple but essential piece of gear to protect your eyes from falling dirt, dust, and any chemical overspray.
Taking these steps to prepare is a huge part of any smart RV maintenance routine. It’s the same forward-thinking mindset you'd use when getting ready for seasonal changes, something you can read more about in our guide on how to winterize your RV. By getting your tools together and putting safety first, you're setting yourself up for a successful repair from the get-go.
#rv #rvlife #rvliving #rvlifestyle #rvrenovation #rvremodel
#rvtravel #rvcamping #rvadventures #ruralwifi #5gwifi
#5ginternet
Decoding Your RV AC's Warning Signs
Your RV's air conditioner almost never dies without a warning. It’ll usually send up a few flares first, and learning how to read those clues is the key to a successful DIY rv air conditioner repair. Whether it's a bizarre new noise, a weak breeze from the vents, or just not cooling like it used to, every symptom tells a story about what’s going on up on your roof.
The best way to tackle this is to think like a troubleshooter. Instead of just guessing, we're going to follow the evidence. If the unit is completely dead, we’ll start by tracing the power source. If it's running but blowing warm air, we'll investigate airflow and the core components. This methodical approach helps you zero in on the real problem, saving you time, money, and the headache of replacing parts that were perfectly fine.
Listening to Your AC Unit
The sounds your RV AC makes—or the sounds it stops making—are your first and most valuable diagnostic tool. A healthy unit has that familiar, steady hum. Any change to that baseline is a sign that something’s off. The first step is just to listen closely for these specific sounds.
- The Thermostat Click: When you dial down the temperature, you should hear a clear click. If that sound is missing, your problem could be as simple as the thermostat itself or the wiring connected to it.
- The Compressor Hum: A moment after the thermostat clicks, the deep, steady hum of the compressor should kick in. If all you hear is the fan whirring away without that lower-pitched sound, you're likely looking at a bad capacitor or a compressor issue.
- The Rattle of Loose Parts: Life on the road means constant vibration. A new rattling or buzzing noise often points to something simple, like a loose screw on the shroud or a bit of debris that’s gotten sucked into the fan cage.
Before you even think about climbing up there, this decision tree infographic gives you a simple, safety-first workflow to follow.
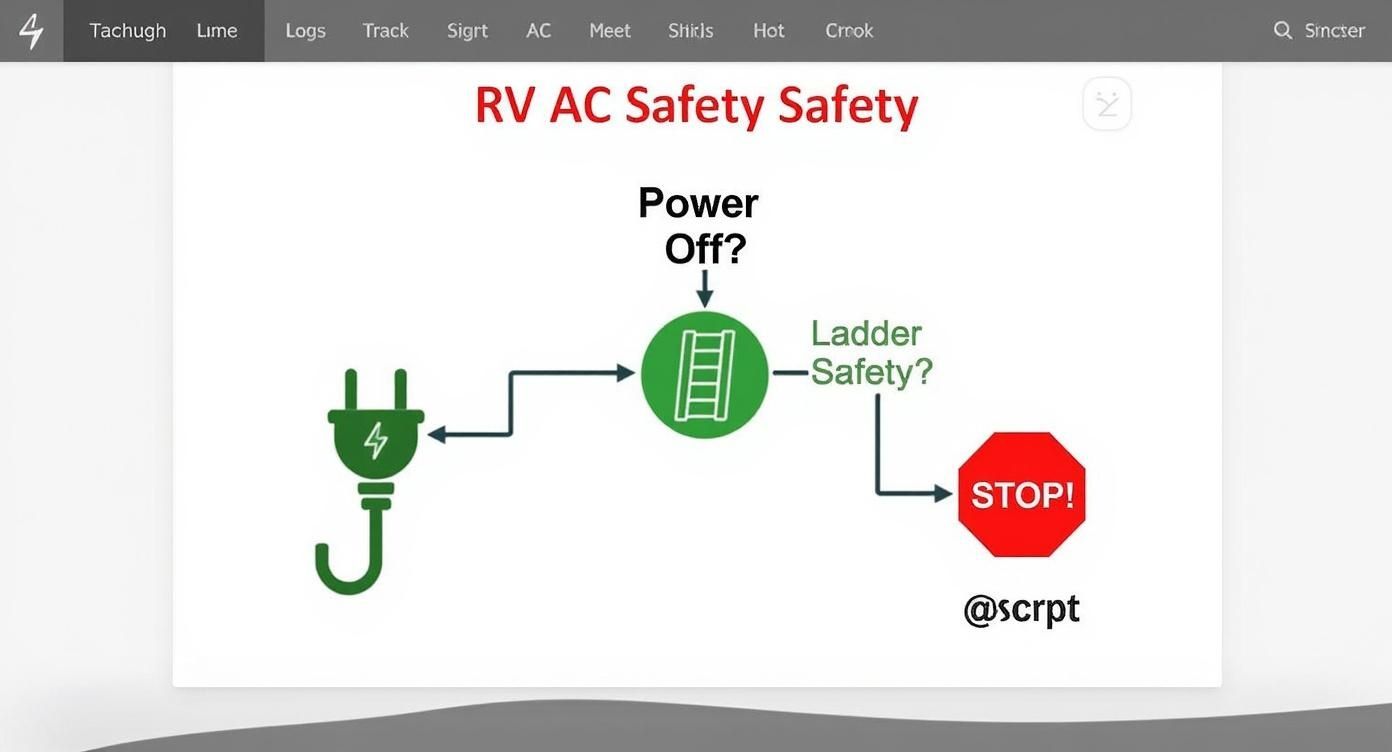
As the guide shows, verifying the power is off and making sure your ladder is secure are the absolute non-negotiable first steps for any safe repair.
From Symptoms to Solutions
Once you’ve listened for clues, you can start connecting the dots between symptoms and their likely causes. This is where you shift from listener to investigator, using your observations to narrow down the list of suspects.
A common mistake is immediately assuming the worst, like a complex refrigerant leak. The reality is, over 70% of cooling problems come from simple issues like dirty filters, clogged coils, or minor electrical faults.
If your AC runs but just isn't getting the job done, the problem is almost always about airflow. Think of it like a person trying to breathe with a stuffy nose—if air can't move freely, the system can't work effectively. Dirty coils, clogged filters, or even bent fins on the condenser can easily choke off the airflow and cripple your AC’s performance.
The technology in these units is always getting better, which is fueling some serious market growth. In fact, the global RV air conditioner market is expected to hit $12 billion, with an annual growth rate over 12%. This boom is driven by cool trends like smart controls and more efficient, lighter designs. You can learn more about the RV air conditioning industry growth and the new tech that's shaping it. By understanding these basic warning signs, you can keep your unit, whether it's brand new or an old faithful, running strong for many seasons to come.
#rv #rvlife #rvliving #rvlifestyle #rvrenovation #rvremodel
#rvtravel #rvcamping #rvadventures #ruralwifi #5gwifi
#5ginternet
Hands-On Fixes for Common AC Issues

Alright, now that you have a good idea of what’s going on, it’s time to get your hands dirty. The good news is that many of the most frequent problems that plague RV air conditioners are surprisingly easy to fix yourself. With a little patience, you can tackle the usual suspects that lead to weak cooling, poor airflow, and other frustrating performance issues.
Most of the time, these simple tasks can take your struggling AC unit and turn it back into a cold-air-cranking machine, often without spending a single dime on parts. In my experience, most rv air conditioner repair jobs begin and end with these exact steps.
Deep Cleaning Your Coils for Better Cooling
Every AC unit has two sets of coils: the evaporator coils inside your rig and the condenser coils up on the roof. Both need to be clean to do their job right. As you travel, they inevitably get caked with a nasty mix of dust, pollen, and road grime. This buildup acts like a thick wool blanket, trapping heat and killing your cooling efficiency.
Giving them a deep clean is one of the single most effective things you can do. First, kill all power to the unit. Then, head up top, remove the rooftop shroud, and you’ll see the condenser coils. Grab a can of foaming AC coil cleaner, spray it on generously, and let it work its magic for as long as the directions say. You can then rinse it off with a gentle stream of water, being extra careful not to drench any of the electrical parts. The evaporator coils are inside and can usually be cleaned the same way once you pop the interior cover off.
Pro Tip: Look closely at the delicate metal fins on the coils. If a bunch of them are bent or squashed flat, pick up a fin comb. This cheap little tool lets you gently straighten them out, which makes a huge difference in restoring proper airflow.
Tackling Electrical Connections and Capacitors
Life on the road means constant vibrations, and those vibrations can work electrical connections loose over time. With the power still off, give every wire terminal you can see a quick inspection. A gentle tug on each wire will tell you if it's secure. If you find a loose one, grab your screwdriver or nut driver and snug it back down.
A super common failure point is the start capacitor. This is a little cylinder-shaped part that gives the compressor the electrical kick it needs to start up. When it goes bad, you'll often hear the fan running, but the compressor itself never turns on. Sometimes you’ll just hear a humming or buzzing sound instead. After safely discharging it, you can test it with your multimeter (set it to measure capacitance or microfarads). If the reading is way off from the rating printed on the side, you’ve found your problem.
The Importance of Clean Filters and Fans
This is the easiest and most impactful fix of all, but it's also the one people forget most often. Knowing the recommended furnace filter replacement frequency and actually sticking to it is crucial. A filthy, clogged air filter is the number one reason an AC unit freezes up. It literally suffocates the system by blocking air from moving over the evaporator coils.
While you've got the inside cover off to check the filter, take a peek at the blower fan. It's not unusual for leaves, bits of insulation, or other debris to get sucked into the fan cage. This can cause some nasty rattling noises and seriously restrict your airflow. Give it a gentle spin by hand to make sure it moves freely.
The RV lifestyle is only getting more popular, and so is the demand for the parts that make it comfortable. The global market for RV air conditioners is expected to hit about $1.5 billion by 2025, with a healthy growth rate of around 7.5% through 2033. This just shows how vital these systems are for modern RVers. Taking care of yours with basic maintenance doesn't just keep you cool; it protects your investment. Speaking of protecting your investment, keeping other parts of your rig in top shape is just as important. For more on that, check out our guide on RV awning replacement parts.
#rv #rvlife #rvliving #rvlifestyle #rvrenovation #rvremodel
#rvtravel #rvcamping #rvadventures #ruralwifi #5gwifi
#5ginternet
Deciding Between DIY and a Professional Technician
Sometimes, you have to know when to tackle a job yourself and when to call in the experts. Here’s a quick breakdown to help you decide.
| Repair Task | DIY Feasibility | Potential Risks | When to Call a Pro |
|---|---|---|---|
| Cleaning Coils/Filters | High | Minor; potential for fin damage or getting electrical parts wet. | If you're not comfortable on the roof or handling cleaning chemicals. |
| Tightening Connections | High | Low, as long as the power is completely disconnected. | If you're unsure about working with electrical components. |
| Replacing Capacitor | Medium | High risk of electric shock if not discharged properly. | If you're not experienced with safely handling and testing capacitors. |
| Recharging Refrigerant | Low | Requires specialized tools, can damage the system if done incorrectly. Illegal to vent refrigerant. | Always. This is a job for a certified HVAC technician. |
| Replacing Compressor | Very Low | Complex, requires brazing, vacuuming the system, and precise refrigerant charging. | Absolutely a pro-only job. Don't attempt this yourself. |
Ultimately, your comfort level is key. Simple cleaning and visual inspections are great DIY tasks. But when it comes to sealed systems like refrigerant lines or major electrical components like a compressor, calling a certified RV tech is the safest and smartest move.
Knowing When to Call an RV Repair Pro
There's a real satisfaction in tackling your own RV air conditioner repair, but a wise RVer knows where to draw the line. While plenty of common AC issues are perfect for a DIY weekend warrior, some problems need specialized tools, certified training, and a deep understanding of how these complex systems work. Pushing past your skill level isn't just frustrating—it can turn a simple fix into an expensive disaster or, worse, a serious safety risk.
Learning to spot the signs that a job is best left to a professional is a critical skill for any responsible RV owner. Some tasks aren't just tricky; they're regulated, meaning you legally need a certified technician to touch them.
The Clear Red Flags
Some problems just scream "call a pro." If you even suspect one of these is happening, your next move should be finding a qualified RV technician, not reaching for your toolbox.
- Refrigerant Leaks or Recharging: This is the big one. Period. Handling refrigerants like Freon is legally restricted to EPA-certified technicians. Trying to top off the system yourself can release harmful chemicals, and an improper charge can kill your compressor in a heartbeat.
- A Seized or Failing Compressor: If you hear a loud, angry grinding or a persistent hum from the rooftop unit but the compressor never actually kicks on, it's likely a major failure. Compressor replacement is a heavy-duty job involving brazing, vacuuming the entire system, and a precise refrigerant charge. This is not a driveway repair.
- Complex Electrical Faults: Swapping out a capacitor? Totally doable for most. But when you get into diagnosing a faulty control board, bad motor windings, or tracking down mystery shorts in the internal wiring, you need advanced electrical know-how. One wrong move with a multimeter can fry expensive components for good.
Look, your safety should never be a question. If a repair involves the sealed refrigerant system or you're getting out of your depth with an electrical diagnosis, making the call is always the right decision. It protects you, your rig, and your wallet in the long run.
Finding a Trustworthy Technician
Finding a good RV tech, especially when you're on the move, can feel like a shot in the dark. A great place to start is with online reviews and asking for recommendations in RV forums or Facebook groups. Don't underestimate the campground office, either—they usually know who the reliable local pros are.
For those of us living the full-time RV life, building a network of trusted contacts is absolutely essential. If you're new to the lifestyle, our guide on how to live in an RV full-time has some great tips on creating these invaluable resources on the road.
#rv #rvlife #rvliving #rvlifestyle #rvrenovation #rvremodel
#rvtravel #rvcamping #rvadventures #ruralwifi #5gwifi
#5ginternet
When you do call a technician, be ready to give them the full story. Describe the symptoms clearly—what sounds it's making, what you've already checked (like filters and breakers), and the make and model of your AC unit. Giving them this intel upfront helps them show up with the right parts and get straight to the problem, which ultimately saves you time and money.
A Few Common Questions About RV AC Repair
Even with the best guide in hand, there are always a few specific questions that pop up when you're elbows-deep in an RV air conditioner repair. Let's tackle some of the most common ones we hear from fellow RVers to get you a quick answer right when you need it.
How Often Should I Clean My RV Air Conditioner Coils?
You’ll want to give your RV AC coils a good inspection and cleaning at least once a year. The perfect time is in the spring, just before you kick off your main travel season. This gets rid of all the dust and gunk that’s settled in over the winter.
Now, if you spend a lot of time camping in dusty areas, near those fluffy cottonwood trees, or out in grassy fields, you're better off checking them twice a year. Trust me on this one—dirty coils are the #1 cause of poor cooling. It can also lead to bigger headaches, like the unit freezing up or even the compressor overheating.
Why Does My RV AC Keep Freezing Up?
Seeing your RV air conditioner turn into a solid block of ice is almost always a tell-tale sign of one thing: restricted airflow over the evaporator coils. Your first and easiest check is the air filter. Is it clogged solid with dust and hair? If so, you're basically suffocating your AC.
If the filter looks good, your next suspect is the evaporator coils themselves. They’re probably caked with dirt and in desperate need of a cleaning. On a side note, running the fan on its lowest speed during super humid weather can sometimes contribute to freeze-ups, too. The moisture just doesn't get blown off the coils fast enough.
A freeze-up is your AC's way of screaming that it can't breathe. When this happens, turn the unit off immediately. Then, switch the fan to high to help it thaw out. Once it's completely defrosted, you can start investigating your filters and coils.
Can I Run My RV AC While Driving?
Yes, you absolutely can run your rooftop RV AC unit while barreling down the highway. There’s a catch, though: it can't be powered by your vehicle's alternator. To use your AC on the move, you need to have an onboard generator running to supply the 120V AC power it needs.
Just keep in mind, firing up the generator will definitely increase your fuel consumption and adds wear and tear to the generator itself. Because of this, a lot of travelers (myself included) just rely on the vehicle's dash air conditioning while in transit. We save the more powerful rooftop unit for when we're parked and plugged into shore power. It’s just a more practical way to manage your resources on a long travel day.
Stay connected no matter where your travels take you. For reliable, high-speed internet on the road, check out SwiftNet Wifi and our 5G internet plans designed specifically for RVers and rural living at https://swiftnetwifi.com.
#rv #rvlife #rvliving #rvlifestyle #rvrenovation #rvremodel
#rvtravel #rvcamping #rvadventures #ruralwifi #5gwifi
#5ginternet


