

If you're trying to boost your cell signal, you're usually fighting one of two enemies: the distance from the nearest cell tower or physical stuff getting in the way. Figuring out which one is your main problem is the secret to finding a fix that actually works, especially when you're in an RV or a house out in the country.
Why Your Signal Disappears in Remote Areas
Ever pull into a gorgeous, secluded campsite only to watch your phone’s signal bars evaporate? It’s a classic frustration for anyone who travels or lives off the beaten path. The reasons your connection dies are usually a mix of what’s around you and what your home—or RV—is made of.
Knowing what these obstacles are is the first real step. Instead of just throwing money at the problem, you can diagnose the issue and pick the right tools for the job.
The Two Main Signal Killers
At the heart of almost every bad reception story, you’ll find two culprits: physical blockages and good old-fashioned distance. Each one needs a slightly different battle plan.
- Physical Obstructions: Anything standing between your phone and the cell tower is going to weaken the signal. We're talking natural stuff like hills and thick forests, but also man-made things like buildings.
- Distance from the Tower: Cell signals are like sound—they get weaker the farther they have to travel. If you're out on the edge of your carrier’s map, the signal that finally reaches you might be too faint for your phone to lock onto.
Believe it or not, your RV itself is a massive signal blocker. Its metal frame and skin act like a Faraday cage, which is just a fancy term for a box that blocks electromagnetic signals—including the cell signal you're trying to get. This is the exact reason you might have a usable bar of service outside your rig, but a total dead zone the second you step inside.
The need for a solid connection has exploded, and it’s no longer just a nice-to-have. For work, safety, and staying entertained on the road, it's become a necessity. This has driven huge growth in the market for gear that can get around these common signal problems.
That’s why the global mobile network booster market is expected to jump from around $8.5 billion to $13.2 billion between 2023 and 2032. This isn't surprising when you think about how much more we all rely on our phones and connected gadgets, especially in places where the signal has to fight through physical barriers.
Figuring Out Your Specific Problem
So, how can you tell what's killing your reception? Just start by looking around. Are you parked in a deep valley or surrounded by a dense forest? Obstructions are probably your main issue. On the other hand, if you’re in a wide-open, flat area but miles from the closest town, distance is the likely suspect.
Once you know whether you're battling hills or miles, you can make a much smarter choice about how to get a stronger signal for your setup. For a deeper dive, you can check out our guide on how to improve cell reception.
The Essential Gear for Boosting Cell Signals
So, you've figured out why your signal is weak. Now it's time to build a toolkit to fight back. Getting a better cell signal isn't about some kind of magic trick; it's about using the right hardware to grab a weak signal, juice it up, and then rebroadcast it so your phone can actually use it.
Think of it like a sound system at a concert. There's a microphone to pick up the singer's voice, a massive amplifier to make it powerful, and huge speakers to blast it out to the crowd. A cell signal booster does the exact same thing, just with cellular frequencies instead of sound waves.
At the heart of any good system, you'll find three key pieces working together.
The Three Musketeers of Signal Boosting
Every decent cell signal booster kit is built around this trio of devices. Once you get what each part does, you'll be able to troubleshoot problems like a pro and understand why the whole setup works so well.
- The External Antenna: This is your signal catcher. You mount it on the outside of your RV or home, and its entire job is to snag the faintest whisper of a cell signal from the nearest tower. Where you put it and what kind it is can make or break your whole system.
- The Amplifier (or Booster): This is the muscle of the operation. It takes that weak signal caught by the external antenna and cranks up its strength in a big way—sometimes by a factor of 32x or more.
- The Internal Antenna: This final piece takes the newly powerful signal from the amp and broadcasts it throughout your rig or living room. It creates a little bubble of solid, reliable coverage for your phone and any other cellular gadgets you have.
For a deeper dive into how all these parts play together, you can learn more about how to choose the perfect cellular amplifier in our comprehensive guide.
Choosing Your Primary Weapon: Directional vs. Omni-Directional
Deciding on an external antenna is probably the single most important choice you'll make here. The two main flavors—directional and omni-directional—are built for very different situations, especially when you compare stationary rural homes to constantly-on-the-move RVs.
A directional antenna is like a sniper rifle. It focuses all its power in one specific direction to lock onto a signal from a tower that's miles and miles away. This is perfect for a fixed setup where you know exactly where the tower is and aren't planning on moving.
On the other hand, an omni-directional antenna is more like casting a wide net. It pulls in signals from every direction at once. It's not as powerful for long-distance reception, but it's a heck of a lot more convenient for RVers who are at a new campsite every few days and don't want the hassle of aiming an antenna every single time they park.
Beyond the Booster: When You Need a Cellular Router
For some folks, especially remote workers or families who need a rock-solid network, just boosting the signal to your phone might not cut it. This is where a cellular router enters the picture.
Instead of just making the bars on your phone go up, this setup creates a powerful, local Wi-Fi network right inside your RV or house. The booster feeds the amplified cell signal directly into the router, which then pumps out a stable internet connection for your laptops, smart TVs, tablets, and everything else. It’s the ultimate solution if you depend on consistent internet, no matter where you are.
To help you visualize these options, here's a quick breakdown of the different approaches to getting a better signal.
Signal Boosting Solutions at a Glance
| Solution Type | Best For | Key Advantage | Consideration |
|---|---|---|---|
| Cell Signal Booster | Improving voice calls and basic data on phones within a small area (RV, small home). | Directly improves the cellular signal your phone uses for calls and data. | Broadcast area is limited; doesn't create a shareable Wi-Fi network. |
| Directional Antenna Setup | Stationary locations (rural homes, long-term campsites) with a known cell tower direction. | Maximum signal gain; can pull in very weak, distant signals. | Requires precise aiming and is not ideal for frequent movers. |
| Omni-Directional Antenna Setup | RVers and anyone on the move who needs a simple, set-it-and-forget-it solution. | Convenience; captures signals from any direction without aiming. | Less powerful than a directional antenna; not as effective in very remote areas. |
| Cellular Router System | Remote workers, families, and anyone needing a robust, multi-device Wi-Fi network. | Creates a stable, password-protected Wi-Fi network for all your devices. | More complex and expensive setup than a simple booster. |
Choosing the right gear really comes down to how you travel and what you need the internet for. A simple booster might be enough for better calls, but a full router setup is a game-changer for serious connectivity.
How to Find the Strongest Cell Signal Source
Here’s the thing about signal boosters: they're amplifiers, not magic wands. They can only beef up a signal that’s already there, however faint it might be. This means the success of your entire setup—your ticket to faster data and clearer calls—comes down to finding the absolute best signal source before you start drilling holes and mounting antennas.
Honestly, this is the most critical part of the whole process. Don't skip it.
And please, don't trust your phone's signal bars. They are notoriously fickle and aren't standardized across different phones or carriers. One phone might show three bars while another shows one, even when they're getting the exact same signal quality. To do this right, you need to look at the raw data.
Ditching the Bars for Decibels
The true, universal measure of cell signal strength is decibel-milliwatts (dBm). It’s a negative number, and the key is to get that number as close to zero as possible. Think of it like a golf score—the lower, the better.
A reading of -50 dBm is phenomenal; that's like being right next to the cell tower. On the flip side, a signal around -120 dBm is basically a dead zone. For a booster to really work its magic, you need to find a signal of at least -110 dBm. That gives it something solid to grab onto and amplify.
Key Takeaway: Ignore the bars on your phone entirely. Your mission is to hunt down the spot with the best dBm reading. Sometimes moving an antenna just a few feet can be the difference between a frustratingly slow connection and a perfectly usable one.
So, how do you find this magic number? You can use your phone’s built-in Field Test Mode or download a dedicated signal mapping app.
Using Apps and Field Test Mode
Several apps can help you pinpoint nearby cell towers and get a precise strength reading. A great starting point is OpenSignal. It has a compass feature that can point you in the general direction of the nearest tower, which is invaluable when you're setting up a directional antenna.
For an even more precise, real-time measurement, you can dive into your phone's Field Test Mode. The steps to access it are different for Android and iOS phones, but a quick online search for your specific model will show you how. Once you’re in, it displays the live dBm reading.
Now the fun part begins. With the app or Field Test Mode running, take a walk around the outside of your RV or home. Watch that dBm number like a hawk. You'll likely discover that one corner of your roof or one side of your rig gets a significantly better signal than anywhere else. That's your sweet spot—that's where the outdoor antenna goes.
Aiming a Directional Antenna
If you’ve got a directional antenna, the process is a bit more hands-on, but the payoff is huge, especially for boosting cell phone signals in those really remote spots.
- Get Your Bearings: Use an app like OpenSignal to figure out the general direction of the closest cell tower for your carrier.
- Do a Test Run: Don’t permanently mount the antenna yet. Just loosely attach it to a pole or tripod and point it in that general direction.
- Sweep and Wait: Connect the antenna to your booster and watch the dBm reading on your phone. Slowly rotate the antenna—just a few degrees at a time—and pause for about 30-60 seconds after each small movement. This gives the reading time to stabilize and give you an accurate measurement.
- Lock It Down: Once you’ve swept the horizon and found the exact position that delivers the strongest, most stable dBm reading, lock that antenna down tight.
Taking the time to do this methodical search ensures you’re feeding the strongest possible signal into your amplifier from the get-go. Getting this foundational step right is everything.
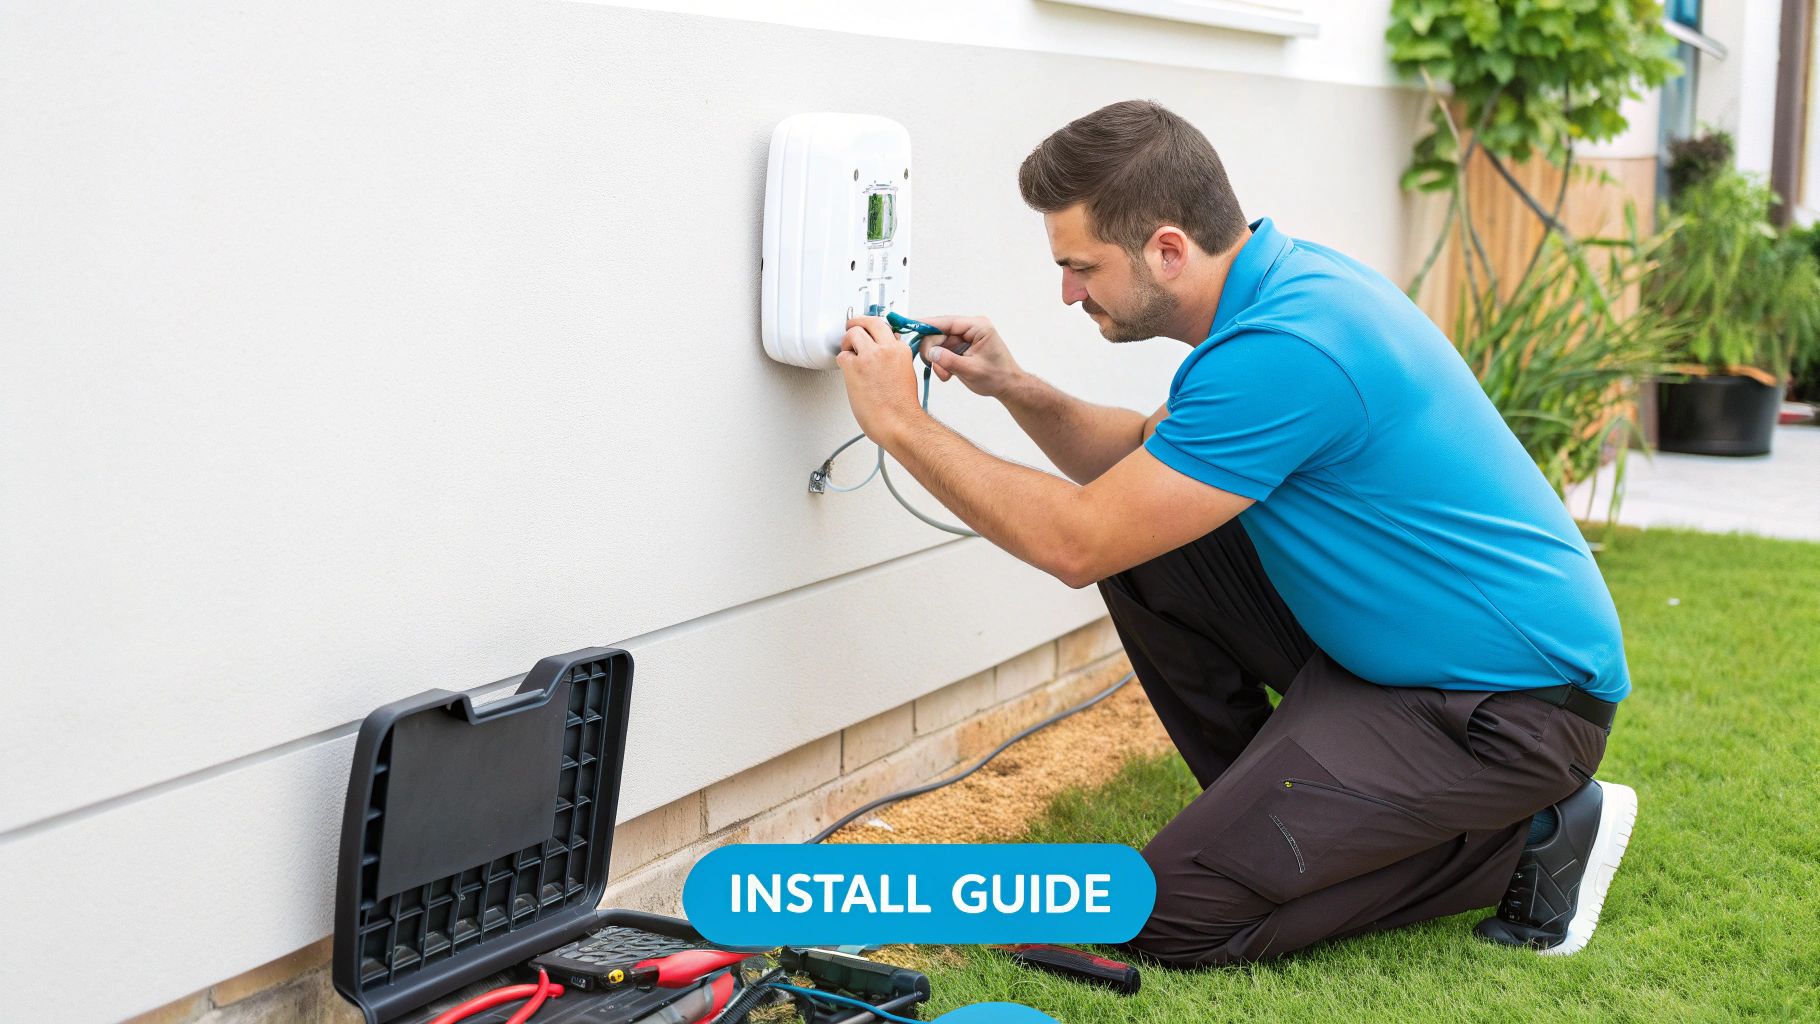
A Real-World Guide to Installing Your Booster
So, you've got a box of booster components. Turning that into a fully functional system that actually boosts your cell signal can feel like a big project, but it's more straightforward than you might think. Let's walk through a typical RV installation, focusing on practical advice I've learned from doing this in the real world—not just what's in the manual.
The whole process really boils down to three main jobs: mounting the outside antenna, placing the inside antenna, and neatly running the cable between them. Nail these steps, and you'll have a reliable setup that lasts for years on the road.
Mounting Your External Antenna
Your first big decision is where to stick the external antenna. The goal is simple: get it as high as possible with the clearest view of the sky you can manage. For most of us in an RV, this means mounting it to the roof ladder or using a dedicated telescoping pole.
- Omni-Directional Antennas: These are the go-to choice for RVs, mostly because they're just so convenient. Strapping one to your ladder is a super popular and effective option. It gets the antenna above most of the RV's metal roof (which blocks signal) and it’s a simple, drill-free installation.
- Directional (Yagi) Antennas: If you're parking for a while and need every last drop of signal strength, a Yagi on a pole is the way to go. You’ll have to aim it at the nearest cell tower, but the performance boost can be massive in really remote spots.
This visual breaks down the basic logic for getting your antenna placement right, which is absolutely crucial for the whole system to work well.
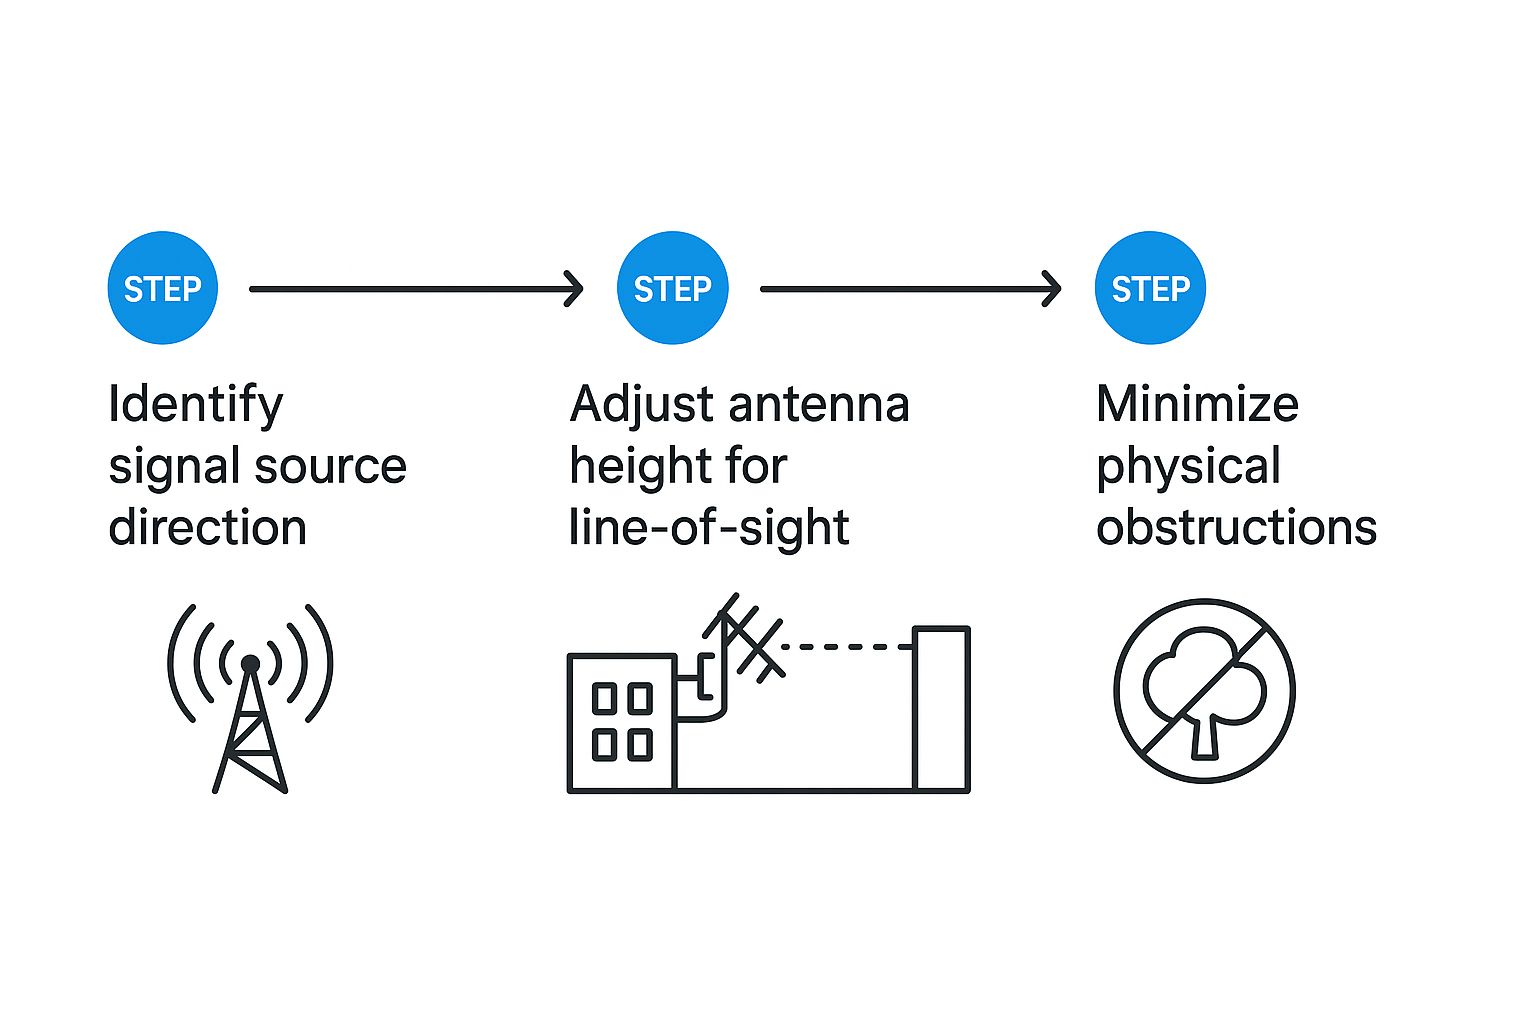
As the infographic shows, finding the signal source and giving your antenna a clear line of sight are your first priorities for a strong, stable connection.
The Importance of Antenna Separation
Now for a rule you absolutely cannot break: antenna separation. The outside (external) and inside (internal) antennas have to be far enough apart, both vertically and horizontally. If they get too close, they create a feedback loop called oscillation.
Think of it like a microphone getting too close to a speaker at a concert—you get that awful, high-pitched screech. With a booster, oscillation causes the system to automatically shut down to protect the carrier's network. In an RV, this usually means putting the external antenna on the roof and the internal one somewhere in the main living area, as far away from the outside one as you can get it.
For some solid hardware recommendations, check out our guide on the best cellular booster for RVs offers top picks.
Pro Tip: Before you permanently mount a single thing, do a "soft install." Just lay out the components where you think they should go and power the system on. Make sure it works without any oscillation errors (usually a red light on the booster). This simple check can save you hours of headaches later.
Routing Cables and Weatherproofing
The final piece of the puzzle is running the coaxial cable from the outside antenna down to the amplifier inside your rig. A lot of RVers, myself included, like to route the cable through a refrigerator vent on the roof. It's a great way to avoid drilling new holes.
Whatever path you end up choosing, make sure you secure the cable so it doesn’t flap around in the wind while you're driving.
Lastly, weatherproof every single outdoor connection. Use the heat-shrink tubing that came with your kit or wrap the connections tightly with good-quality waterproof electrical tape. Moisture is the number one enemy of any electronic system, and taking a few extra minutes to seal your connections will make sure your investment lasts for many adventures to come.
Fine-Tuning Your Connection for Better Performance
Alright, you’ve got the booster installed. Now for the fun part: dialing it in for the best possible performance. Think of this as the final polish that turns a good setup into a great one.
A lot of this comes down to understanding what the booster itself is telling you. Those little indicator lights are your best friend for spotting issues like oscillation or signal overload before they mess with your connection.
For instance, a solid green light is the goal—it means everything is running smoothly. But if you see a flashing red light, that’s a clear sign your antennas are too close together, causing feedback.
It's amazing how a simple fix, like moving your indoor antenna a bit, can solve that and potentially boost your speeds by 25%.
Reading the Lights
You don't need to dig out the manual every time a light blinks. The colors and patterns tell a simple story once you know what to look for.
Here’s the quick-and-dirty guide to what those LEDs are trying to tell you:
- Steady Green: All systems go. You're getting the best possible signal.
- Flashing Red: This is oscillation. The booster is shutting down a specific band to protect the network. Your antennas are too close!
- Blinking Amber/Orange: You're getting too much signal from the tower. This is overload, and the booster is automatically reducing its gain to compensate.
If you're dealing with overload (that amber light), the fix is often as simple as adjusting the gain settings right on the booster itself. No need to get the tools back out. Sometimes, just nudging that small indoor antenna a few inches can make a surprising difference in your uplink and downlink speeds.
Once you’ve got those lights showing a steady green, you're in a great spot. From here, any other tweaks are just icing on the cake.
| Adjustment Type | Effectiveness | Best For |
|---|---|---|
| Indoor Antenna Repositioning | Medium (~30% boost) | Fixing oscillation in a small RV or office. |
| Gain Reduction | High (~40% boost) | Correcting signal overload from a nearby tower. |
| Band Locking | Variable | Fighting network congestion in crowded areas. |
"Honestly, just paying attention to the LEDs and moving my antenna around has saved me hours of frustration and downtime. It’s the first thing I check."
Locking In the Best Frequency
Now for a pro move: band locking. This tells your cellular router to focus on a specific frequency and ignore the ones that are clogged up with traffic.
This is an absolute game-changer in areas where everyone is fighting for bandwidth on the same popular channels. In some spots, 73% of users complain about slowdowns on these peak frequencies.
You can usually find this setting in your router's advanced options. It might be called "Band Locking," "Band Selection," or "Network Mode." Here’s the general process:
- Log in to your router using the IP address from the manual.
- Find the "Band Selection" or "Network Mode" menu.
- Manually select a band that's less likely to be congested. (For rural LTE, Band 5 is often a good starting point).
- Save your changes and restart the router.
A quick reboot will lock that frequency in and should give you much more stable speeds. Just remember, full bars don't always equal fast internet. Signal strength is only half the battle; congestion is the other.
If you’re still getting sluggish performance with a strong signal, that’s when you should experiment with band locking.
It's also worth noting how significant this technology has become. The global market for cell phone signal boosters was valued at around $12.85 billion in 2025 and is projected to grow at a compound annual growth rate (CAGR) of about 10% through 2033. You can read more on these projections for the signal booster market here.
Keeping this setup fine-tuned is an ongoing process, but it prevents a ton of common headaches and keeps your connection running smoothly.
Always be tweaking.
A Few Common Questions About Boosting Your Signal
Even after you get your rig all set up, questions are bound to pop up. It's totally normal. Let's run through some of the most common ones we hear from folks trying to get a better cell signal. Clearing these up will help you feel a lot more confident about your gear and what to expect from it.
Will a Cell Signal Booster Work if I Have No Service at All?
This is probably the biggest question people have, and the short answer is no. A booster needs something to work with. Think of it like a megaphone—it can turn a faint whisper into a clear voice, but it can't create sound out of complete silence.
The good news is that even a very weak, barely-there one-bar signal on the roof of your RV or house can often be turned into a solid, usable connection inside. If you're in a true "dead zone" where your phone shows "No Service" no matter where you go, a booster won't be able to help. The first step is always finding a spot, even a small one, where you can pick up a faint signal from a carrier.
Are Cell Phone Signal Boosters Legal?
Absolutely. Here in the United States, consumer cell phone boosters are perfectly legal to own and use, but there's a catch: they must be certified by the FCC. All the major, reputable brands sell devices that have gone through this certification, which guarantees they won't mess with the broader cellular network.
You're also required to register your booster with your cell phone carrier. Don't worry, it's a simple, free process you can usually do online in a few minutes. Using a non-certified booster is illegal because it can cause serious interference for other users, and that can lead to some hefty fines. My advice? Always buy from a well-known, reputable source.
The whole point of FCC certification is to confirm the booster operates within safe power limits and doesn't cause harmful network interference. It’s what protects the cellular network for everyone.
Do I Need a Special Booster for 5G?
This is a great question, especially with all the hype around 5G. For most people, the answer is no, you don't need a special "5G booster."
Most of the high-quality 4G LTE boosters on the market today are also fully compatible with the lower-band 5G frequencies. This is the kind of 5G that carriers are rolling out for their nationwide coverage, and it's what you're most likely to find when you're out on the road or in a rural area.
These boosters do a fantastic job of improving both your 4G and basic 5G signals. What they won't boost is the super-fast, high-frequency millimeter-wave (mmWave) 5G. But honestly, you'll almost never run into that outside of dense urban centers or sports stadiums. For just about every RVer and rural user, a quality 4G LTE booster is a solid investment that will dramatically improve the 5G you actually encounter.
Ready to stop searching for signal and start enjoying reliable, high-speed internet wherever your adventures take you? SwiftNet Wifi provides powerful 5G internet solutions designed specifically for RVers and rural residents. Explore our plans and get connected today! #rv #rvlife #rvliving #rvlifestyle #rvrenovation #rvremodel #rvtravel #rvcamping #rvadventures #ruralwifi #5gwifi #5ginternet


