

Got a spotty WiFi signal? The fix is usually a lot simpler than you'd think. The number one rule is to place your WiFi extender halfway between your main router and the area with the weak signal—what most people call a "dead zone." This sweet spot is key. It lets the extender grab a strong, clean signal from the router and then blast it out effectively to the rooms that need it most.
Finding the Sweet Spot for Your WiFi Extender
I like to think of a WiFi signal as a voice. Your router is shouting, but that voice gets fainter the farther away you move. A WiFi extender's job is to listen to that shout and then shout it again, just as loudly.
If you put the extender too close to the router, it’s just shouting over your router’s voice and not really extending the range. But if you stick it way out in the dead zone, it can't hear the router clearly in the first place. All it can do is rebroadcast a weak, garbled message. The magic happens right in the middle.
This image really helps visualize where that "sweet spot" is in a typical home.
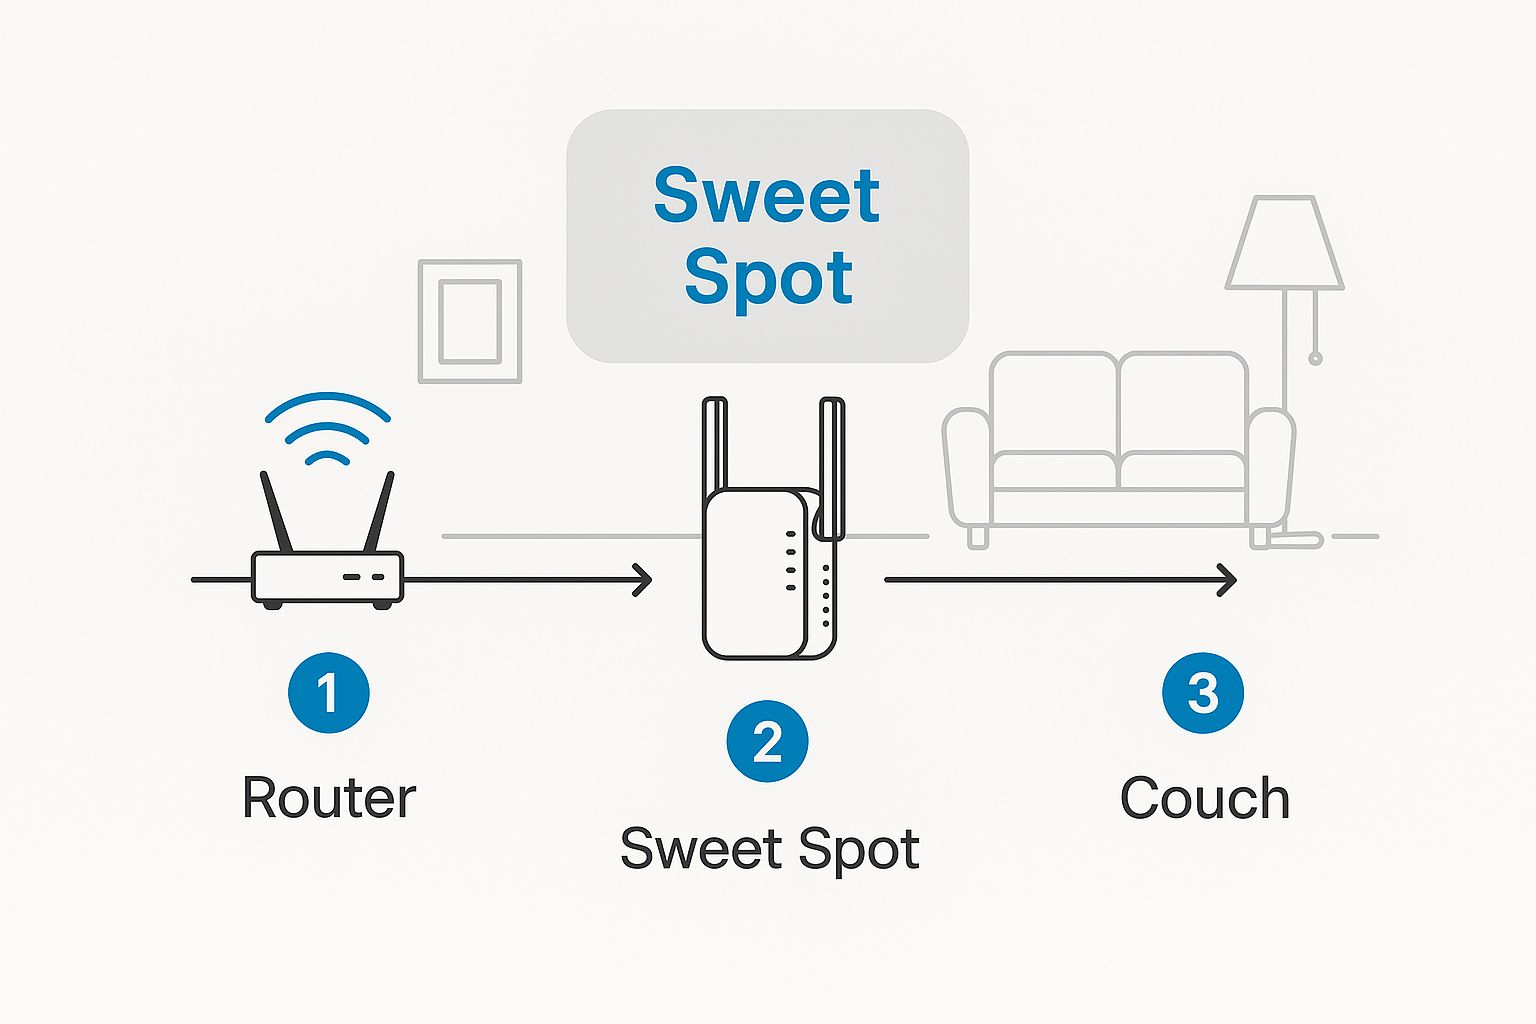
As you can see, that midway point is crucial. It ensures the extender has a reliable signal to work with before it pushes coverage out to your hard-to-reach devices.
Why Placement Is Everything
Getting the placement right is non-negotiable if you want this thing to actually work. It's a huge market—in fact, the global Wi-Fi extender market is expected to hit $5.5 billion by 2035 as more people demand better connectivity at home.
The proof is in the user experience. One consumer survey found that a whopping 65% of first-time users didn't see any improvement until they moved their device. Once they repositioned it, an overwhelming 80% noticed an immediate, significant boost in performance. You can find more details about trends in the Wi-Fi extender market on futuremarketinsights.com.
To help you nail the placement, here’s a quick-reference table summarizing the key do’s and don’ts I've picked up over the years.
WiFi Extender Placement Quick Reference
| Do This | Don't Do This |
|---|---|
| Place it halfway between the router and the dead zone. | Place it in the dead zone itself. |
| Keep it in an open area, free from obstructions. | Hide it behind furniture, in a cabinet, or near metal objects. |
| Position it off the floor, ideally at table height or higher. | Put it on the ground or in a basement. |
| Ensure it's away from other electronics like microwaves. | Place it next to devices that can cause signal interference. |
| Aim for a location with at least a 50% signal from the router. | Set it up where the signal from the router is already weak. |
Getting this right can be the difference between a smooth, reliable connection and wanting to throw your extender out the window.
The real goal isn't just to kill dead zones, but to deliver a stable, usable connection inside them. Placing your extender halfway ensures it has a strong enough signal to "catch" and a clear path to "throw" it where you need it.
Ultimately, the right location has less to do with the extender's technical specs and more to do with this simple principle of signal transmission. Keep this in mind, and you'll be set whether you're in a multi-story house, a sprawling apartment, or even an RV.
How to Map Your Home's WiFi Coverage
Before you can find the perfect spot for a Wi-Fi extender, you first have to play detective and figure out where your signal is strong and where it completely disappears. Don't worry, this doesn't involve any complicated gear—just your smartphone and a little bit of legwork. The idea is to build a mental map of your home's wireless strengths and weaknesses.
A great first step is to grab a free Wi-Fi analyzer app for your phone. These apps give you a much more detailed look at your signal strength than the basic bars at the top of your screen, measuring it in dBm (decibel-milliwatts).
With the app running, stand right next to your router and take a reading. That's your baseline, the strongest your signal will be. Now, just start walking. Move slowly through your house, keeping an eye on how the numbers change as you go from room to room. Pay extra attention when you get to those spots where your connection always seems to drop.
Pinpointing Your Dead Zones
As you explore, make a mental note of the exact places where the signal strength takes a nosedive. Is it that far corner of the basement? The back bedroom? Out on the patio? These are your dead zones. Knowing precisely where they begin and end is crucial for finding that sweet spot for your extender.
If you want to get really granular with this, we've got a complete guide that shows you how to map WiFi coverage like a pro. It's packed with a few more advanced techniques for sniffing out weak spots.
Here's the key takeaway: The best place for your extender is not right in the middle of a dead zone. It needs to be placed where it can still get a strong, stable signal from your main router, while also being close enough to the dead zone to blast a fresh, powerful signal into it.
This mapping exercise is especially important in homes that don't have a simple, boxy layout. A few common scenarios I run into all the time:
- Multi-Story Homes: Signal strength can plummet when moving between floors. Make sure to check the areas directly above and below your router's location. Floors are serious Wi-Fi killers, so you might find a dead zone on another level even if it's not far away horizontally.
- L-Shaped Homes: The "corner" of the L often acts like a wall, creating a signal shadow that blocks Wi-Fi from getting around it. You'll likely need to place your extender just before that bend to effectively push the signal into the other leg of the house.
- RVs and Trailers: I've seen this a thousand times—metal walls are absolute signal assassins. When you're mapping out your rig, check the signal both inside and just outside to find a central spot that can cover both areas without the vehicle’s structure getting in the way.
Navigating Common Signal Obstacles in Your Home
Finding the perfect spot for your extender is more of an art than a science. It's not just about measuring distance; your home is probably full of Wi-Fi signal killers you've never even thought about. Many common building materials can absorb or reflect wireless signals, creating weird dead zones that have nothing to do with how far you are from the router.
Dense materials are usually the main culprits. If you think of your Wi-Fi as a beam of light, thick obstacles cast a dark shadow. Things like brick, concrete, and even walls with metal studs are notorious for weakening or just completely blocking Wi-Fi signals. Getting a handle on this is the first step to figuring out where to place your extender for a solid connection.
This isn't just a hunch. Because of thick walls and tricky architectural features, about 40% of users have to mess around with multiple extender positions just to find one that works. As a general rule of thumb, try to keep it under 30 meters between the router and extender for 2.4 GHz bands, and no more than 15 meters for 5 GHz bands. You can dig deeper into how different factors play into signal range in this market report on Wi-Fi extenders.
Spotting Less Obvious Signal Blockers
Beyond what your walls are made of, everyday household items can throw a wrench in your Wi-Fi signal. These are usually things that have a lot of metal or water, both of which are surprisingly good at messing with wireless signals.
Here are a few common but often overlooked signal blockers to watch out for:
- Large Metal Appliances: Your refrigerator, oven, and microwave are basically giant metal boxes. They can create a "signal shadow," blocking Wi-Fi from getting to the other side.
- Mirrors: It sounds strange, but the metallic backing on most mirrors is great at reflecting Wi-Fi signals, causing them to bounce away from where you actually need them.
- Aquariums: A big fish tank is essentially a wall of water. It will absorb a surprising amount of your Wi-Fi signal as it tries to pass through.
One of the best tricks I've learned over the years is to think vertically. I've found that placing an extender higher up, like on a bookshelf or a cabinet, often gives it a much clearer line of sight to the router, letting it bypass floor-level clutter like couches and entertainment centers.
By spotting and working around these common obstacles, you give your extender the cleanest possible path to grab the signal from your router and blast it out where you need it. The result is a much more stable and reliable connection for all your devices.
Unique Placement Strategies for RVs and Rural Homes
Getting reliable WiFi in a standard house is one thing, but it’s a whole different ballgame for those living the RV life or in a rural home. You're not just fighting against drywall and furniture anymore; now you’re up against signal-killing materials like metal and glass, not to mention the challenge of covering wide-open spaces.
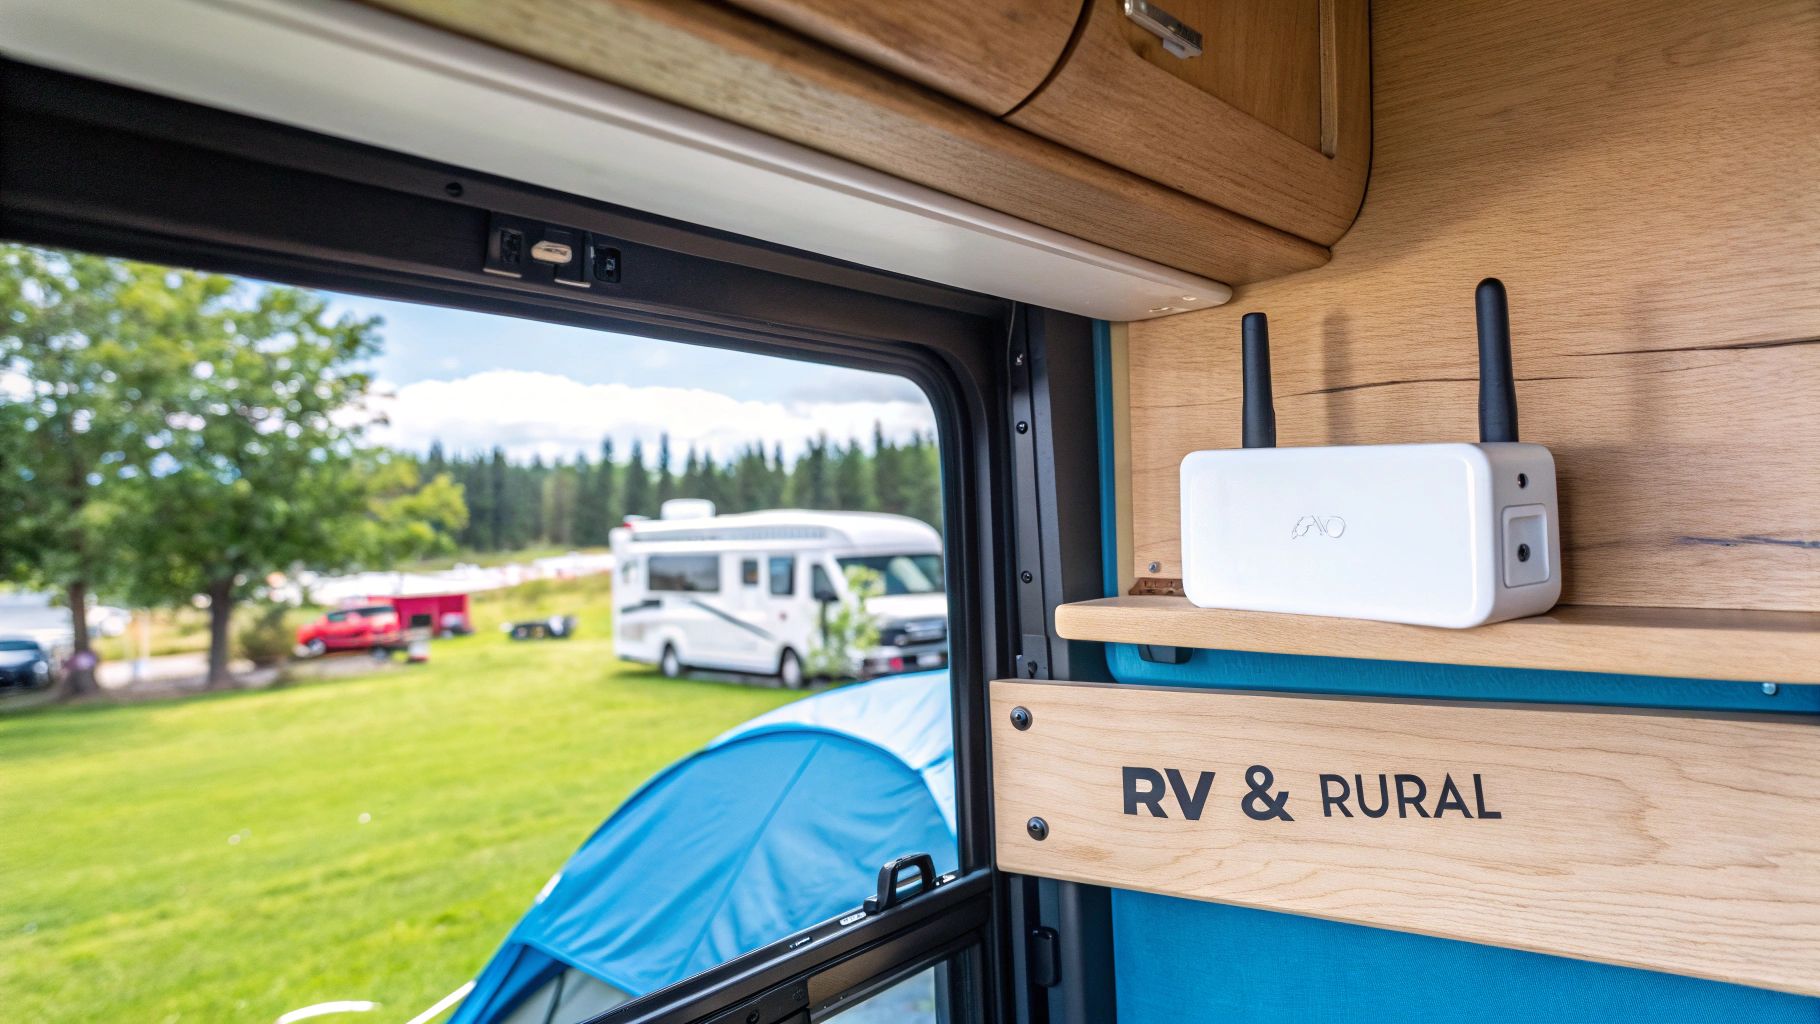
Take an RV, for instance. That compact space is surprisingly deceptive. The rig is basically a metal box filled with glass windows—two materials notorious for reflecting and blocking WiFi signals. This can create frustratingly unpredictable dead zones, both inside your living space and just outside at your campsite.
Optimizing WiFi in Your RV
In an RV, you’re usually trying to accomplish two things: get a strong, stable signal inside for all your devices, and push a usable connection outside to your camping area. This calls for a bit of a balancing act when deciding where to put your WiFi extender.
- Go for a central window. I've found that the best spot is often near a large window in the middle of the rig. This gives the signal a clear escape route from the metal shell, massively improving coverage for your outdoor seating area.
- Get it up high. Don't just toss the extender on a low countertop where it's buried behind other things. Placing it on an overhead cabinet helps the signal broadcast over the dense furniture and appliances crammed into a small RV interior.
- Think line of sight. If your main router is at the front of the RV, try to place the extender about midway back with as clear a path between them as possible. Definitely avoid tucking it behind the microwave or TV.
For anyone who relies on a solid connection while traveling, truly understanding the unique needs of internet for RV living is the key to staying online from anywhere.
Extending Your Reach in Rural Settings
Out in the country, the biggest challenge is almost always distance. You might be trying to get a signal from the house out to a workshop, a barn, or even just the far corner of your property.
A window facing your target area is your best friend in rural settings. Placing an extender there essentially turns the window into a directional antenna, focusing and boosting the signal's range significantly.
If you have a two-story home, try putting the extender in an upstairs window. The higher broadcast angle can help the signal travel over ground-level obstacles like parked cars or small sheds. Just be mindful that the device is protected from direct sunlight and moisture. The same rules of elevation and clear sight lines apply here—just on a much larger scale.
How to Test and Fine-Tune Your Extender's Performance
Alright, you’ve picked a promising spot for your extender. Now for the moment of truth: is it actually doing its job? Just seeing full Wi-Fi bars on your phone can be deceiving. What you really care about is usable speed and a stable connection. The only way to know for sure is to run a quick before-and-after test.
Start by standing in your main Wi-Fi dead zone—that spot where videos always buffer or calls drop. Make sure the extender is unplugged for now. Pull out your phone, run a free online speed test (like Ookla's Speedtest or fast.com), and jot down the download speed, upload speed, and ping.
Now, go plug in the extender, connect your phone to its new network, and run that same speed test from the exact same spot. This comparison is everything.
Understanding Your Speed Test Results
Those numbers you get back tell the whole story. You're not just looking for a bigger download number; a truly good connection is about balance.
- Download Speed: This is how fast stuff gets to you from the internet. If you were struggling with 5 Mbps before and now you're cruising at 30 Mbps, that's a huge win. Hello, smooth video streaming.
- Upload Speed: This is how fast you can send data out. It's a big deal for video calls, uploading photos, or sending big files for work. Seeing this number jump means your connection is much more capable.
- Ping (Latency): Measured in milliseconds (ms), this tells you how responsive your connection is. For online gaming or snappy video calls, lower is always better. Dropping from a laggy 100ms to under 40ms is a game-changer.
If the results aren't what you hoped for, don't sweat it. Tiny adjustments can make a surprising amount of difference. For a deeper dive into tweaking your signal, check out our guide on how to extend your WiFi range.
Don't get discouraged if the first placement isn't perfect. Think of it as tuning an instrument. A slight adjustment to an antenna's angle or moving the extender just a few feet can dramatically improve its performance.
Simple Tweaks for Better Performance
Is your new, extended connection still feeling sluggish or dropping out? Before you get frustrated, try these simple but often-overlooked fixes.
First, the obvious one: double-check that you’re actually connected to the extender’s network. It usually has “_EXT” added to your main Wi-Fi name. Phones can be stubborn and sometimes cling to the router's original, weaker signal.
Next, play with the antennas. If they're adjustable, try pointing one vertically and the other horizontally. This little trick can help your devices get a better signal no matter how you're holding them.
Finally, just move it. Nudge the extender a few feet closer to your router, then a few feet farther away. Sometimes finding that perfect sweet spot is a matter of inches, not feet.
A Few Lingering Questions About WiFi Extender Placement
Even after you've found what feels like the perfect spot, a few questions might still pop up. It happens to everyone. Let's walk through some of the most common things people ask when they're trying to fine-tune their extender setup.
Should My WiFi Extender Have the Same Name as My Router?
This is a great question, and my advice is usually to give the extender's network a slightly different name—something like "HomeNetwork_EXT" works well. It’s a simple change that gives you a surprising amount of control.
When the names are identical, your phone or laptop can get a little stubborn. It might cling to the weaker signal from your main router, even if you're standing right next to the extender. A separate name lets you manually switch over and guarantee you're on the strongest connection available.
Can I Plug My WiFi Extender Into a Power Strip?
For the best possible performance, you really want to plug your extender directly into a wall outlet. It's one of those small details that can make a huge difference in signal stability.
Power strips and surge protectors, as useful as they are, can introduce a bit of electrical "noise" and interference. This can mess with the extender's signal quality. A direct wall connection is always the cleanest, most stable path for power, which translates to a cleaner, more stable Wi-Fi signal.
A common mistake is treating an extender like any other appliance. Plugging it directly into the wall ensures it gets clean power, which is critical for maintaining a stable, high-quality wireless signal without added electronic interference.
How Do I Know if I Need a Second WiFi Extender?
Sometimes, one extender just isn't enough, especially in a larger or oddly shaped home. If you've tried all the placement tricks and still have a stubborn dead zone, it might be time to consider a second unit.
To figure this out, find that new dead zone and see if you can place a second extender about halfway between it and your main router. The key here is to avoid "daisy-chaining," which is when you connect one extender to another. That setup will absolutely kill your internet speeds. Each extender needs its own clear shot back to the router to work properly.
Ready for a seamless connection that covers every corner of your home or RV? SwiftNet Wifi provides high-speed 5G internet designed for rural homes and travelers who refuse to compromise on speed and reliability. Check out our plans today at https://swiftnetwifi.com.
#rv #rvlife #rvliving #rvlifestyle #rvrenovation #rvremodel #rvtravel #rvcamping #rvadventures #ruralwifi #5gwifi #5ginternet


