

Ever wonder why your phone's signal bars vanish the moment you turn onto a remote backroad or pull into that perfect, scenic campsite? It’s a frustratingly common story. The distance from a cell tower is a big part of the problem, but it’s not the whole picture. The real culprits are often the things that make these spots so beautiful in the first place: natural terrain, dense forests, and even the materials your RV is made from.
Why Your Signal Disappears Out in the Wild
The dream of escaping it all often runs headfirst into the modern need for a decent phone signal. You find a gorgeous, secluded spot, ready to unwind or get some remote work done, only to realize you're in a total digital dead zone. This isn’t just bad luck; it’s physics.
Cellular signals are just radio waves, and they have a tough time pushing through the obstacles common in rural areas and RV parks.
This infographic breaks down a classic scenario where the landscape itself wipes out your signal—a huge challenge for RVers and folks living off the beaten path.

As you can see, even if a tower is out there somewhere, hills and trees can easily absorb or deflect the radio frequencies your phone is desperately trying to catch.
The usual Signal-Killing Suspects
Knowing what’s blocking your signal is the first step to fixing it. A few key things are almost always working against your connection when you're far from the city.
- Natural Terrain: Hills, mountains, and deep valleys are the big ones. If you don't have a clear line of sight to a cell tower, your signal strength will nosedive. Even a thick patch of trees can scatter those radio waves, weakening them before they ever get to you.
- Building Materials: Sometimes the call is coming from inside the house—or in this case, the RV. Materials like aluminum siding, metal roofs, and even those fancy energy-efficient Low-E windows are fantastic at blocking cell signals from getting in.
- Weather Conditions: Don't underestimate Mother Nature. Heavy rain, dense fog, snow, and even high humidity can mess with signal transmission. Water droplets in the air literally absorb and scatter the radio waves, causing a noticeable drop in performance.
How a Signal Booster Fights Back
So, what can you do about it? This is where a booster phone signal system becomes your best friend. Think of it as a powerful megaphone and a high-tech hearing aid for your phone, all rolled into one. It’s a three-part system designed to grab, amplify, and then spread a usable signal where you need it.
A signal booster doesn't magically create a signal out of thin air. What it does is take an existing—even if it's incredibly weak—outside signal, juice it up, and then broadcast that much stronger signal inside your RV or home.
This simple process can turn a frustrating one-bar zone into a reliable spot for calls, texts, and data. It's no surprise the demand for these devices is exploding. In 2020, the mobile phone signal booster market was already valued at around $12,020 million and is on a steady upward climb.
Of course, when you're running a signal booster in an RV, you need a reliable power source to keep it working. That’s where things like inverter RV generators come in handy, ensuring your booster has the steady juice it needs to keep you connected, no matter where you roam.
Choosing the Right Signal Booster for Your Setup
https://www.youtube.com/embed/a8Z_jtP1mpU
Picking out the right device to booster phone signal is often where people get stuck. You start seeing technical terms like "gain" and "dB," and it's easy to feel like you're in over your head.
The secret is to ignore the noise and focus on one thing: matching the booster's features to your specific situation. Are you living the RV life, or are you settled in a rural home? Getting this right from the start will save you a ton of time, money, and frustration down the road.
Mobile vs. Stationary Boosters
First things first, you need to decide between a mobile booster made for vehicles and a stationary one built for a house or cabin. They both amplify cell signals, but they’re engineered for completely different worlds.
- Vehicle/RV Boosters: These are your road trip companions. They're compact, designed for a simple install in a moving vehicle, and almost always use an omni-directional antenna. Their whole purpose is to grab the best available signal as you travel through areas where service quality is all over the map.
- Stationary/Home Boosters: Think of these as the heavy-hitters for a fixed location. They are more powerful systems that typically come with a high-gain directional antenna. You point it at the nearest cell tower, and it pulls in a much stronger, more stable signal for your whole house.
A mobile unit is perfect for the RVer hopping between campsites. A stationary unit is the only real answer for a permanent rural home that's fighting for a connection with a single, distant tower.
The Great Antenna Debate: Omni-Directional vs. Directional
The type of outdoor antenna in your kit is arguably the most critical piece of the puzzle. It determines how well your booster can "hear" the cell tower's signal.
An omni-directional antenna is a must-have for mobile setups. It pulls in signal from a full 360-degree circle, so you never have to aim it. This is ideal for an RV because it can latch onto signals from different towers as your location changes, no adjustments needed.
A directional antenna, like a Yagi, is the powerhouse for stationary life. It has a narrow, focused beam that lets it reach towers miles farther away than an omni ever could. It does require you to find and aim it at your best tower, but the reward is a massive jump in signal strength and reliability.
For a rural cabin where the nearest tower is miles away over a hill, a directional antenna is non-negotiable. It's the difference between having a usable signal and having none at all.
Understanding Key Specifications
When you're comparing booster models, you'll see a few technical specs pop up again and again. Don't let them scare you off; they're actually pretty simple.
Gain (dB): This is the big one. Measured in decibels (dB), gain is just a number that tells you how much the booster amplifies the signal. More gain equals more power. For a small camper van, a booster with +50 dB of gain will do the trick. For a large rural home that's far from everything, you'll want the maximum allowed by law, which is around +72 dB.
Carrier Compatibility: Thankfully, most modern boosters work with all the major carriers—Verizon, AT&T, T-Mobile—at the same time. It's always smart to double-check, though, just to be sure it will boost the signal for everyone in your home or RV, no matter their provider.
The need for this technology is exploding. The cellular signal booster market is on track to hit $2.5 billion by 2025, driven by our collective need to stay connected even when we're far from city infrastructure.
RV vs. Rural Home Signal Booster Comparison
To make the choice crystal clear, let's break down the key differences between a booster for an RV and one for a rural home. Your lifestyle and location directly determine which features matter most.
| Feature | Best for RVs | Best for Rural Homes |
|---|---|---|
| Booster Type | Mobile / Vehicle Booster | Stationary / Home Booster |
| Antenna Choice | Omni-directional | Directional (Yagi) |
| Ideal Gain | +50 dB | +65 to +72 dB |
| Primary Goal | Consistent signal while moving | Max signal from a fixed, distant tower |
As you can see, the right choice depends entirely on whether you're staying put or constantly on the move.
Picking the right booster for an RV involves its own unique set of challenges, from power draw to finding the right place to mount the antenna. For a deeper look at specific models built for life on the road, check out our guide on the best cellular booster for RV travel. It'll help you find the top picks that balance raw power with the realities of RV living.
#rv #rvlife #rvliving #rvlifestyle #rvrenovation #rvremodel
#rvtravel #rvcamping #rvadventures #ruralwifi #5gwifi
#5ginternet
Installing Your Booster for Maximum Signal Gain
Getting your new signal booster out of the box is exciting, but a smart installation is what actually turns a weak, frustrating signal into a strong, reliable one. This is where the rubber meets the road, and the little details make a massive difference in getting the best possible booster phone signal. It’s not just about plugging things in; it's about strategy.
Honestly, the performance of the entire system boils down to one thing: the quality of the signal your outside antenna can grab. Before you mount anything permanently, your first job is to become a signal detective.
Pinpointing the Strongest Outside Signal
You can't boost a signal that barely exists. The mission here is to find the single best spot on your RV's roof or around your home where the cellular signal is strongest, even if it's just a flicker of a bar. That's where your external antenna needs to live.
A word of warning: don't trust the signal bars on your phone's screen. They are notoriously inaccurate and more for show than for precise measurement. You'll want to use your phone’s field test mode or a dedicated signal meter app to get the real story. These tools give you the nitty-gritty details in decibels (dBm), which is how the pros measure signal.
Here are a few tools I’ve used that work well:
- OpenSignal: A fantastic app for mapping out nearby cell towers from different carriers.
- Network Cell Info Lite (Android): This one gets technical, but it provides incredibly detailed data, including those all-important dBm readings.
- Your Phone's Field Test Mode: Both iPhones and Androids have a hidden menu showing raw signal data. Just do a quick search for your specific model and "field test mode" to see how to access it.
With your tool of choice ready, start walking around your property or climbing onto the RV roof, keeping an eye on the dBm reading. Remember, signal strength is measured in negative numbers, so a reading of -85 dBm is way better than -110 dBm. The closer that number gets to zero, the stronger the signal.
The Critical Rule of Antenna Separation
Once you've found the sweet spot for your outside antenna, the next make-or-break step is getting the right amount of separation from your inside antenna. This is, without a doubt, the most common mistake people make, and it completely torpedoes performance.
When the two antennas are too close, they create a feedback loop called oscillation.
Think of it like a microphone getting too close to a speaker at a concert—you get that horrible, high-pitched squeal. In a booster system, oscillation forces the amplifier to slash its power or shut down to protect the carrier's network. All that signal gain you were hoping for? Gone.
To stop this from happening, you need to put as much distance and as many physical barriers between the two antennas as you can.
- Vertical Separation: This is your best bet. Mount the outside antenna high up on the roof or a pole, and place the inside antenna down low inside your space.
- Horizontal Separation: If you're limited on vertical height, maximize the horizontal distance instead.
- Use Obstructions: The metal roof of an RV or the walls of a house are natural signal blockers. Use this to your advantage by placing antennas on opposite sides of these barriers.
For a stationary setup, most booster kits recommend at least 20 vertical feet or 50 horizontal feet of separation. In an RV, just get as much separation as you physically can.
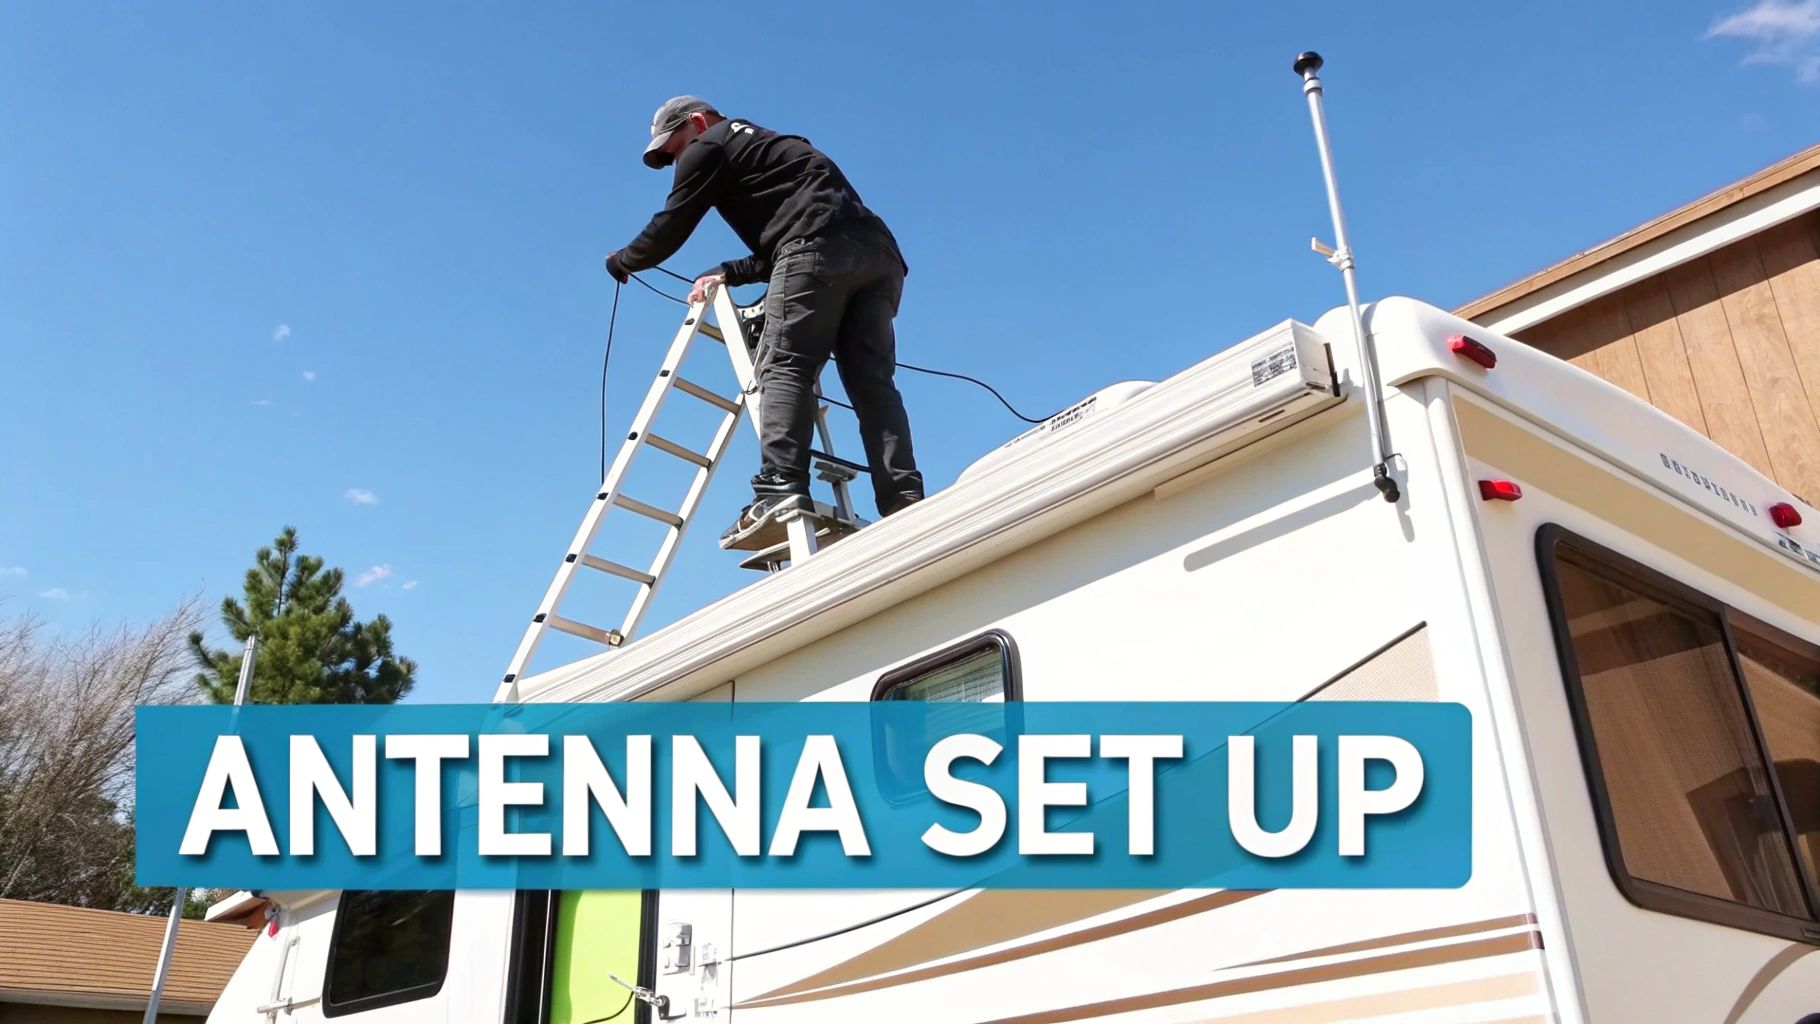
Mounting and Routing for a Clean Setup
With your locations scouted, it's time to get hands-on. For RVers, popular spots to mount the external antenna are on the ladder, directly on the roof, or on a collapsible pole. Whatever you choose, make sure it's a secure, weatherproof mount that can handle highway speeds and foul weather.
Now for the tricky part: routing the coaxial cable from the outside antenna to the amplifier inside. The goal is a clean, protected path that doesn't involve drilling unnecessary holes or creating a potential leak point.
Here are a few pro tips I've picked up for a damage-free install:
- Utilize Existing Entry Points: Check for refrigerator vents, slide-out seals, or any pre-existing cable entry ports you can sneak the cable through.
- Use Drip Loops: Before the cable enters your rig, create a small downward loop. This simple trick ensures rainwater drips off the bottom instead of following the cable right inside.
- Seal Everything: If you absolutely have to drill a new hole, seal it up like Fort Knox. Use a high-quality, weatherproof sealant like Dicor lap sealant to make it completely watertight.
If you're setting up a booster in a rural home, the same principles apply, just on a larger scale. For a deeper dive into these strategies, check out our guide on choosing the best internet antenna for rural areas. A proper installation isn't just about getting it to work today—it's about making sure it works reliably for years.
#rv #rvlife #rvliving #rvlifestyle #rvrenovation #rvremodel
#rvtravel #rvcamping #rvadventures #ruralwifi #5gwifi
#5ginternet
Fine-Tuning Your Boosted Connection
Getting your booster installed is a great first step, but the real magic happens during the fine-tuning process. This is where you go from a "good enough" signal to the fast, stable connection you were hoping for. Think of it as dialing in the perfect settings—small adjustments that can make a massive difference in performance.
This part is less about big, sweeping changes and more about precision. You're listening to the feedback your system gives you and making small, smart tweaks to maximize both signal strength and quality.
Decoding the Amplifier Lights
Those little indicator lights on your amplifier aren't just for show; they're your system's dashboard. Learning to read them is the key to knowing what to adjust. While every brand is a little different, most stick to a similar color code.
- Solid Green: You're golden. This means the booster is running at full power with no issues. The signal is being amplified just as it should be.
- Blinking Green: This is a common one. It usually means the booster has automatically dialed back its own power (gain) to prevent feedback. It's working, but you're leaving performance on the table.
- Solid Red: Time to stop and figure things out. Red typically signals a major oscillation issue, which happens when the inside and outside antennas are too close and "hearing" each other. The booster has likely shut itself down to protect the carrier's network.
- Solid Orange/Yellow: This is pretty rare in rural spots, but it can happen. It usually means the incoming signal from the tower is too strong and overloading the amplifier. This might happen if you park your rig right under a cell tower.
That blinking green light is your cue. It's telling you there's room for improvement and that it's time to start tweaking.
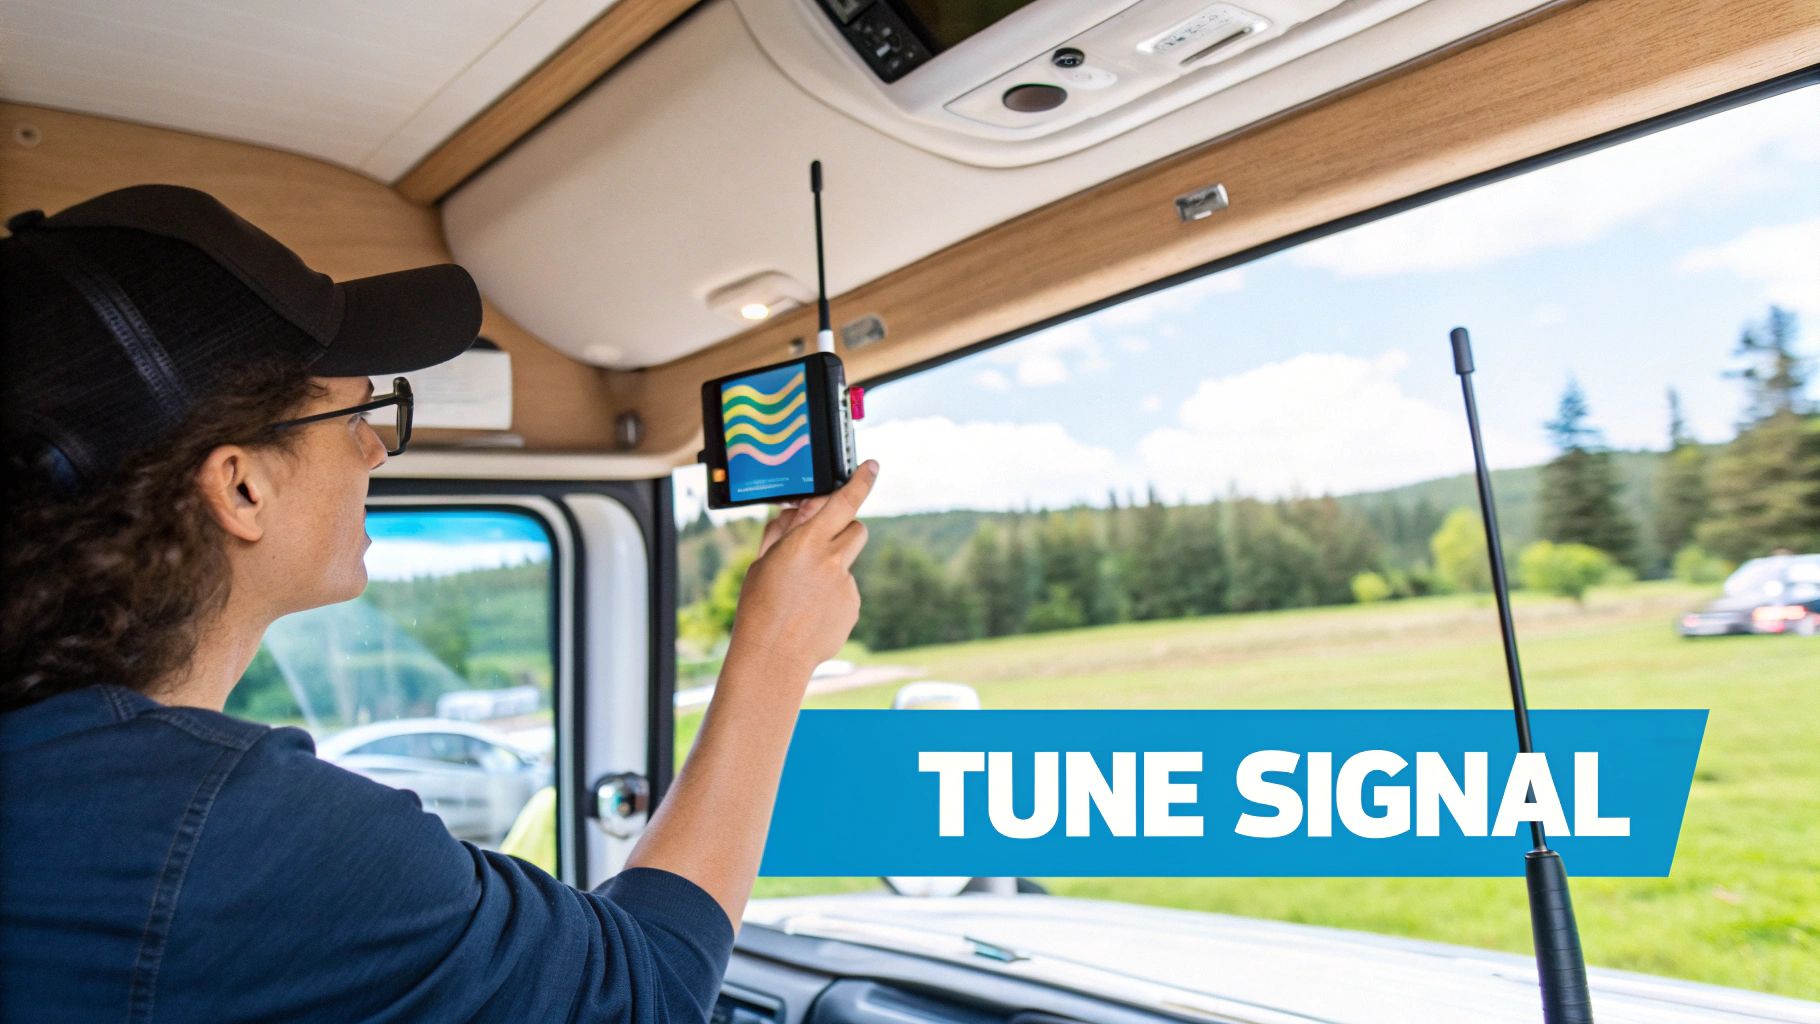
Aiming the External Antenna for Peak Performance
If you've got a directional antenna, its aim is everything. Seriously, a few degrees can be the difference between buffering video and seamless streaming. Your initial setup probably got you pointed in the right general direction, but fine-tuning is what truly locks it in.
This is a bit of a dance, and your signal meter app is your partner.
Start with the antenna pointed where you got the best signal during the initial setup. Nudge it just a tiny bit—a couple of degrees left or right.
Then, wait. Give it a good 30-60 seconds for the booster and your phone to catch up and show the new reading. Check your app to see if your dBm reading improved.
Keep repeating this slow sweep across the horizon, looking for that sweet spot where the dBm reading is closest to zero. When you find it, lock that antenna down tight.
Remember, the goal isn't just raw strength. A stable -90 dBm signal is almost always better for data speeds than a jumpy signal that fluctuates around -85 dBm. Quality over quantity.
Strategic Placement of the Internal Antenna
The last piece of the puzzle is inside your RV or home. Where you put the internal antenna carves out the shape and strength of your new bubble of connectivity. You want to aim that freshly boosted signal right where you'll be using your devices.
A few things to keep in mind:
- Dodge the Blockers: Put the antenna in a central spot, away from things that kill signal like metal cabinets, refrigerators, or thick walls.
- Get Some Distance: Create as much separation as possible between the inside and outside antennas. If the external one is on the back of your RV roof, try placing the internal one up in the front cab area.
- Focus Your Fire: In a house, you might need to pick a priority zone. If your home office is critical, place the antenna there to give it the strongest, most reliable signal.
This need for reliable connection is exactly why the global signal booster market, valued at $12.75 billion in 2024, is exploding. Our demand for high-speed data for work and play is pushing the technology forward. If you're curious about where the industry is heading, you can read the full market analysis from Business Research Insights. Nailing these fine-tuning steps ensures you get every bit of performance out of this powerful tech.
#rv #rvlife #rvliving #rvlifestyle #rvrenovation #rvremodel
#rvtravel #rvcamping #rvadventures #ruralwifi #5gwifi
#5ginternet
Solving Common Signal Booster Problems
Even the best-installed piece of tech has an off day. When your booster phone signal system starts acting up, the good news is you can usually diagnose and fix the problem yourself in minutes—no need to wait on a support line.
We've all been there: frustrating blinking lights, sudden drops in speed, or dropped calls. These issues almost always come back to a handful of core causes. Let’s walk through the most common culprits so you can get back online, fast.
The Blinking Red Light of Doom
A solid or blinking red light on your amplifier is the most common—and alarming—issue you'll see. It's your booster's way of screaming for help, and it almost always points to one problem: oscillation.
Oscillation is just a fancy term for a feedback loop. It happens when your outside and inside antennas are too close to each other. The system essentially "hears" its own amplified signal, causing it to overload and shut down to protect the wider cell network.
Your mission, should you choose to accept it, is to increase the separation between your two antennas.
- Go Vertical First: Add as much height between the antennas as you can. If your outside antenna is on the roof of your rig, try moving the inside antenna to a lower spot inside.
- Go Horizontal Second: If you can't add more height, go wider. Maximize the horizontal space separating the two antennas.
- Use Your Rig as a Shield: The metal roof and walls of your RV or home are actually great at blocking signals. Use this to your advantage by placing the antennas on opposite ends of these barriers.
After you make an adjustment, give the booster a quick power cycle. Unplug it for about 30 seconds, then plug it back in and see if the light turns green.
A blinking green or orange light is a less severe version of the same issue. It means the booster has automatically dialed down its own power to prevent oscillation. It's working, but you're not getting the full amplification you paid for. Increasing antenna separation will solve this too, allowing the booster to crank back up to its maximum gain.
Data Speeds Are Slow or Unstable
Sometimes your phone shows more bars, but your internet speeds still feel like you're stuck in the mud. This usually means the booster is amplifying a signal that was poor quality to begin with. Remember, a booster can only improve what it receives; it can’t create a high-quality signal out of a weak, noisy one.
The main fix here is to fine-tune the aim of your outdoor antenna. A tiny adjustment of just a few degrees can be the difference between locking onto a clean signal or a fuzzy one. Use a signal meter app to find the direction with the best dBm reading—it's a far more accurate measure than the bars on your screen.
Also, do a quick check for interference. Other electronic devices or even large metal objects near your indoor antenna can sometimes disrupt the broadcasted signal and cause instability.
Connections Drop During Calls
Nothing is more infuriating than dropping a call when you thought your booster had you covered. If this is happening, it’s often a sign that the incoming signal is fluctuating. The connection is just strong enough to start the call but too unstable to maintain it.
This problem circles back to the quality of the signal your outside antenna is capturing. Re-aiming your antenna is always the first step. You should also make sure all your cable connections are screwed on tight. A loose F-connector can introduce just enough signal loss and instability to drop a call.
For a deeper dive into getting your system set up for success right from the start, you can learn more about how to improve cell reception in our detailed guide.
#rv #rvlife #rvliving #rvlifestyle #rvrenovation #rvremodel
#rvtravel #rvcamping #rvadventures #ruralwifi #5gwifi
#5ginternet
Common Questions About Boosting Your Cell Signal
After you get the hang of how this tech works, a few questions always seem to surface. It's totally understandable—when you're investing in a solution to boost your phone signal for your RV or rural home, you want straight answers. Let's dig into the most common questions we hear so you can make a smart choice and get the best possible connection.
Will a Booster Work with Absolutely No Signal?
This is a big one, and the short answer is no. A signal booster is a powerful amplifier, but it’s not a signal creator. To work its magic, it has to have some existing, usable signal to latch onto, even if it’s incredibly weak. It just can't generate a signal from nothing.
Think of it like this: a PA system can turn a whisper into a roar, but if there's dead silence, there’s nothing to amplify. You need at least one flickering bar of service somewhere outside for the booster to have something to work with.
Do I Need a Specific Booster for 5G?
Great question. For most people, the answer is no, but there's a small detail to know. The majority of modern signal boosters are "5G-ready," which means they're built to amplify the low-band and mid-band 5G signals. These are the exact frequencies that carriers are using to expand coverage in rural and suburban America—precisely where you need a booster most.
What they typically don't support is the super-fast, high-band (mmWave) 5G you might find in a packed football stadium or a dense downtown city block. For life in an RV or a rural home, a standard 5G-compatible booster is exactly what you need to tap into the growing 5G network.
Key Takeaway: For the vast majority of RVers and rural residents, any booster labeled "5G Compatible" is going to be perfect. It will enhance the 5G signals you're most likely to find on the road and at home, plus all the 4G LTE signals you already use.
Can One Booster Help Multiple Phones and Carriers?
Absolutely, and this is one of their best features. Nearly all consumer signal boosters are carrier-agnostic. That means a single kit can improve the signal for every major North American carrier—think Verizon, AT&T, and T-Mobile—all at the same time.
Anyone inside the booster's coverage bubble will get a better signal, no matter what phone they have or who their provider is. This makes it perfect for families, couples, or anyone with guests, ensuring everybody gets a better connection from one device. No need to buy separate gear for different carriers.
Does a Signal Booster Need an Internet Connection?
Not at all. A cell phone signal booster is a completely self-contained system. It works directly with the cellular signals coming from the tower and doesn't need Wi-Fi, satellite internet, or any other data connection to do its job.
It's a simple, stand-alone setup that relies on three core parts:
- An outdoor antenna to catch the faint cell signal.
- An amplifier to make that signal stronger.
- An indoor antenna to broadcast the strengthened signal to your devices.
All it requires is a regular power source to run the amplifier. That’s it. It’s a straightforward and independent fix for bad cell reception.
Ready to finally solve your connection problems on the road or in your rural home? SwiftNet Wifi provides high-speed 5G internet solutions designed specifically for people who live, work, and travel beyond the reach of traditional broadband.


