

Getting your new SwiftNet Wifi modem up and running is pretty straightforward, but the initial hookup is where a lot of people trip up. Think of it like this: a solid physical setup is the foundation for a stable internet connection, especially when you're in an RV or a rural home where signals can be tricky.
The most important thing to remember is the order of operations. Just plugging things in randomly is a surefire way to run into frustrating setup problems right from the start.
Your First Steps to a Stable Connection
Let's walk through the right way to get your modem out of the box and powered on, ready for activation. We're going to focus on getting the physical connections right first, which prevents the most common headaches later on. It’s a simple process, but doing it correctly makes all the difference.

The Essential Hookup Sequence
The goal here is simple: establish a solid physical link between the wall, your modem, and your computer before the modem even tries to search for a signal from SwiftNet. It's a small detail that has a huge impact.
Here's the basic flow I follow every time:
- Unpack and Inspect: First, lay everything out. Make sure you have the modem, the power cord, and any coaxial or Ethernet cables that came in the box.
- Find the Perfect Spot: Where you put your modem matters. You'll want to find a spot that’s central, out in the open, and not shoved behind a TV or inside a cabinet where the signal can get blocked.
- Connect the Data Cable: This is the coaxial cable. You'll screw one end into the wall outlet and the other into the back of your modem. Make sure it's finger-tight.
- Power It On: This is the final step. Only after all the other cables are securely connected should you plug the modem's power adapter into a wall outlet.
The single most common mistake I see is plugging in the power cord first. Always, always connect the coaxial and any Ethernet cables before you connect the power. This gives the modem a chance to properly detect the physical network as it boots up.
To make this even easier, here’s a quick checklist of the parts you'll be handling and where they go.
Essential Modem Hookup Checklist
| Component | What It Does | Where It Connects |
|---|---|---|
| Coaxial Cable | Brings the internet signal into your home or RV. | Connects from the wall outlet to the "Coax/Cable In" port on the modem. |
| Ethernet Cable | Connects the modem to your computer or a Wi-Fi router. | Plugs into the "Ethernet" port on the modem and the corresponding port on your device. |
| Power Adapter | Supplies electricity to the modem. | Connects from the "Power" port on the modem to a standard electrical outlet. |
With these cables connected in the right order, your device will be physically ready to communicate with the network. From here, we'll get into the specifics of each phase to make sure your modem setup is a success.
Unboxing and Positioning Your SwiftNet Modem
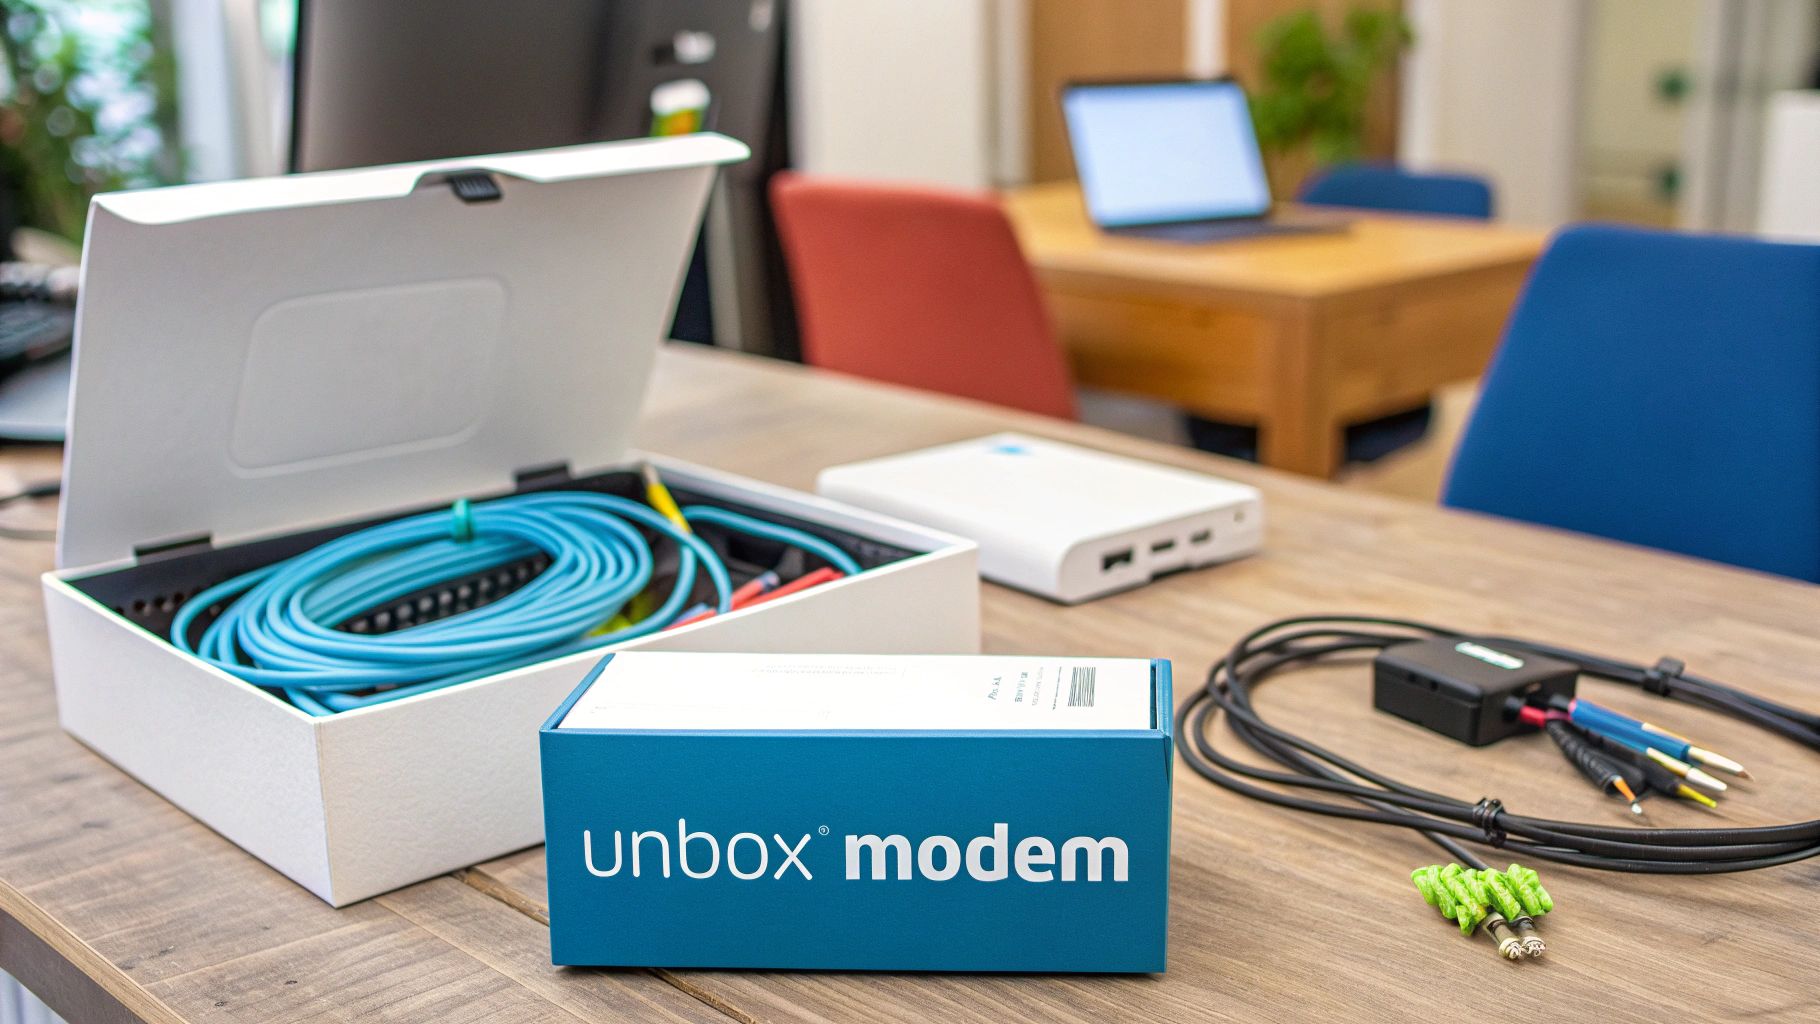
Alright, the SwiftNet kit has arrived. This is where the rubber meets the road. Go ahead and open the box, laying everything out so you can see what you're working with. You should have the modem, a power adapter, and a couple of essential cables—one coaxial and one Ethernet.
Now, before you get excited and start plugging things in, let's talk about the single most important decision you'll make: where this modem is going to live. This isn’t about aesthetics or hiding a box. Your modem's placement can make or break your internet experience, with obstructions potentially cutting your signal strength by up to 30%.
Find the Best Location
You want to find a spot that’s central, elevated, and as out in the open as possible. I always tell people to think of the Wi-Fi signal like a lightbulb. The more walls, doors, and furniture you put between your eyes and the bulb, the dimmer it looks. Your internet signal works the exact same way.
Try to steer clear of these all-too-common placement blunders:
- Tucked Away in Cabinets or Closets: This is a classic mistake. Walls and doors are the natural enemies of a strong Wi-Fi signal.
- Next to Big Metal Objects: Appliances like your fridge or even a metal filing cabinet can act like a sponge, absorbing and disrupting your signal.
- Crowded by Other Electronics: Keep it away from the microwave and cordless phones. They operate on similar frequencies and are notorious for causing wireless interference.
This is doubly important for my fellow RVers. In a tight space, you need a stable, central spot where the modem won't get bounced around but can still broadcast clearly to your devices. A little trick I use is a small patch of heavy-duty Velcro on the modem's base and the countertop. It keeps everything locked down, even on bumpy roads.
Taking a few minutes to get the placement right from the get-go will save you from a world of future headaches like sluggish speeds and dropped video calls. A little bit of forethought here really does pay off.
Connecting Your Modem Cables in the Right Order
Plugging in a few cables seems straightforward enough, but the actual sequence you follow is what makes the difference between a quick setup and a frustrating one. I’ve seen it many times: people get the order wrong and end up staring at a modem with stubbornly blinking lights, wondering what went wrong.
The secret is to establish a solid physical data link before giving the modem power. Think of it like making sure the pipes are connected before you turn on the water. This allows the modem to boot up, see the network line immediately, and start its "handshake" with the provider's network correctly from the get-go.
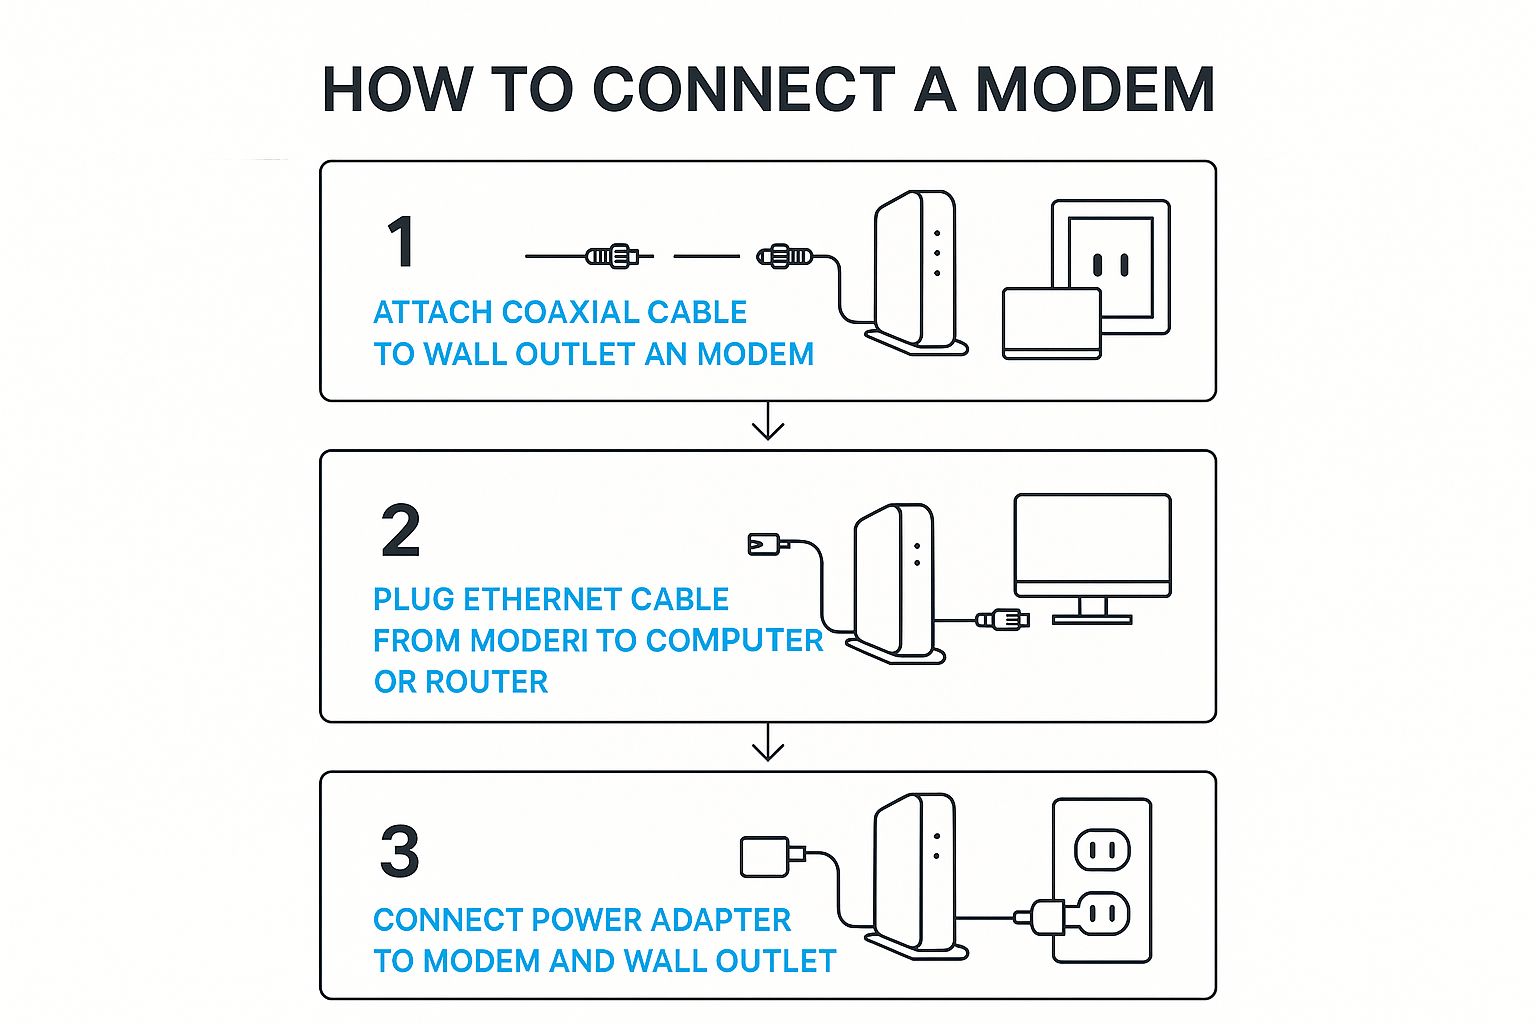
The Correct Cabling Sequence
So, let's walk through the right way to do this. We'll start with the most important piece—the data connection coming from outside.
-
First, the Coaxial Cable: Grab that thick cable with the screw-on connector. This is your lifeline to the internet. Find the port on your SwiftNet modem labeled "Cable In" or "Coax" and securely attach one end. You just need to hand-tighten it until it feels snug; there's no need to break out a wrench. The other end connects to the active wall outlet or the port on your satellite dish.
-
Next, the Ethernet Cable: If you plan on wiring directly to a computer or using a separate Wi-Fi router, now's the time to plug in the Ethernet cable. One end goes into the "Ethernet" port on the modem, and the other plugs into your computer's Ethernet port or your router's "WAN/Internet" port.
-
Finally, the Power Adapter: This is the last and final step. Only after the data and Ethernet cables are firmly in place should you connect the power adapter. Plug it into your modem first, then into a power outlet on the wall or a surge protector.
This visual guide shows just how simple this three-step flow is.
Following this "data-first, power-last" method gives your modem the absolute best shot at connecting properly on the first try, saving you a ton of potential hassle.
If you remember one thing, make it this: Power is always last. Hooking up the coaxial cable first ensures the modem can find the SwiftNet signal the moment it boots up, which sidesteps a lot of common activation headaches. For a full walkthrough of the entire setup, check out our complete guide on how to connect a modem.
Activating Your SwiftNet Internet Service
With your modem all cabled up and powered on, it's time for the final piece of the puzzle: getting your connection live. This is the moment your modem introduces itself to the SwiftNet network and performs its initial "handshake." The best way to follow along is by keeping an eye on the status lights on the front of your device.
First, you'll see the Power light go solid. A moment later, the Downstream/Upstream lights (usually shown with little arrows) will start to blink. Don't worry, this is completely normal—it just means the modem is hunting for a signal. Once it locks on, these lights will turn solid, typically a steady green or blue.
The real star of the show is the Online or Globe icon. When this light turns solid, you have a confirmed, active internet connection to the modem. If it’s still blinking after 10-15 minutes, it's probably a good idea to go back and double-check that the coaxial cable is screwed in tight at both ends.
Launching the Self-Activation Portal
Once that Online light is shining steadily, you're ready for the home stretch.
Grab a connected device like your laptop or phone and open a web browser. In most cases, you'll be automatically redirected to the SwiftNet self-activation portal. If that doesn't happen, just try to browse to any website (like google.com), and the portal should pop right up.
This secure page is where you'll officially bring your service to life. It’s a straightforward, guided process that links your specific modem to your SwiftNet account.
To make it a breeze, have this info ready beforehand:
- Your SwiftNet Account Number: You can usually find this in the welcome email we sent you.
- The Phone Number on Your Account: This is the main contact number you gave us when you signed up.
The portal will simply ask you to enter this information and agree to the terms of service. The whole thing rarely takes more than five minutes. It’s a far cry from the old days of waiting on the phone for a technician! This self-service approach is a big reason why getting online is so much faster now.
After you finish the on-screen steps, your modem will probably do one last quick restart. Once the lights return to a solid green or blue, you’re all set. You are officially online and ready to surf, stream, and connect
Troubleshooting Common Modem Setup Problems
So, you've followed all the instructions, but you're still stuck with a modem whose lights just keep blinking, refusing to go solid. It's a frustrating spot to be in, but don't panic. This is a pretty normal part of getting set up, and most of these little hiccups are easy to fix without having to call for backup.
Before you go any further, just do a quick visual check. Make sure every cable is pushed in firmly. It sounds simple, but a coaxial cable that’s even a tiny bit loose can be the one thing stopping your modem from locking onto the network signal.
The First-Aid Checklist for Connectivity
If all your connections are solid but you’re still offline, it's time for a quick troubleshooting rundown. These are the tried-and-true fixes I always turn to for the most common setup headaches, from those endlessly blinking lights to a flat-out refusal to connect.
- Confirm Your Coaxial Outlet is Active: This is a big one, especially if you're in an RV park or a home with a bunch of different wall jacks. Not all of them might be "live." If you have another outlet, try plugging your modem into it to see if that solves the problem.
- Do the Classic Power Cycle: There's a reason it's the oldest trick in the book—it works. Unplug the modem's power cord from the wall outlet, wait a full 60 seconds (don't rush it!), and then plug it back in. This gives the modem a chance to clear its memory and try to establish a completely fresh connection.
One more thing to consider before you get too deep into troubleshooting: make sure the issue isn't just slow speeds. If you're connected but everything feels sluggish, it might just mean your plan can't keep up with what you're doing. It's worth learning about the ideal internet speed for working from home to see if that’s the real culprit.
Getting a stable setup is more important than ever. With the global cable modem market expected to hit $9.81 billion in 2025, it’s clear that more and more households are depending on these little boxes for everything from work to entertainment. You can read more about the growing cable modem market on GlobeNewswire.
Frequently Asked Questions About Modem Setup
Even with the clearest instructions, there are always those little "what if" questions that come up. You're not the first person to wonder about the blinking lights or whether you've got all the right gear. Let's walk through some of the most common questions we get from folks setting up their modems for the first time.
Do I Need a Separate Router with My SwiftNet Device?
That really boils down to which SwiftNet device you have. If you've got one of our modem/router combo units, you're good to go—no extra hardware needed. These all-in-one boxes are designed to do both jobs: pull in the internet signal from the outside world (that's the modem part) and then create your local Wi-Fi network for all your laptops, phones, and tablets (that's the router part).
On the other hand, if your device is a standalone modem, then yes, you'll need to connect a separate Wi-Fi router to it. The modem's only job is to get the internet to your RV or home; the router is what actually broadcasts that connection wirelessly.
What Do the Different Lights on My Modem Mean?
Think of those little lights as your modem's way of talking to you. While the exact symbols can vary a bit from model to model, they all follow the same basic language:
- Power: A solid light just means it's plugged in and has power. Easy enough.
- Downstream/Upstream (The Arrows): These will blink while the modem is hunting for a signal. Once they lock on and turn solid (usually blue or green), you know it's successfully talking to our network.
- Online (The Globe Icon): This is the one you're waiting for. A solid light here means you have a full, stable internet connection. You're online!
If those lights keep blinking for more than 15 minutes, it's usually a sign that something's not quite right. The first thing to do is double-check all your cable connections to make sure they're snug.
If you're connected but everything feels painfully slow, the setup itself might not be the issue. It could be a speed problem. Our guide on troubleshooting slow internet is the perfect next step to figure out what's really going on.
How Long Should I Wait for the Modem to Connect?
This is where a little patience goes a long way. When you first plug in a modem, it has a whole startup routine to go through. It needs to boot up its internal software, scan for the best channels, and then negotiate a solid connection with the network.
This whole process can take anywhere from 2 to 10 minutes. My advice? Go grab a cup of coffee and let it do its thing before you start worrying that something is broken.
Ready for reliable internet that travels with you? SwiftNet Wifi provides high-speed 5G service designed for RV life and rural homes, ensuring you stay connected wherever you roam. Get started with SwiftNet Wifi today!


