

Getting your new modem hooked up is pretty straightforward. You’re essentially just connecting a few cables in the right order to bridge the gap between your wall outlet and your computer or Wi-Fi router. The whole point is to get that 'Online' light to stop blinking and go solid, which tells you you're officially connected to the internet.
Your Quick Guide to Getting Connected
Setting up a modem can feel a bit technical, but trust me, it’s more like snapping a few Lego bricks together than defusing a bomb. It all comes down to plugging a few key cables into the right spots. This is the big-picture view before we get into the nitty-gritty. Your main objective is to create a solid, physical link between your home and your internet provider, SwiftNet Wifi.
First things first, let's get your gear together. You should have the modem itself, its power adapter, a coaxial cable (that's the one with the pin in the middle and a screw-on connector), and an Ethernet cable. Each piece has a specific job, and getting them all laid out and ready to go is half the battle.
Understanding Your Setup Components
The hardware you're dealing with is simple. The coax cable brings the internet signal in from the wall, the modem acts as a translator for that signal, the power cord gives it juice, and the Ethernet cable is what carries that translated signal over to your devices. Easy enough.
Pro Tip: When you're screwing in the coaxial cable, just hand-tighten it until it feels snug. Resist the urge to grab a wrench! Over-tightening can actually damage the delicate port on your modem or the wall plate, which can cause all sorts of annoying signal problems down the road.
Before you start plugging things in, it helps to know exactly what each component does and where it goes. I’ve put together a quick table to make it crystal clear.
Essential Modem Setup Components
Here's a simple breakdown of the hardware you'll need and the role each part plays in getting your SwiftNet Wifi online.
| Component | What It Does | Where It Connects |
|---|---|---|
| Modem | Translates the ISP signal into a usable internet connection for your home network. | Between the wall outlet and your computer or router. |
| Coaxial Cable | Carries the internet data signal from your ISP's network into your home. | Screws into the wall outlet and the corresponding port on the modem. |
| Power Adapter | Supplies the necessary electricity to power the modem and its internal components. | Plugs into a standard electrical outlet and the modem's power port. |
| Ethernet Cable | Delivers the internet connection from the modem to a single device or a router. | Plugs into the modem's Ethernet port and your computer or router's WAN/Internet port. |
Once you have these items laid out, you’re all set to start making the physical connections. Getting this foundation right ensures that when you power everything up, your modem can start its digital handshake with your provider’s network and bring your SwiftNet Wifi service to life.
Preparing for a Flawless Modem Setup

Before you even touch a single cable, let's talk prep. A little forethought here goes a long way in making sure your SwiftNet Wifi connection is strong and stable right out of the gate. Think of it as laying the groundwork for a frustration-free setup.
Your first job is to play location scout for the modem. This one decision has a surprisingly huge effect on your internet performance. You’re looking for a spot that’s central, elevated, and out in the open. Try to resist the urge to tuck it away in a cabinet or behind the TV. And definitely keep it away from other electronics that can cause signal chaos, like microwaves or even some cordless phones.
I’ve seen it a hundred times: people stick their modem on the floor in a far corner of the room. It’s a classic mistake. Signals get obstructed and heat gets trapped. Just putting it up on a shelf or desk gives it the breathing room it needs to perform its best.
Your Pre-Flight Checklist
Found the perfect spot? Great. Now it’s time for a quick inventory check. Pop open your SwiftNet Wifi kit and make sure all the pieces are there. Nothing stops a setup dead in its tracks faster than a missing cable.
Here's what you should have:
- The Modem: This is the brains of the operation, translating the signal from the wall into internet for your devices.
- Power Adapter: The cord that gives the modem its juice.
- Coaxial Cable: That’s the thicker cable with the screw-on connectors. It’s your modem’s link to the outside world via the wall outlet.
- Ethernet Cable: Usually bright yellow or blue, this connects the modem to a computer or your Wi-Fi router.
Give each component a quick once-over. A bent pin on a cable or a frayed power cord can cause headaches you don't need. Catching these little things now will save you a support call later. With your gear inspected and your location picked out, you're ready to get things connected.
Getting Your Hardware Hooked Up
Alright, with your modem's new home prepped, it’s time for the fun part: plugging everything in and bringing your SwiftNet Wifi connection to life. This is where the magic happens, but don't worry, it's just a few simple cables. We'll walk through it step-by-step.
First up, find your coaxial cable – it’s the thick round one with a little pin in the middle of a screw-on connector. Connect one end to the cable outlet on your wall. Just screw it on until it's finger-tight. Seriously, no need for a wrench here; over-tightening can actually damage the port. Now, connect the other end to the matching port on the back of your modem.
With the data line connected, it's time to give it some juice. Grab the power adapter, plug the small end into your modem, and the other end into a nearby electrical outlet. The instant it gets power, you'll see the lights on the front flicker to life. This is totally normal. The modem is starting its boot-up sequence and trying to talk to the SwiftNet Wifi network for the first time.
This image shows just how straightforward the physical setup really is.
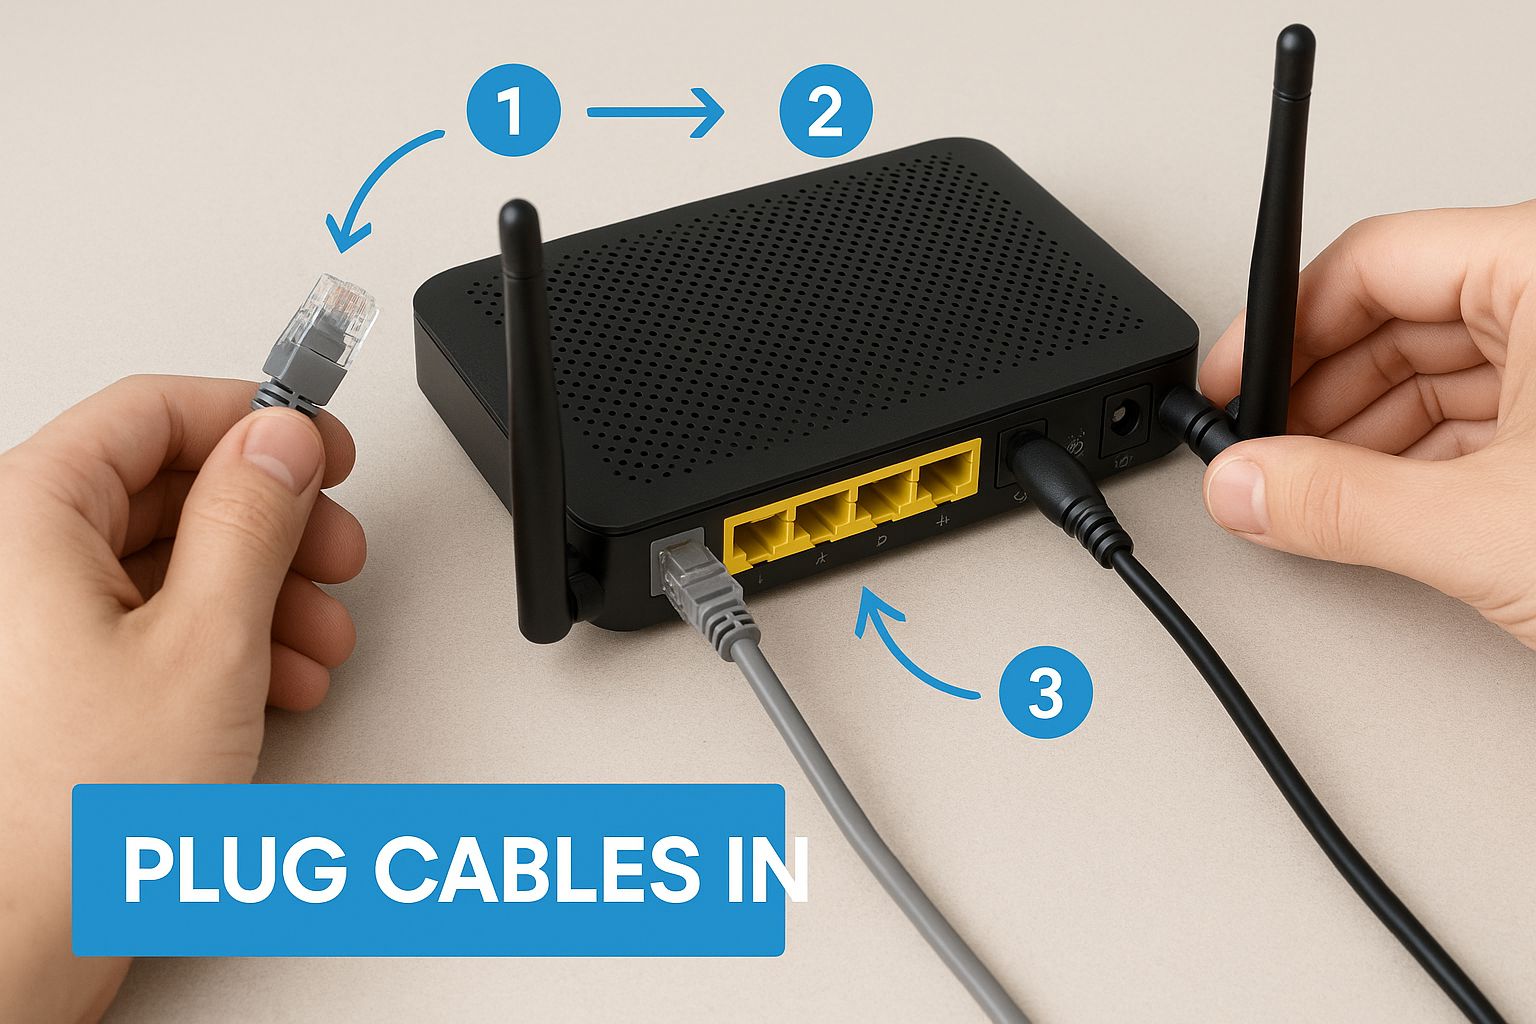
As you can see, it's really just a matter of connecting a couple of cords correctly.
The Waiting Game: Watching the Lights
Now comes the part that requires a little patience. The modem needs some time to fully boot up, run its internal checks, and lock onto the network signal. This can take anywhere from two to ten minutes, so maybe grab a coffee.
You're looking for a specific sequence of lights. The Power light will usually turn solid first. After that, you’ll see the Downstream and Upstream lights (often marked with arrows) start blinking as they hunt for a signal. They’ll eventually turn solid, too. The real prize is a solid "Online" light, which sometimes looks like a little globe. That's your "we are connected" signal.
Once that 'Online' light is holding steady and not blinking, you're on the home stretch.
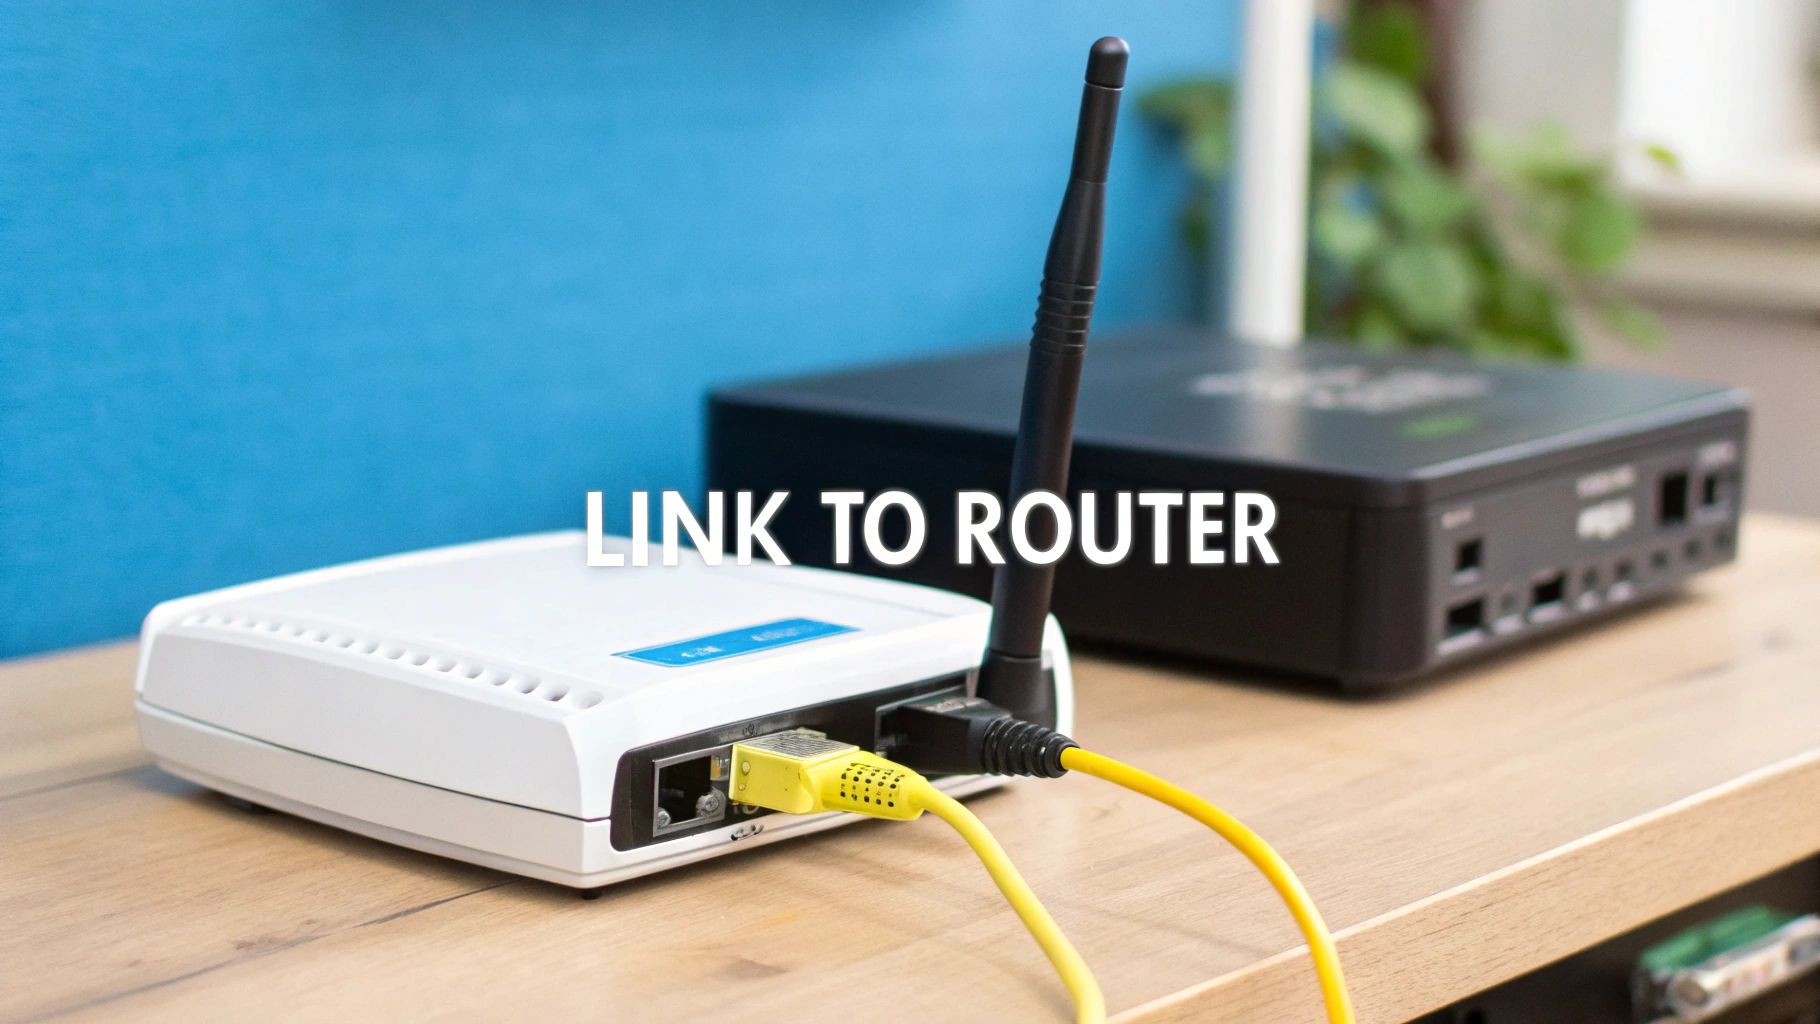
The last physical step is connecting your own gear. Grab an Ethernet cable and plug it into the modem's Ethernet port. The other end will go into your computer's Ethernet port or—more commonly—into the port labeled "WAN" or "Internet" on your personal Wi-Fi router.
That's it! With the cables connected and the lights giving you the green light, your hardware is officially set up. Now you're ready for the final step: activating your service.
Activating Your Internet Service
Alright, the hardware is hooked up and the modem lights are holding steady. You’re on the home stretch now, at the final checkpoint before you can start surfing: activating your service.This is the official digital handshake between your new modem and the SwiftNet Wifi network. It’s the last step that unlocks your internet access.
For most people, this part is surprisingly painless. Just open a web browser on any computer that’s connected to the modem. In a perfect world, you'll be automatically whisked away to the SwiftNet Wifi self-activation portal. It’s a straightforward process designed to get you online in minutes without ever having to pick up the phone. The portal will just ask for some basic info to identify your account.
Key Takeaway: Your modem's MAC address is its unique fingerprint. You'll want to have this number handy—it's printed on a sticker right on the modem. The network needs this to confirm that your specific device is authorized to be on your account.
When Self-Activation Doesn't Work
Of course, technology doesn't always play nice. Sometimes that automatic portal just refuses to show up, leaving you staring at a "no internet" error page. Don't worry, this is a common hiccup.
Your next move is a quick call to customer support. To make this call as smooth and brief as possible, I always recommend gathering this information before you dial:
- Your Account Number: This is the fastest way for the support agent to pull up your details.
- The Modem's MAC Address: As I mentioned, this is the non-negotiable piece of info they'll need to provision your device.
- The Modem Model: Something simple like, "I'm trying to connect a Netgear CM2000."
Having this ready turns a potentially long, frustrating call into a short, productive one. This same principle applies whether you're at home or trying to get online from the road. If you're curious about how this whole dance works in a mobile setup, you can learn more about real-world connection solutions for internet in an RV.
Understanding Your Modem Technology
Before you can get online, you need to know what kind of internet you're working with. Not all connections are the same, and the way you hook up your modem can change completely depending on the tech that brings the internet to your doorstep. Figuring this out first will save you a ton of headaches later.
For most people, the internet arrives via a cable or DSL modem. A cable modem hooks up to a coaxial cable—yep, the same kind you use for cable TV. DSL, on the other hand, uses a regular telephone line. They look a little different, but they do the same job: they take the signal from your provider and turn it into an internet connection your devices can actually use.
We’ve come a long way from the screeching symphony of dial-up, which topped out at a glacial 56 Kbps. Today, the network modem market is a different beast entirely, expected to be worth $15 billion by 2025 and growing at a 7% clip each year through 2033. If you're a data nerd, you can dig into the network modem market trends yourself.
Exploring Other Connection Types
While cable and DSL are the old guard, a few other technologies are popping up everywhere, and each has its own quirks for setup.
-
Fiber Optic: This is the new gold standard for speed. Instead of a modem, fiber uses something called an Optical Network Terminal (ONT). This little box takes light signals from the fiber optic cable and converts them into an electrical signal for your Ethernet connection. The result is blazing-fast internet.
-
Satellite: If you live out in the sticks, this might be your go-to. A satellite dish on your property talks to a satellite in orbit. The setup is a bit more involved—you have to get the dish aligned just right and then connect it to a special satellite modem inside.
-
Cellular (5G Home Internet): This has been a game-changer for travelers and folks in rural areas. It’s basically a modem that uses a SIM card to tap into a 5G cellular network, just like your phone. Setup is often as simple as popping in the SIM card and plugging it in.
Knowing the ins and outs of these technologies is crucial, especially if you’re always on the move. For digital nomads, getting a cellular modem up and running is an essential skill. We actually cover this in-depth in our guide on finding reliable internet for RV living if you want to see how it works in the real world.
When you know what kind of tech you have, you're not just blindly following steps—you're empowered to get things working and fix them when they break.
Common Questions About Connecting a Modem
Even when the setup process seems straightforward, you're bound to run into a question or two. It just happens. Let’s walk through some of the most common hangups people have when connecting a modem, so you can get your SwiftNet Wifi up and running without a hitch.
One of the biggest head-scratchers is always the modem lights. What do they all mean? Think of them as your modem’s way of communicating with you.
A solid Power light is your first sign of life. Good start. Next, you'll likely see blinking Downstream/Upstream lights, often marked with arrows. This just means the modem is working hard to find and lock onto a signal from us.
The real prize is a solid "Online" light, which usually looks like a little globe. Once that light stops blinking and stays solid, you’re officially connected to the internet. If it just keeps blinking, there's likely a snag somewhere.
What to Do When the Online Light Blinks
A stubbornly blinking "Online" light is a classic setup headache, but don't reach for the phone just yet. Most of the time, it's something simple.
First, go back and check your work. Make sure every single cable is plugged in all the way and, more importantly, that the coaxial cable is screwed in securely. You'd be surprised how often a slightly loose coax connection is the culprit.
If the cables are solid, it's time for the oldest trick in the IT book: a power cycle. Unplug your modem’s power cord from the wall. Now, go grab a drink or check your phone—wait a full 60 seconds. This gives the modem’s internal components a chance to fully reset. Plug it back in and give it a few minutes. This simple reboot fixes a surprising amount of connection problems.
Still blinking after all that? It could point to a service outage in your area or a trickier issue that our SwiftNet Wifi support team can help you solve.
A question we get all the time is whether it's better to buy your own modem or just rent one. Renting is definitely the easy button—it comes with support and you know it's compatible. But those monthly fees add up. Buying your own modem can save you cash in the long run and sometimes even boost performance. Just be sure to check that it’s compatible with our network first!
These troubleshooting tips are universal, whether you're setting up at home or hitting the road. For our more mobile customers, we put together a detailed guide on how to get wifi in a motorhome that dives into the unique challenges of staying connected on the move.
Ready for reliable, high-speed internet no matter where you roam? SwiftNet Wifi delivers powerful 5G connectivity to rural homes and RVs. Get connected today!


