

You've parked, leveled the RV and opened your laptop for a call. Your phone shows a strong signal, the campground advertises Wi-Fi, and yet your upload stalls while the TV buffers. Buying another router might help, but it won't fix an overloaded tower or a campground login that keeps expiring.
A dependable RV WiFi setup starts with separating the internet connection reaching your RV from the wireless network inside it. Choose sources that suit your work, measure performance where you sit, and change settings only when a test identifies the problem.
Choose the Right Internet Source for Your RV
The expensive mistake is buying a device and expecting it to work at every stop. A capable cellular router still needs usable carrier service, and satellite equipment still needs suitable sky access. Choose the connection around your travel pattern, not the fastest speed printed on the box.
Before shopping, divide your needs into these groups:
- Casual browsing: Email, route planning, and checking campground reservations can usually tolerate interruptions. Start with included campground Wi-Fi or an existing phone hotspot.
- Streaming: Use a dedicated hotspot, cellular router, or satellite connection that sustains downloads without exhausting your data allowance.
- Business-critical work: Video calls, VPNs, cloud uploads, and point-of-sale systems need a tested primary connection and an independent backup. Don't assign these tasks to free campground Wi-Fi just because it connects.
RV Internet Sources Compared
| Option | Best for | Main strength | Main limit | Setup effort |
|---|---|---|---|---|
| Campground Wi-Fi | Light browsing and backup | Free or included with the site | Shared, congested and often behind a login portal | Low |
| Phone hotspot | Short stays and occasional use | Already owned | Limited hotspot data, heat buildup and a modest device capacity | Low |
| Dedicated 4G or 5G hotspot | Daily travel and light remote work | Pocket-sized and battery powered | Requires usable carrier coverage at the site | Low |
| 4G or 5G router with external antenna | Remote work, video calls and streaming | Better signal access and support for many connected devices | Needs antenna placement and compatible power, often a 12V source | Medium |
| Satellite | Boondocking where cellular fails | Works far from cellular towers | Needs a clear view of the sky and generally costs more | Medium to high |
A phone hotspot is a sensible starting point for occasional use. During extended video calls, though, tethering can heat the phone and drain its battery quickly. Keep it ventilated rather than charging it under a cushion or leaving it in direct sunlight.
Coverage Maps Aren't Campsite Tests
The FCC's broadband mapping guidance explains that mobile coverage maps represent service outdoors or in a moving vehicle, not indoor service. A covered campsite can therefore have poor reception inside a metal-bodied RV.
Compare service outside and inside, then test uploads as well as downloads. An external antenna can improve access to an existing signal, but it can't create tower coverage.
For remote stops, understand how satellite internet works before choosing it as your fallback. If you're considering a compact terminal powered from the vehicle, Revolink Satellite Gear's guide to Starlink Mini USB-C power requirements is useful for matching the power supply and cable rather than assuming any USB-C socket will work.
Choose a primary source for work and a backup using a different carrier or network type. Test both on arrival before trusting either with a deadline.
How to Place Your Router and Antenna
Router placement involves separate radio paths. The cellular connection runs between the tower and your router; the local wireless network runs between the router and your devices. Improving reception from the tower doesn't automatically improve coverage at the bed or outside workspace.
Use placement tests before buying accessories. Keep your laptop, test service and background traffic consistent so you're comparing positions rather than unrelated changes.
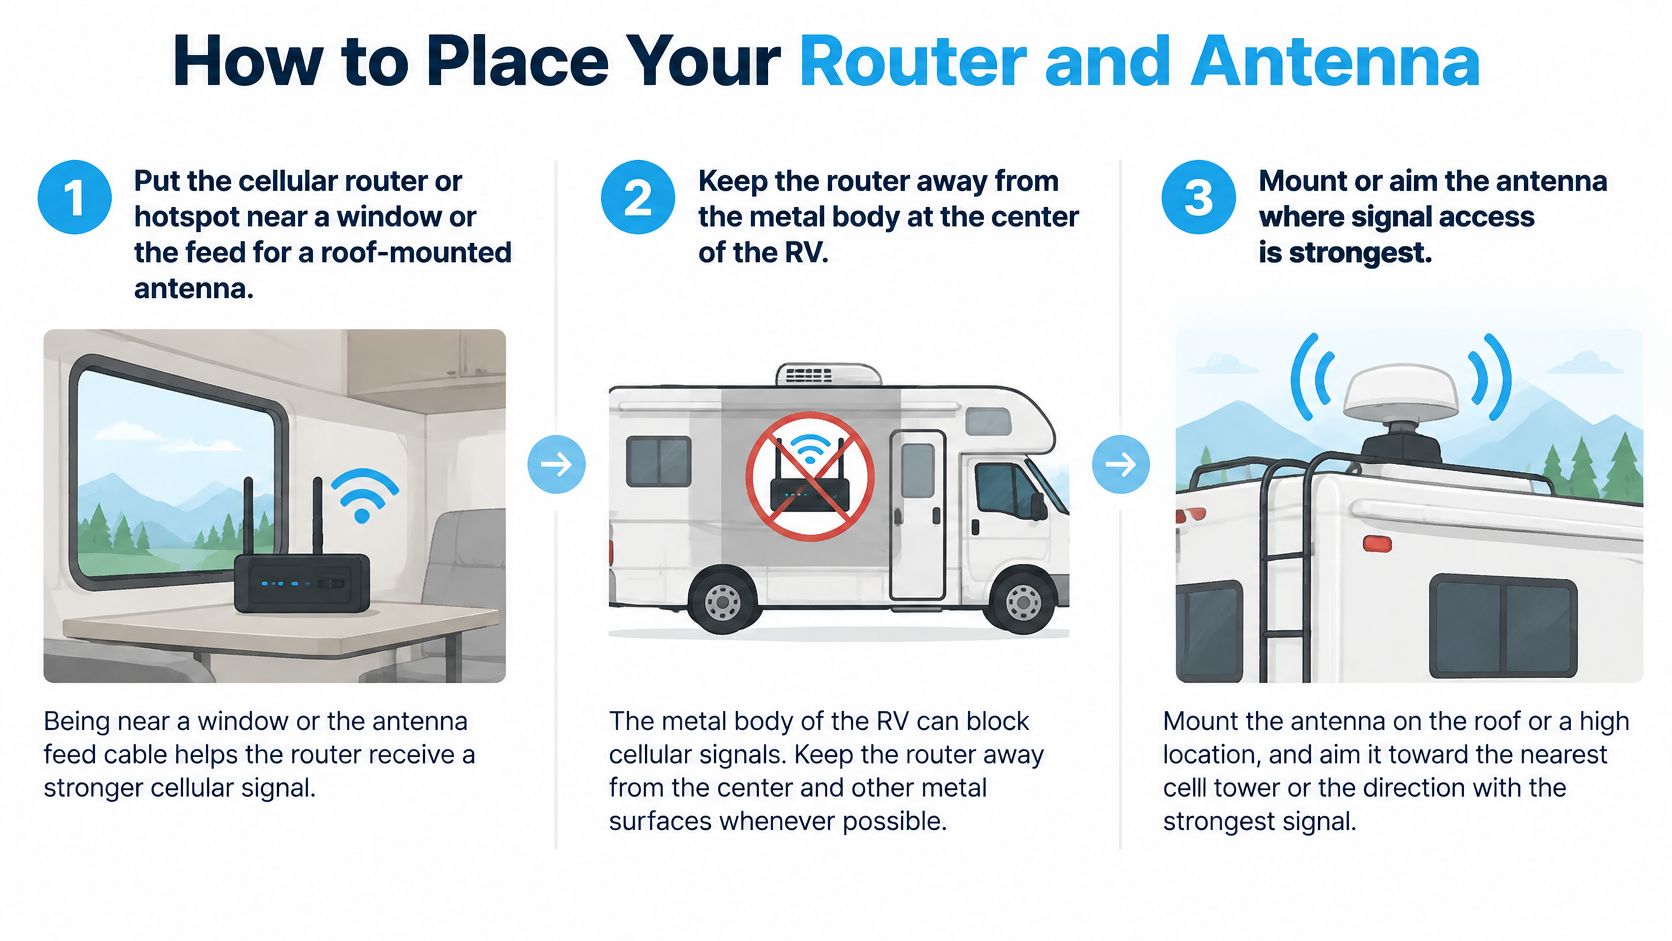
This placement graphic shows the starting arrangement for the router and antenna.
Follow a Repeatable Placement Routine
- Start near an opening. Place the cellular router or hotspot near a window or the cable feed for a roof-mounted antenna, away from the metal-enclosed center of the RV. Don't hide it in a cabinet for appearance, and avoid windowsills that become hot in direct sun.
- Open the signal-status screen. Record RSRP, which describes received signal power, RSRQ, which describes signal quality, and SINR, which compares the useful signal with interference and noise. Signal bars compress these differences, so don't choose a location from bars alone.
- Test sustained traffic. Run downloads and uploads, then repeat at different times of day. A strong radio connection can still deliver poor internet performance when other customers fill the tower's available capacity.
- Move and compare. Shift the unit toward another window or adjust an external antenna according to its mounting instructions, then repeat the same tests. Prefer the position with dependable uploads over a location that produces an impressive but inconsistent download peak.
- Check occupied locations. Test at the bed, cockpit or dining area, workspace, outside seating area and TV. Record latency, packet loss, download and upload, rather than declaring success because the laptop works beside the router.
Keep a simple log with the location, time, signal readings and test results. A phone screenshot of the router's status page helps you compare positions without relying on memory.
Read the Failure Pattern
If the connection works beside the router but fails at the workspace, investigate interior coverage. If every location slows together while signal readings remain similar, investigate congestion or the upstream connection. Neither pattern justifies replacing the router without another test.
The NIST wireless-network security guidance warns that nearby access points using identical or conflicting channels can cause disruptive interference. Scan neighboring networks before finalizing your local settings.
Acceptance rule: Every location you intend to use must pass the actual task you'll perform there. An isolated failure is a reason to investigate placement or congestion, not proof that the equipment is defective.
Never install or operate a Wi-Fi signal jammer. The FCC prohibits intentional Wi-Fi interference and can take enforcement action; interference also disrupts your own connection and neighboring campers.
Lock Down Security Before Work Devices Connect
Secure the router before joining a work computer or signing into personal accounts. Cellular service doesn't replace local network security, and a private-looking network name doesn't tell you whether administration or encryption is configured safely.
Use the router's management app or browser interface while following its quick-start instructions. Save the administrator credentials somewhere you can retrieve offline.
Secure the Router in Order
- Replace the default administrator password. This protects the settings interface, not just access to Wi-Fi. Use a different password from the one you'll give household members.
- Update the firmware. Install the manufacturer's available update while power is stable. Don't unplug the router during the update.
- Disable remote administration unless it's needed. Local administration is sufficient for most travelers. If remote access is necessary, enable only the specific management method you intend to use.
- Create a separate guest network. Put visitors and campground-facing accessories there, with access to your trusted local devices blocked. Confirm the router isolates guests rather than merely broadcasting another network name.
- Choose WPA3-Personal with AES where supported. The Wi-Fi Alliance deployment guide supports WPA3-Personal transition mode when WPA2 compatibility is still necessary. Avoid WEP, original WPA and TKIP.
- Enable protected management frames. Use the router's WPA3-compatible setting to help resist certain deauthentication attacks. Test important clients after saving the change.
Don't Mistake Compatibility for Hardware Failure
An older printer, streaming stick or vehicle accessory may stop joining a WPA3-only network. Before replacing it, check its supported security modes and try transition mode or a segregated WPA2-AES network. Don't weaken the entire network to accommodate an accessory that can be isolated.
Use a long, unique Wi-Fi passphrase that you don't reuse for banking, email or router administration. Join each device individually so you can identify the accessory that fails rather than changing several security settings at once.
For a broader settings review, use our guide to securing your Wi-Fi network.
Reduce transmit power if coverage extends unnecessarily far beyond the RV, but verify that your intended outdoor workspace still works. During extended storage, switch the network off rather than leaving an unused access point running.
How to Configure the Local Network
The tower-to-router connection supplies internet access; the router-to-device network distributes it inside the RV. Configure that local network after securing administration and encryption. Otherwise, you risk troubleshooting compatibility while also changing security settings.
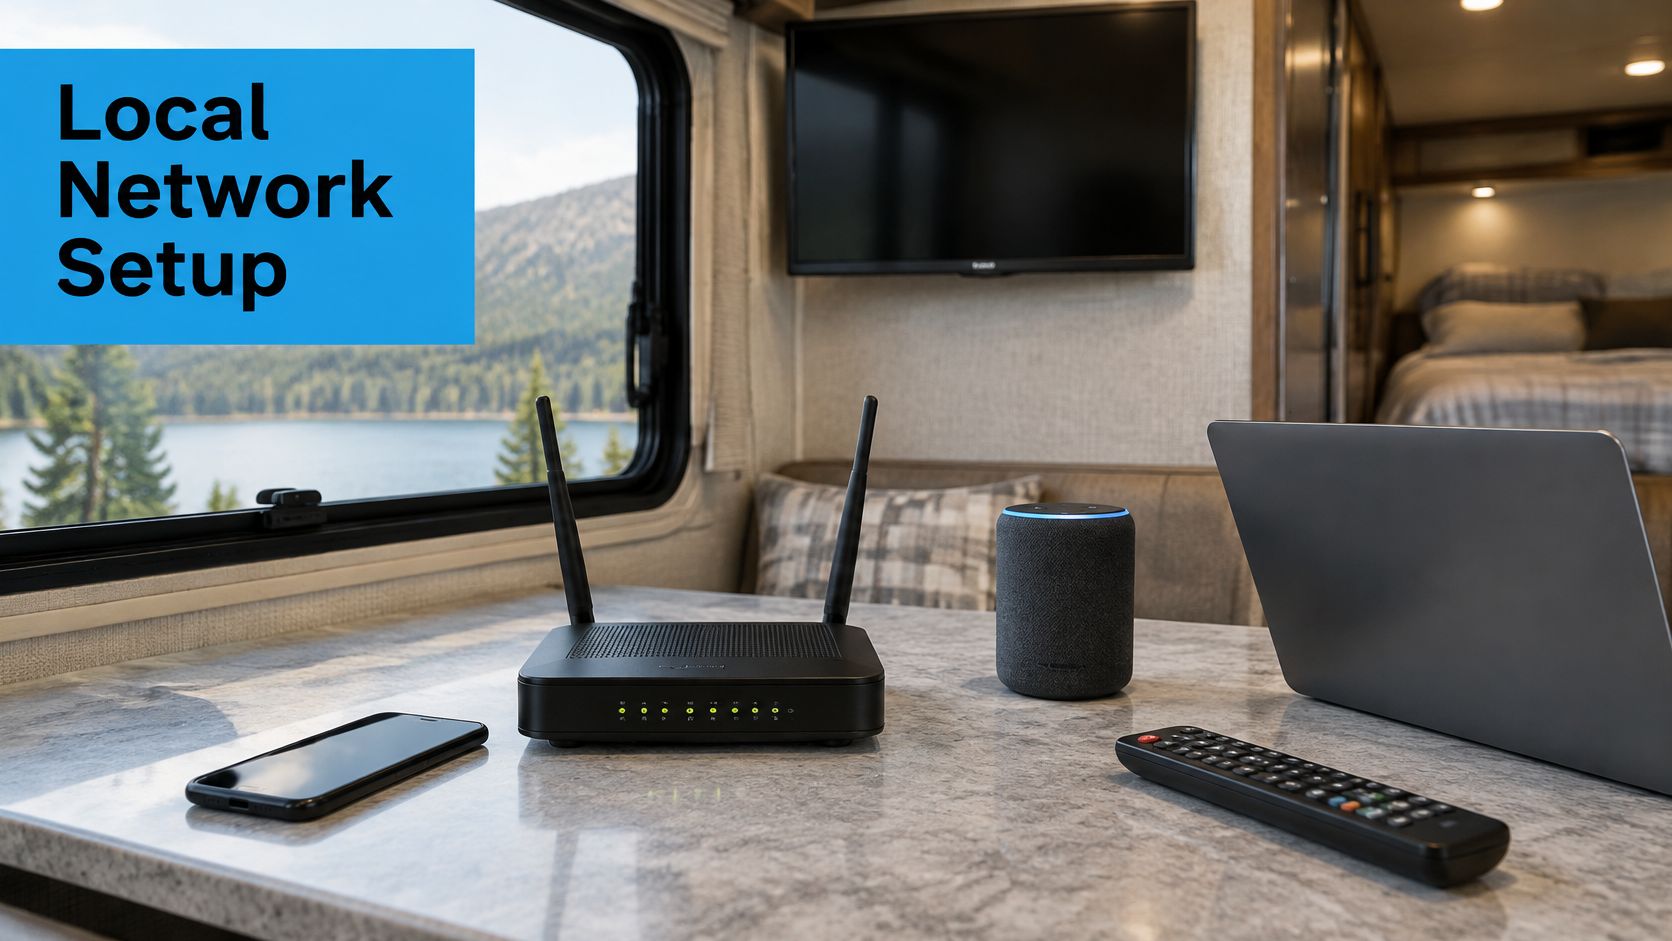
A typical interior setup combines wireless devices with equipment that can use Ethernet.
Set Bands and Channels Deliberately
- Assign devices by location and workload. Use 5 GHz for nearby laptops and TVs that need higher throughput. Try 2.4 GHz for distant accessories or devices behind cabinets and interior walls, then confirm the choice with a task test.
- Scan neighboring access points. Use the router's channel scan or a Wi-Fi analyzer app to identify crowded channels. Choose a cleaner supported channel rather than assuming the automatic selection remains suitable after moving campsites.
- Narrow the channel width when crowded. The widest setting occupies more spectrum, which can increase contention around neighboring networks. Compare stability and throughput after the change instead of treating maximum width as a speed guarantee.
Keep band names distinct while diagnosing a troublesome device if your router allows it. That makes it easier to confirm which band the device uses; automatic band steering can otherwise hide the answer.
This video offers a visual reference while you work through the router settings.
Make Local Devices Predictable
- Reserve addresses for fixed equipment. Use DHCP reservations for the printer, TV or point-of-sale device when other equipment needs to find it consistently. Reservations prevent address changes after a reboot from breaking saved connections, but they won't repair a weak wireless link.
- Check wired ports and the client cap separately. LAN ports determine how much equipment you can cable directly; the wireless client limit governs associated Wi-Fi devices. A router with four LAN ports doesn't have a four-device wireless limit, and filling its allowed client count doesn't guarantee enough internet capacity for everyone.
Use Ethernet for a stationary work laptop or TV when practical. It removes that device's local wireless hop and gives you a useful diagnostic comparison if Wi-Fi performance becomes erratic.
Separate Advertised Rates From Usable Internet
The IEEE Wi-Fi timeline lists Wi-Fi 6's theoretical maximum at 9.6 Gbit/s. That is a wireless link capability, not a promise of internet speed at your campsite.
Actual throughput is limited by the upstream connection, interference, antenna placement and active traffic. A faster local router can improve distribution inside the RV, but it can't make an overloaded cellular connection deliver more internet capacity.
Fix Slow or Dropped RV WiFi at Campgrounds
Strong bars but slow pages usually mean you're measuring the wrong thing. Bars describe a radio connection, not how much capacity remains on the campground's internet service or cellular tower.
Many campgrounds advertise Wi-Fi, and plenty of travelers weigh it when choosing where to stay. A network existing at the park entrance says nothing about usable capacity at your site at 8 p.m., though. Treat campground Wi-Fi as a shared, variable resource: the same connection that carries email at noon can stall a video call once neighboring rigs start streaming. Availability alone isn't a sufficient standard for a work connection.
Coverage maps create a second gap between promise and performance. A carrier map can show solid service at the campground while the RV's metal body leaves usable signal only near a window. Measure at the desk where you'll work, not at the driveway or the picnic table.
Evening streaming can fill a shared connection that worked well earlier. A login portal can also expire while your device remains associated with the access point, leaving a healthy-looking Wi-Fi icon without usable internet.
RV WiFi Symptoms, Causes and Fixes
These are planning allowances for troubleshooting, not guaranteed repair times. A configuration change is usually quick to test; identifying a recurring schedule problem takes longer.
| Symptom | Likely cause | Fix | Time to fix |
|---|---|---|---|
| Strong bars but slow pages | Cellular congestion at peak evening hours | Retest morning and evening, then switch to the backup carrier or source | Allow a week of schedule changes to confirm a recurring pattern |
| Good download, poor upload | Weak uplink or congested tower | Test upload separately, reposition the antenna and retest | A few minutes for the initial test |
| Campground Wi-Fi drops every few minutes | Captive-portal session timeout or shared load | Reauthenticate on the portal and move calls to cellular | A few minutes |
| Devices cannot see the network | Channel conflict or band mismatch | Rescan channels and move distant devices to 2.4 GHz | A few minutes |
| Older device will not join | WPA3-only setting | Enable transition mode or use a separate legacy network | A few minutes |
| Works outside but weak inside | Metal body blocks the signal | Move the router to a window or add an external antenna | Allow a day for an antenna installation |
A missing network name can also mean the device doesn't support the selected channel. Confirm band and channel compatibility before interpreting the symptom as congestion.
Check Authentication and Isolation
Open a browser when the campground connection stops passing traffic. Complete the captive portal again, and verify that your travel router supports the campground's authentication method. A successful login on your phone does not authenticate the router, so confirm the router itself passes traffic before blaming the network.
Client isolation is different: it prevents devices on the shared network from communicating directly. That can explain why internet browsing works but a printer or casting target disappears. Keep equipment that needs local discovery together behind your own router, subject to campground rules and router compatibility.
For broader diagnosis, use our guide to why wireless internet is slow. If general downloads are stable but live television still freezes, Watching IPTV Canada's guide to reduce buffering on live TV helps narrow playback-specific causes before you replace networking hardware.
Keep business-critical traffic on a tested cellular primary connection. Use campground Wi-Fi as a secondary source for browsing and other interruptible tasks.
Failover may restore internet access without preserving an active VPN or call. Test reconnection behavior before a meeting. If both links fail, move sensitive work to a later window and log the outage rather than repeatedly restarting everything.
Test Your Setup Before Your Next Stop
Treat arrival testing as part of parking, not something to attempt after a meeting starts. Leave the workstation packed until you know which connection can support it. A successful speed test is useful, but a successful work session is the better acceptance test.
Use the same laptop and test tools at each stop. Record results in a spreadsheet or offline note with the campsite, connection source and time, so you can distinguish a repeatable failure from an isolated interruption.
Run an Arrival Checklist
- Test each available source. Check the campground network and your cellular connection before unpacking the desk. Confirm that each passes traffic rather than merely displaying a connected status.
- Check the places you'll use. Run tests at the desk, bed and TV location, recording latency, packet loss, download and upload. Include the exterior workspace if you intend to work outside.
- Run representative tasks. Join a test video call, connect the work VPN and upload a typical file. For streaming, play the service you use rather than relying solely on a speed-test result.
- Force a backup test. Disconnect the primary source, switch to the fallback and record what happens. Note whether calls, payment software and VPN sessions recover automatically or need a manual restart.
- Repeat during evening demand. Test again when neighboring sites are occupied and using their connections. Don't commit to an extended work stay based only on a quiet arrival afternoon.
Compare results with your employer's or application's published requirements rather than applying an arbitrary universal speed target. Calls need steady uploads and low packet loss; streaming generally tolerates more latency but still needs sustained downloads.
Make the Stay-or-Move Decision
Stay when the primary connection passes both morning and evening tests with steady uploads, low packet loss and successful task completion. If it fails either window, put the workload on the tested backup or choose another site. Don't replace equipment until you've ruled out placement and congestion.
Buying rule: Test a replacement at the campsite where the current setup fails. A better result somewhere else doesn't answer the question.
Our router arrives pre-activated, needs no professional installation and gets you online in 60 seconds after plugging it into a wall outlet. Our 7-day money-back guarantee lets you test it at your site and return it for a full refund if it doesn't outperform your current setup. After the trial, you can rent the router for $15 per month or buy it for $349.
Keep your test log through the return window. Compare the same tasks at comparable times, not a quiet morning on the replacement against an overloaded evening on the old connection.
For connected social-account posts sharing this article, place these tags after the article link:
#rv #rvlife #rvliving #rvlifestyle #rvrenovation #rvremodel #rvtravel #rvcamping #rvadventures #ruralwifi #5gwifi #5ginternet
SwiftNet Wifi offers plug-and-play cellular internet for RV travelers who want a connection they can evaluate at their own campsite. Visit SwiftNet Wifi to choose a setup, then use the arrival checklist to compare it with your current connection before relying on it for work.


