

It's 7:40 on a Tuesday, you're in a campground outside Flagstaff or a farmhouse office forty minutes from the nearest fiber cabinet, and the video call freezes for the third time. The laptop shows full bars. A quick speed test looks respectable. None of it adds up until a Wi-Fi analyzer reveals that every rig and every neighbor within range is piled onto the same channel.
Most guides to how to change WiFi channel stop at the number. Pick 1, 6 or 11, save, done. That advice is right as far as it goes, and it's where I'd start too, because the channel is the cheapest variable to move. But the channel sits beside three others that decide whether the connection holds at 8 p.m.: channel width, router placement, and what your own devices are doing to the air.
The sequence below produces an answer rather than a guess. Choose a candidate, scan from the spot where you sit, log in, apply it, test it against the old setting, then decide whether to keep it.
Channel Picks for 2.4 GHz and 5 GHz
The 2.4 GHz band looks like it offers eleven choices. It offers three. Intel's support documentation states that channels 1, 6 and 11 are the preferred choices because they are the three commonly used 20 MHz channels designed to avoid overlap, and it lays out the collision map: channel 1 overlaps channels 1 through 5, channel 6 overlaps 2 through 10, and channel 11 overlaps 7 through 11 (Intel support article on Wi-Fi channels).
Read that map once and the band stops being mysterious. A network on channel 3 sits on top of channel 1 and reaches into 6. A network on channel 8 presses on both 6 and 11.
In a campground loop or a thin-walled apartment stack, every unit runs an access point a few dozen feet away. Picking a number outside the trio there spreads congestion across two of the good channels instead of one.
Why 5 GHz is usually the easier answer
The upper band has far more non-overlapping room. A technical comparison of U.S. channel plans counts 12 non-overlapping 20 MHz channels in the 5 GHz UNII bands for 802.11a operation (arXiv paper on Wi-Fi channel selection). Those channels group into three practical blocks: 36 to 48 is non-DFS and the safest place to start, 52 to 64 and 100 to 140 are DFS blocks where the radio must check for radar, and 149 to 165 is usually non-DFS with less crowding.
DFS is worth understanding before you pick a channel in it. European allocations put DFS at 52 to 64, 100 to 112, 116 to 128 and 132 to 140, and a router using those ranges must run a Channel Availability Check before transmitting and vacate the channel if radar appears (Keenetic's DFS explainer). That obligation explains the slow boot after a reboot and the sudden channel hop in the middle of an evening.
| Band | Channel | Overlaps with | Best use |
|---|---|---|---|
| 2.4 GHz | 1 | Channels 1-5 | Pick when it is the quietest of 1, 6 and 11 |
| 2.4 GHz | 6 | Channels 2-10 | Pick when it is the quietest of 1, 6 and 11 |
| 2.4 GHz | 11 | Channels 7-11 | Pick when it is the quietest of 1, 6 and 11 |
| 5 GHz | 36-48 | No overlap at 20 MHz | Safest non-DFS starting point |
| 5 GHz | 52-64 | No overlap at 20 MHz | DFS block; may switch suddenly after a radar event |
| 5 GHz | 100-140 | No overlap at 20 MHz | DFS block in many regions; check that your router supports it |
| 5 GHz | 149-165 | No overlap at 20 MHz | Usually non-DFS with less crowding |
The rule I'd give anyone: pick the 2.4 GHz channel with the fewest strong neighbors, or move the device to a non-DFS 5 GHz block if the hardware supports it. Then confirm the choice with a test instead of trusting the menu.
Scan the Airwaves Before You Choose
Start with a baseline, not a guess. Before you change a single setting, walk the three or four spots where you use the internet and write down what each one delivers.
- Record the baseline where it counts. At the RV desk, the kitchen table, the corner where the streaming stick lives. Run a speed test, a latency test and a packet-loss test from each spot, in that order, so later comparisons are fair.
- Scan from the same spot, not from beside the router. A Wi-Fi analyzer app on a phone or laptop shows you the room you're sitting in. Standing next to the router shows a wall of loud neighbors and tells you nothing about what reaches your desk.
- Note which 2.4 GHz channels neighbors use and how strong each one is. Strength beats count. A faint signal from a rig across the loop matters less than a full-strength network on the other side of a shared wall.
- Choose the candidate with the fewest strong neighbors. If two tie, take the one whose overlap reaches closest to where you sit most of the day.
A quiet scanner is not a clean channel. A phone app hears access points. It does not hear the hidden node behind a metal wall, your Bluetooth headset, or the microwave in the next slide-out.
Microsoft's guidance recommends graphing nearby networks with a Wi-Fi analyzer before selecting a channel and retesting after any network change, and it notes that interference shifts with building orientation, neighboring equipment and time of day (Microsoft's Wi-Fi and your home layout guidance). That variability is why a campsite that worked on channel 1 in April can be unusable on channel 1 in July.
If the interference you're chasing shows up as streaming buffering rather than slow file transfers, the ROVE IPTV Canada Wi-Fi interference guide separates household device interference from ordinary network congestion, which tells you whether a channel change is even the right tool. Keep your scan notes either way. Changing one variable at a time is the only way to know which change did the work.
Log In to Your Router or SwiftNet Device
Every router and hotspot has a local admin page, and you reach it from a device already connected to that network, never from the internet. The label on the bottom of the unit carries what you need.
Look for three things on that label: the default gateway address, the admin username and the admin password. Most home routers use a private address such as 192.168.0.1 or 192.168.1.1, but use whatever your own unit prints. Type it into the browser's address bar, not the search field. Entering a search engine address instead of the gateway is the single most common reason people conclude their router "has no channel settings".
Find the gateway address from a connected device
If the label is worn off or the device is mounted where you can't read it, get the address from a machine that's already online.
-
On Windows: open Command Prompt and run
ipconfig, then read the Default Gateway line. - On macOS: open the network details for the active connection and read the Router entry.
- On Android or iOS: open the Wi-Fi settings, tap the network you're joined to, and look for the router or gateway field.
If someone changed the admin login and the new one is lost, a factory reset restores the defaults, and it also erases every custom setting on the box: network name, Wi-Fi password, any port forwarding, any fixed addressing. Write those down before you hold the reset pin for ten seconds.
On the SwiftNet 5G Diamond router, the wireless pages expose both radios, so 2.4 GHz and 5 GHz are set independently on the dual-band Wi-Fi 6 unit. On the pocket-sized 4G Bronze hotspot, check the device documentation before assuming a channel menu exists, because some hotspots deliberately don't expose one. If you're reaching the admin page for the first time, our walkthrough on how to set up the WiFi router covers the login and network-naming steps in order. And if the admin page won't load at all, the channel isn't your problem yet: you have a connection-path issue, and that gets fixed first.
How to Change the Channel Step by Step
Menu names vary by brand. The sequence doesn't. Work through it once and note what you changed, so a rollback is a two-minute job.
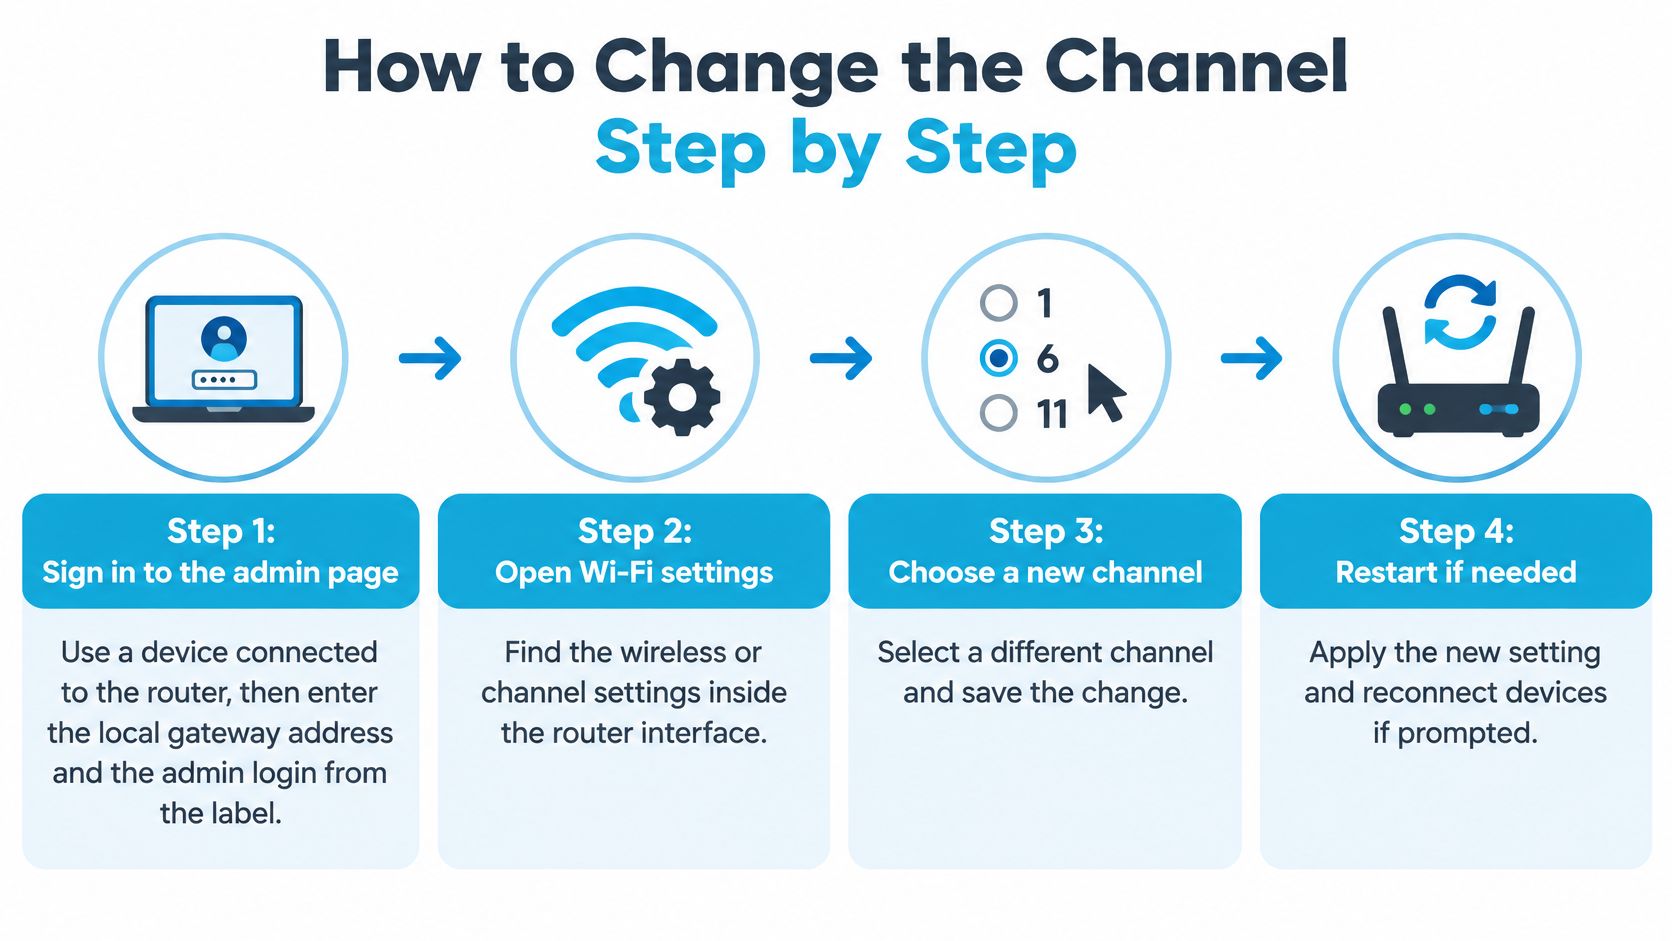
- Sign in from a device on the network. Use the gateway address and admin login from the label. The slip: editing the Wi-Fi adapter's channel on your laptop does nothing, because the access point is the only thing that decides what the network broadcasts on.
- Open the wireless settings and choose the band. 2.4 GHz and 5 GHz usually live on separate pages or tabs. Change one, leave the other alone, so you know which change produced the result.
- Replace Auto with the channel from your scan. Auto lets the router decide at boot and rarely re-evaluates. The slip: leaving Auto selected and assuming your pick stuck.
- For 5 GHz, start in a non-DFS block. 36 to 48 or 149 to 165. Use a DFS block only when the router supports it and the non-DFS room is crowded.
- Save and wait a minute or two. The radio restarts and clients drop briefly.
- Reconnect, then forget and rejoin if speeds still look wrong. Phones hold stale association data. Forgetting the network and joining again clears it.
The whole sequence fits into four moves: sign in, open the wireless settings, choose the channel, save and let the radio restart.
A note on channel spacing before you pick a number
The 2.4 GHz band carries either 11 or 13 channels depending on the country, with channel centers spaced just 5 MHz apart, while a typical Wi-Fi transmission occupies about 20 MHz. Clearing interference needs roughly 25 MHz of separation between centers, which is exactly why 1, 6 and 11 remain the practical set wherever 11 channels are allowed, and why moving from channel 6 to channel 5 or 7 usually solves nothing at all (Keenetic's 802.11n explainer). Those channels are still close enough to interfere heavily with the transmission you were trying to escape.
If you're already inside the router interface and wondering which of the other fields are worth touching while you're there, the Rove IPTV Canada router settings guide covers the settings that matter for streaming traffic specifically. Recheck your channel every few weeks in a seasonal park, because the population changes and so does the interference.
Test Speed, Latency and Channel Width
Repeat the baseline tests from the same spots, in the same order, at roughly the same hour of the day. Comparing a 3 p.m. result against a 9 p.m. result tells you about your neighbors, not about your channel change.
Judge latency and packet loss before headline speed. A video call, a remote desktop session and a VoIP line all feel latency spikes that a download test never reports. Then run a sustained transfer rather than a short burst, because a five-second test measures the buffer as much as the link.
Run 20 MHz against 40 MHz
A 40 MHz channel doubles the width and roughly doubles the spectrum the radio occupies. That raises peak link rate and also raises the number of neighbors it can collide with. A 2025 study found that Bluetooth Low Energy activity reduced Wi-Fi TCP throughput by as much as 11.90% and increased ping latency by up to 21.43%, depending on the selected channel and whether the network ran 20 MHz or 40 MHz width (study on Wi-Fi and Bluetooth coexistence). That finding is a good reason not to treat a scanner's network count as a proxy for real performance.
The narrower channel often wins. Test 20 MHz and 40 MHz at the desk where you work, then keep the width that produces the steadier latency and sustained throughput, even when its peak number is lower.
A channel change also won't fix interference from Bluetooth peripherals, USB 3 devices, microwaves or a badly placed access point. Those problems live in the room, not in the channel plan. Move the source or the router and retest before blaming the setting you just applied.
If latency is the symptom you care about most, our notes on why wireless internet gets slow cover the variables upstream of the channel, from backhaul quality to client limits. Keep whichever configuration wins on real tasks. A stable call at 8 p.m. beats a faster speed-test screenshot at noon.
Decide Whether to Keep the New Channel
Sometimes you make the change, retest carefully, and nothing moves. That's a result, not a failure. It tells you the channel wasn't the constraint.
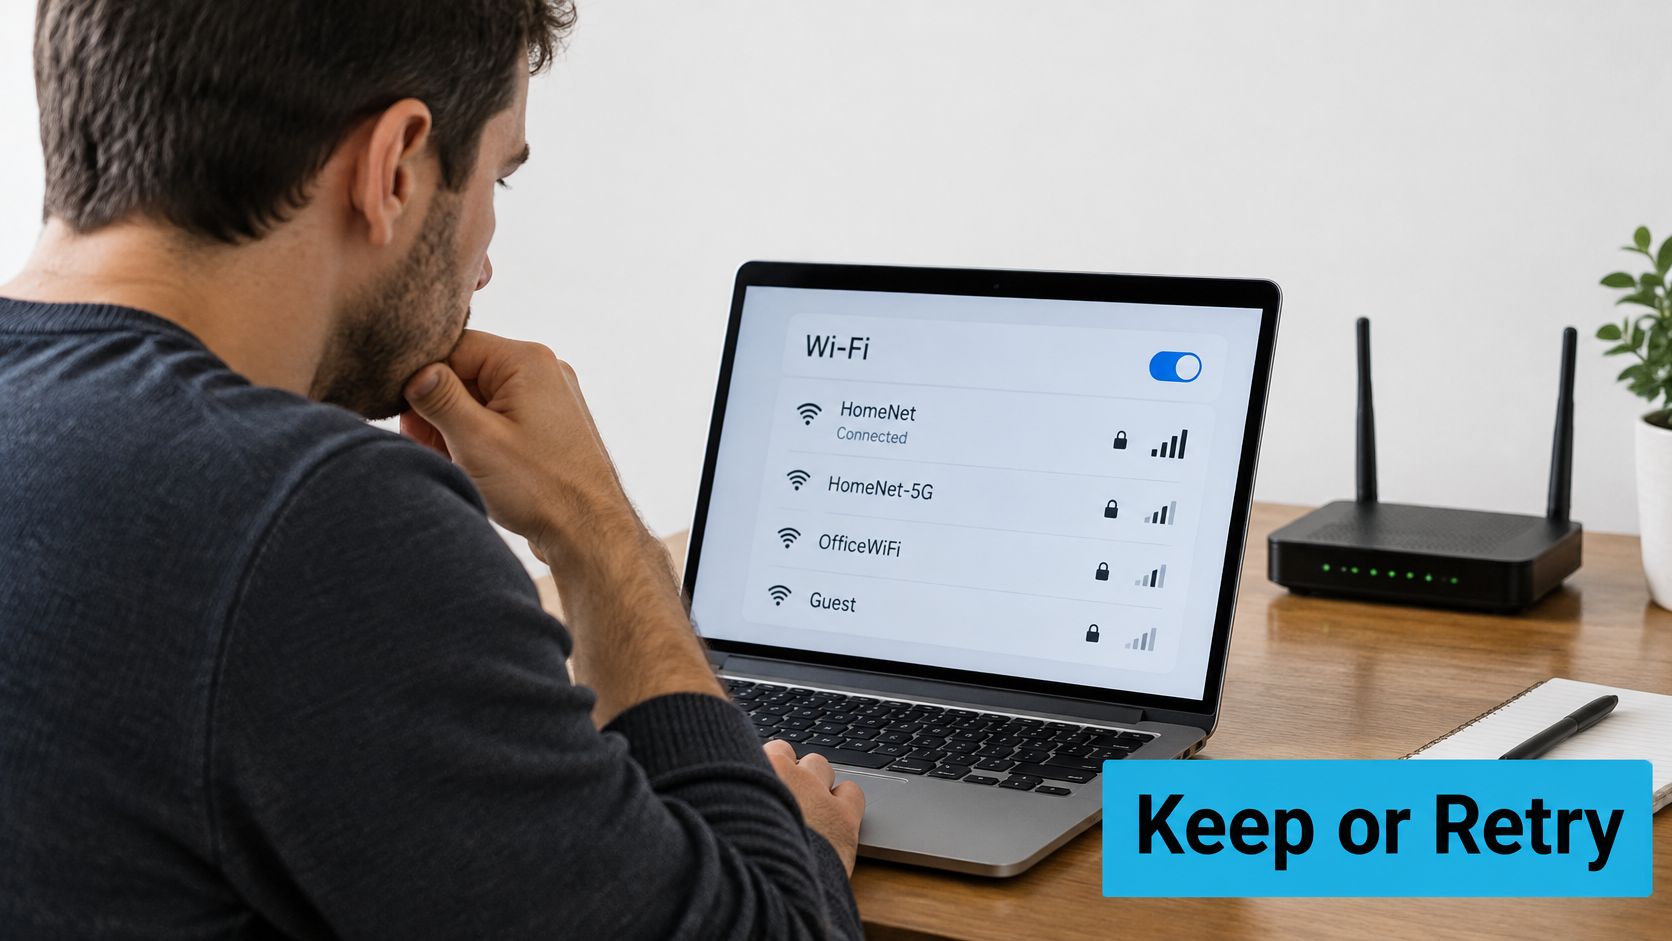
A scanner only hears access points, and the client is the thing that suffers. Measurement work on live deployments found that overlapping unlicensed-channel use caused considerable Wi-Fi throughput degradation, with latency effects still needing investigation, and that hidden-node problems arise when another radio shares the spectrum without the access point ever detecting it (measurement study on unlicensed coexistence). A channel that scans quiet can still underperform at one particular client, especially an outdoor-facing RV setup or a fixed-wireless link aimed at a distant sector. Test from the client's position, never from beside the router.
What each symptom is telling you
| Symptom | Likely cause | Fix |
|---|---|---|
| Speed drops only at peak hours | Neighbors share your channel | Re-scan at that hour and move to the quietest channel |
| Video calls stutter after a 5 GHz switch | DFS radar event forced a channel change | Use a non-DFS block such as 36-48 or 149-165 |
| Choosing a new channel did nothing | Bluetooth, microwave or USB 3 interference | Move the device or router away from the source, then retest |
| Ping spikes on a 40 MHz channel | Wider channel overlaps more traffic | Drop to 20 MHz and compare latency |
| Only one room is weak | Router placement, not channel | Reposition the router and retest before changing channels again |
Three interference types get conflated in most advice. Co-channel interference means someone is on your channel. Adjacent-channel interference means someone is next to it, which is the channel 5 problem again. Hidden-node interference means a radio is transmitting that the access point can't hear, so carrier sensing fails and packets collide. Only the first is reliably fixed by picking a different number.
Keep the new channel if latency and throughput stay steadier over several days, checked at two or three different times. If only one room is weak, the router's position is the lever, so move it and retest. For broader fixes, our guide on ways to boost internet speed covers what sits beyond the wireless settings.
If your laptop or phone supports Wi-Fi 6E, the 6 GHz band offers considerably more room than 5 GHz with additional wide channels, so check that before buying new hardware to chase a congestion problem.
And if no channel works, look upstream rather than sideways. SwiftNet will make network changes you request on your service, though our ability to diagnose and fix connections with third-party smart home hardware is limited, so describe that device and how it's wired when you write in. Send your baseline numbers, band, channel and width to support@swiftnetwifi.com and you'll get a useful answer instead of a script.
SwiftNet Wifi exists for exactly this kind of connection: a 5G router that reads the strongest tower from AT&T, Verizon or T-Mobile and keeps working where a single-carrier hotspot would drop, whether you're full-timing in an RV or living past the end of the fiber line. Pair that with the channel, width and placement work above and your evenings stop being a fight with buffering. Visit SwiftNet Wifi to check coverage and start a plan with no contract.


