

You're parked, the laptop is open, and your video call keeps freezing while the phone shows a perfectly respectable signal. Or perhaps everything works outside the RV, then stalls the moment you sit down at the dinette. Both situations can send you shopping for an RV WiFi antenna, but only one clearly points toward an antenna problem.
The useful question isn't which antenna has the biggest gain number. It's which part of your connection is failing. Find that first, and you can choose equipment that fixes the problem instead of adding another box, cable, and roof penetration.
How an Antenna Changes the Signal Path
Your RV internet connection has separate wireless links. The antenna you buy must address the right one.
The inside link connects your laptop, phone, and television to the router over Wi-Fi. Router placement, interior walls, appliances, and band selection affect this connection. A router buried behind the refrigerator can deliver poor laptop reception even when its connection to the internet is excellent.
The outside link connects the router's radio to a cellular tower or campground access point. An exterior antenna addresses this path by moving the receiving and transmitting elements outside the coach.
Get Outside the Bodywork
A metal-and-glass RV is like talking from inside a closed car with the windows up. A roof antenna is like holding the phone out of the window: you've removed an obstruction, not made the person at the other end speak louder.
This is the relationship between the indoor router and your connected devices.
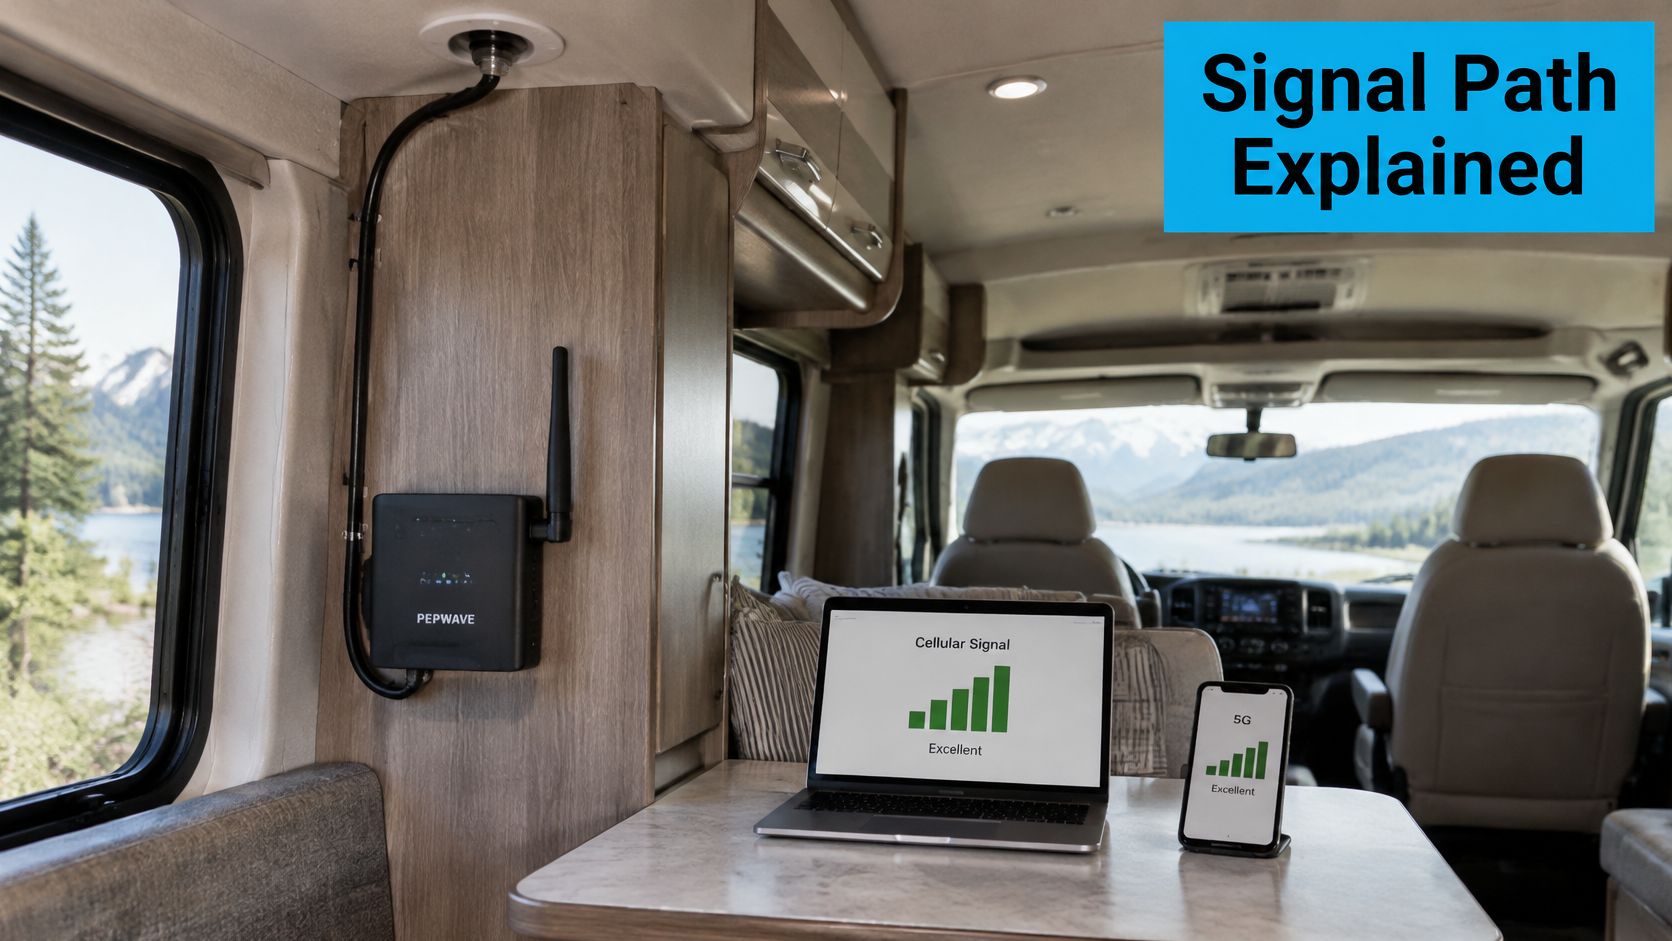
A campground Wi-Fi antenna connects to the park's access point. A cellular antenna connects to a carrier's tower. They aren't interchangeable just because both ultimately supply internet to your laptop.
Rural cellular coverage commonly relies on spectrum below 1 GHz, which generally travels farther and penetrates obstructions better than higher-frequency cellular service, a practical distinction discussed in The Tools Trunk's RV connectivity guide. That advantage doesn't make a metal coach transparent. Getting outside its skin still matters.
Choose Bands for the Actual Path
For Wi-Fi, 2.4 GHz generally reaches farther through obstacles, while 5 GHz favors capacity over a shorter, clearer path; Wi-Fi 6E adds 6 GHz, as explained in HPE Aruba's Wi-Fi generation guide. Higher-frequency Wi-Fi and cellular signals also demand more attention to coax loss and positioning.
Don't confuse a Wi-Fi band with a cellular generation. A router can use cellular service outside while broadcasting a different Wi-Fi band inside.
First check: Compare reception inside the coach with reception at the proposed antenna location, not merely beside another window.
Use a phone on the same carrier as a rough screening tool at roof height, but only where you can reach safely. Don't climb an unsuitable roof or work near overhead wires. Phone bars aren't a calibrated antenna test, and different devices can select different bands, but a clear improvement outside is useful evidence.
Signal strength is still only one link in the chain.
Weak Signal or Network Congestion
Will an antenna fix this campsite? It might improve reception, but it can't add capacity to an overloaded tower or campground internet connection.
Vehicle placement affects reception. The FCC's rural mobile broadband testing guidance requires in-vehicle testing with antennas inside vehicles to represent consumer conditions. That supports testing the coach's effect, not assuming every slow connection needs more antenna gain.
Read More Than the Bars
Open your cellular router's status page and record RSRP, the received signal strength; RSRQ, a signal-quality measure; and SINR, the signal's relationship to interference and noise. Compare these readings on the same device rather than treating phone bars as a universal scale.
Then record both download and upload speed. Use the same test service and device, pause background downloads, and keep the router in place. If possible, test through Ethernet to remove the laptop's Wi-Fi connection as another variable.
Weak reception and poor speeds throughout the day make antenna placement worth investigating. Strong reception with a repeatable evening slowdown points toward congestion, although plan restrictions and network management can produce similar symptoms.
Symptoms, Likely Causes and Next Steps
| Symptom | Likely cause | Next step |
|---|---|---|
| Full bars, slow evening speed | Network congestion at the tower or park | Test at several times of day; an antenna will not fix it |
| Weak bars, slow all day | Weak signal | Relocate the antenna higher or try a directional mount |
| Good download, failed video calls | Upload limit or congestion | Check upload speed; consider a second carrier |
| Signal drops when the rig turns | Antenna pattern or aim | Switch to an omnidirectional setup or re-aim |
| Speed only on one port | Unused MIMO ports | Connect all compatible matched ports |
The port-related symptom needs care: don't disconnect modem leads during operation just to compare them. Check the router's diagnostics and port assignments before blaming an antenna.
Say a remote worker gets full bars, but calls fail at 7 p.m., with uploads under 1 Mbps while downloads look acceptable. Those are hypothetical readings, but they illustrate why a download result alone can mislead. A second carrier or shifted work hours may help more than a larger antenna.
Strong reception doesn't guarantee that the network has room for your traffic.
Campground Wi-Fi and cellular each have their own upstream capacity ceiling. Improving either radio link won't remove congestion farther upstream. Our guide to ways to boost internet speed offers additional checks before you replace hardware.
Before buying, test morning, midday, and evening over three days. That's a practical sampling routine, not a promise that every network pattern will reveal itself.
RV WiFi Antenna Types Compared
Say a couple spends weekends at the same campsite, two miles from a tower, while a full-timer moves every week. That hypothetical distance doesn't predict performance, but the travel patterns do suggest different equipment.
The weekend campers can aim a directional antenna and leave it alone. The full-timer needs something that doesn't require finding a tower after every move.
RV WiFi Antenna Setups Compared
| Setup | Signal path improved | Best for | Main limit |
|---|---|---|---|
| Omnidirectional MIMO roof antenna | Router to any nearby cell tower | Full-time rigs moving between towers | Needs a roof mount and matched cables |
| Directional high-gain panel | Router to one known tower | Fixed campsites with a known tower direction | Must be aimed; poor for moving |
| Campground Wi-Fi extender | Router to the park access point | Parks with weak but present Wi-Fi | Cannot fix an overloaded park network |
| Cellular router with built-in antenna | Router to cell tower | Light use with no roof work | Limited reach in weak coverage |
| Satellite dish | Router to satellite | Remote areas without cell coverage | Needs a clear sky view; higher cost and latency |
Satellite costs and latency depend on the service and orbit, so don't treat that row as a universal ranking against every cellular connection. Its defining advantage is access where terrestrial coverage isn't available.
RV internet is an umbrella term, not a single antenna category. A satellite terminal isn't a cellular antenna, and a park Wi-Fi extender won't improve your modem's tower connection.
Match the Hardware to Your Stops
An omnidirectional antenna receives around the rig without manual aiming. That convenience matters when the useful tower direction changes, but “omnidirectional” doesn't mean it can reach every tower or overcome terrain.
A directional panel concentrates its pattern toward a chosen direction. It can help a marginal, reachable tower link, but it adds setup work and can miss a better serving tower elsewhere. Don't buy one just because its advertised gain exceeds an omnidirectional model's number.
A built-in antenna is often the sensible starting point when coverage is already good. It avoids roof work, exposed connectors, and installation losses.
Choose the row that fits where you camp most often. Then check band compatibility, router connections, and the physical installation before ordering. Distance alone doesn't decide the winner, and no amount of gain makes an unavailable network usable.
Cable Length and Connector Loss Limits
A longer coax run can erase the antenna's gain. The roof location may be excellent, but the signal still has to reach the modem through the cable.
The Solwise multiband MIMO antenna specification gives coax attenuation of 0.56 dB/m at 900 MHz and 0.785 dB/m at 1,800 MHz. The estimates below use those rates, exclude connectors, and apply only to the specified cable, not every coax product.
Coax Cable Loss by Run Length
| Cable length | Loss at 900 MHz | What it means |
|---|---|---|
| 3 ft (0.9 m) | About 0.5 dB | Small loss on both bands, about 0.7 dB at 1,800 MHz |
| 15 ft (4.6 m) | About 2.6 dB | About 3.6 dB at 1,800 MHz, using most of a 4 dB budget |
| 25 ft (7.6 m) | About 4.3 dB | About 6.0 dB at 1,800 MHz, exceeding the 4 dB target |
These are cable-loss calculations, not predicted speed reductions. A decibel loss doesn't translate into a fixed percentage of lost internet speed.
Higher-frequency signals generally suffer greater coax attenuation. That makes a cable acceptable on a lower cellular band potentially disappointing on a higher band.
Put the Router Near the Antenna
Use under 4 dB total loss as a practical design target, and allow roughly 0.5 dB per connector interface when making a conservative preliminary budget. Actual connector loss requires the component specification; the allowance isn't a universal measured value.
- Move the radio closer: Mount the cellular router near the roof entry while preserving ventilation and service access.
- Use suitable cable: Choose one continuous, low-loss 50-ohm assembly with the correct connectors.
- Remove avoidable transitions: Extra adapters and splitters add loss and more potential failure points.
- Extend the digital side: Run Ethernet farther inside the coach instead of extending the RF coax.
In a hypothetical installation using the longer mid-length run above, adding connector allowances already pushes the higher-band total beyond the design target. Moving the router closer is a better first correction than buying an antenna with a more impressive headline gain.
Before purchasing a longer cable, write down its attenuation at your operating bands, the installed length, and every connector interface. Budget the complete path, not just the antenna.
How to Mount and Connect a Multi-Antenna Setup
A modern cellular router has several antenna ports, and each compatible cellular port serves a separate radio path. MIMO uses multiple paths for diversity and spatial streams, so connecting a single external lead isn't equivalent to installing a complete external antenna system.
The basic installation sequence starts with identifying the ports.
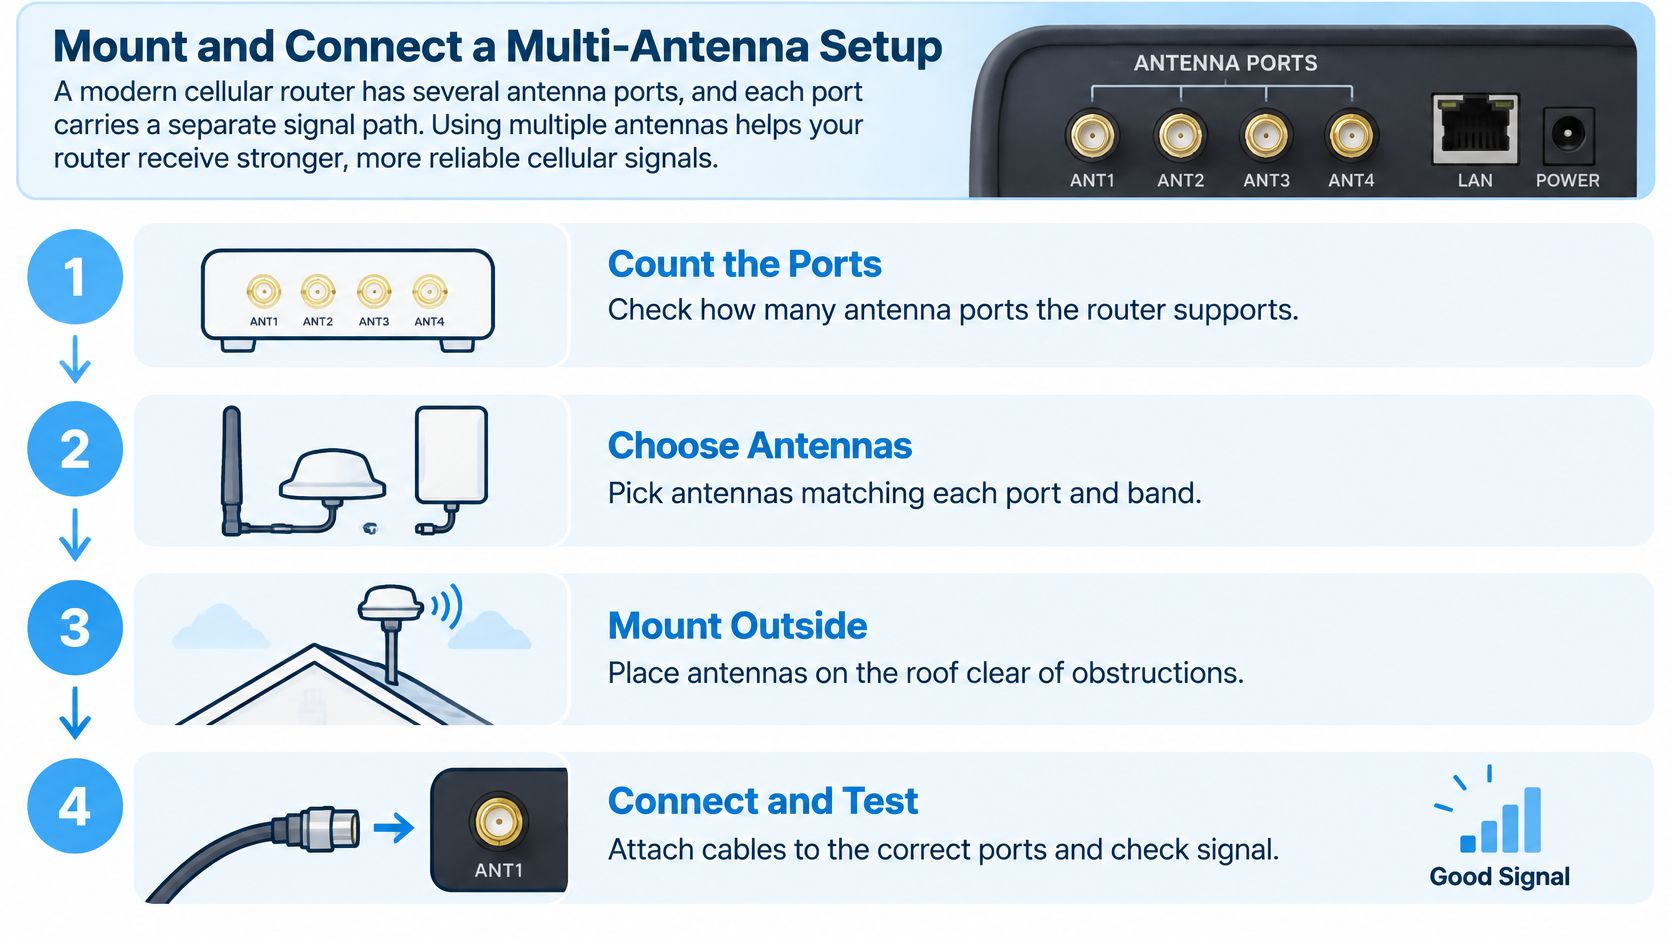
Match the Ports Before Drilling
- Identify every connection. Read the router's port diagram and distinguish cellular, Wi-Fi, and GPS sockets. Similar-looking connectors don't establish electrical compatibility, and confusing these functions is an easy installation mistake.
- Choose a roof position with open surroundings and clearance from metal structures, satellite equipment, and other antennas. Check underneath before drilling, because an unobstructed roof surface can still conceal wiring or framing.
- Plan separation for separate antennas. RV Mobile Internet's cellular antenna guide supports allowing at least 5 inches between different antennas and roughly 10 inches for a separate-antenna MIMO-style arrangement. Follow the manufacturer's layout for an integrated MIMO enclosure rather than trying to separate its factory-installed internal elements.
- Mount the antenna and route matched cables to their labeled ports. Keep cable types and lengths similar where practical, but don't add unnecessary coax to make lengths identical; the common slip is creating extra loss for cosmetic symmetry.
- Connect every compatible cellular path. Follow the antenna and modem connection diagrams, including any external-antenna setting in the router interface. Leaving supported paths unused can prevent the modem from using its intended spatial streams.
Test the Completed Installation
- Power up and record signal readings, upload speed, and download speed with the rig stationary. Compare against the original setup using the same device and test method, rather than comparing unrelated tests taken elsewhere.
- Change one thing, then retest. Adjust height or position separately so you can identify what helped. Comparing a morning baseline with a busy evening result can hide an otherwise useful installation improvement.
Before leaving the roof, secure cable strain relief and weatherproof the entry using materials compatible with the roof membrane. Don't rely on sealant to provide the mechanical strength of the mount.
For a visual installation reference, watch the setup demonstration.
Aim for stable reception and repeatable throughput with all intended paths operating, not identical speed readings “on each port.” MIMO paths work together, and ordinary speed tests measure the combined connection rather than independent port performance.
Booster Rules and Power Limits in RVs
A passive external antenna and a powered cellular signal booster aren't the same device. Consumer boosters amplify radio signals, and their installation carries regulatory obligations.
Keep the approval documents with the equipment so replacement parts don't become guesswork.
Follow the Approved System
- Confirm provider consent and register the specific booster before operating it. The FCC's signal-booster FAQ also requires manufacturer-specified antennas, cables, and coupling devices.
- Keep the approved component combination intact. A replacement antenna that physically fits can still make the installation noncompliant.
- Leave interference controls enabled. The FCC's consumer-booster policy requires these safeguards during operation and limits use to supported subscriber-service bands.
A booster amplifies the signal available at its receiving antenna. Poor donor-antenna placement remains a problem, and inadequate separation from the indoor antenna can interfere with proper operation. Our explanation of cellular signal boosters helps distinguish amplification from a direct modem antenna connection.
Understand the Power Limits
Under the FCC consumer-booster regulation, uplink composite conducted power and equivalent isotropically radiated power may not exceed 1 watt per operating band, while composite downlink conducted power and EIRP may not exceed 0.05 watt, or 17 dBm, per band. Evaluate the antenna, cable, and coupling components as one approved system.
Wi-Fi equipment has separate rules. For outdoor access points in 5.15–5.25 GHz, the FCC's U-NII regulation permits up to 1 watt conducted output with antenna gain no greater than 6 dBi, with output reductions required above that gain. That's a specific equipment category and band, not a blanket allowance for every RV radio.
Compliance check: A connector match isn't approval to substitute a booster antenna.
Power wiring deserves equal care. If you're modifying the RV's electrical supply, Motor Sportsland's guide to RV wiring provides useful electrical-system context, but the equipment's power instructions still govern the connection.
Check the booster's approved antenna and cable list before buying an upgrade.
Choose Your Antenna Setup Before Your Next Trip
Make the decision at the campsite you use most, not from a gain chart at home. Keep a simple log with the time, antenna or phone location, signal readings, upload, download, and whether your actual work call succeeds.
Start with the test schedule described earlier, using safe roof-height measurements and consistent test conditions. Save screenshots from the router's status page so you can compare quality readings as well as bars.
Follow the Evidence
- Persistent weak reception: Choose an omnidirectional MIMO roof installation for frequent moves. Reserve a directional panel for a stationary setup where aiming is practical.
- A repeatable busy-period collapse: Investigate another carrier or connection source rather than paying for additional gain.
- A cable-heavy installation: Place the router near the antenna entry and extend Ethernet to the living area. Calculate loss using the cable's actual specification.
- A proposed booster: Complete consent, registration, and approved-component checks before installation.
Don't cut the roof until you've checked whether a portable arrangement meets your needs. A temporary test placement can establish whether the proposed location helps before you commit to holes, brackets, and sealant.
Keep a No-Mount Option
For readers who don't want roof work, our SwiftNet router requires no dish, mounting, or aiming. It arrives pre-activated, needs no professional installation, and plugs into a wall outlet to get you online in 60 seconds. That simple setup doesn't remove the need to evaluate cellular coverage at your stops.
Our guide to the best internet option for an RV can help you weigh that choice against a permanent installation.
Save your test results before you shop. Buy only the setup that addresses the failing connection, and keep the original measurements so you can verify whether the money improved anything.
SwiftNet Wifi offers plug-in cellular internet for RV travel and rural living without a dish or permanent antenna mount. Visit SwiftNet Wifi to explore a setup that fits your travels, using your campsite tests to decide whether you need simpler connectivity or an external-antenna installation.


